Bit backwards in the order now.. But fitted the heated seats this week - was suprised by hoe easy everything worked out and went together!
This is what it all comes to visually, admittedly the wrong one and sitting proud ATM but that's due to me getitng it stuck as one of the metal locating clips on the back had bent and caused me to have to remove the dash surround to remove it!
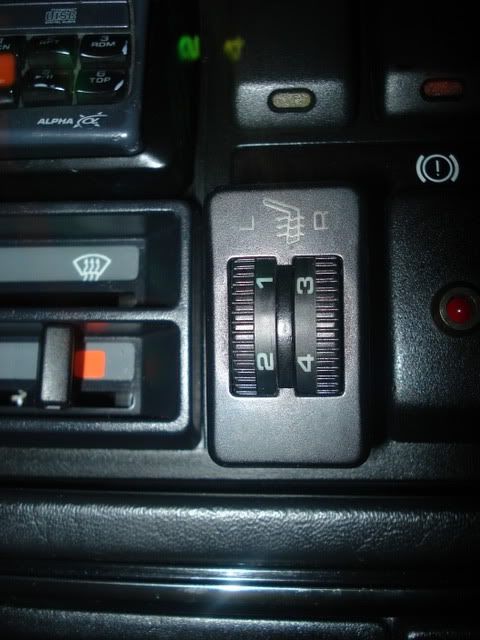
So the fun starts!
Job 1: Fit Loom.
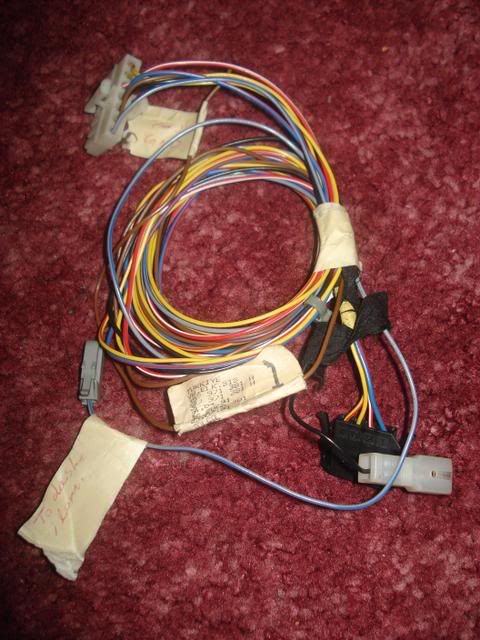
So this is the loom which needed to go in, at one end is an earth, a 4 pin plug which goes onto the switch, a single white plug with a 12v line and another 12v line (this is a loom from a Mk3 so has junction box plugs. To run this in, I took off the sill trim, lifted the carpet, removed the front seats, undid the screws for bonnet release, dropped the fusebox from its bracket, pulled back the door seal and flicked off the plastic holding the carpet up, making it possible to lay the length of the loom into place. Refitting is a reversal of removal. Along the loom then I had 2 conenction,s one to pull out below drivers seat, one below passenger, this was fed directly across, and the 2 flying leads put through the cuts in carpet and holes where the seat runner guides through.
Loom:
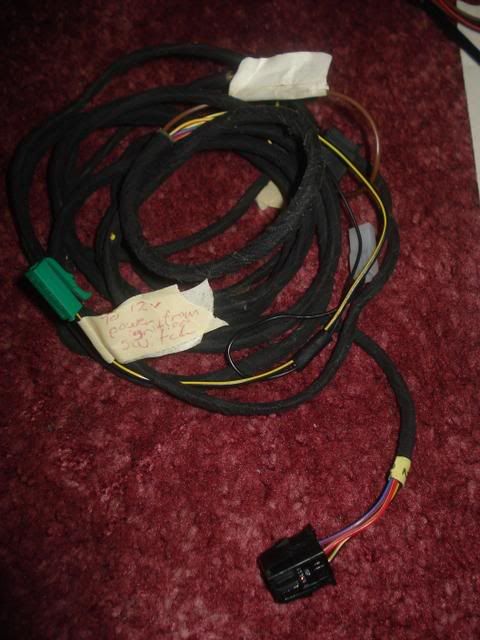
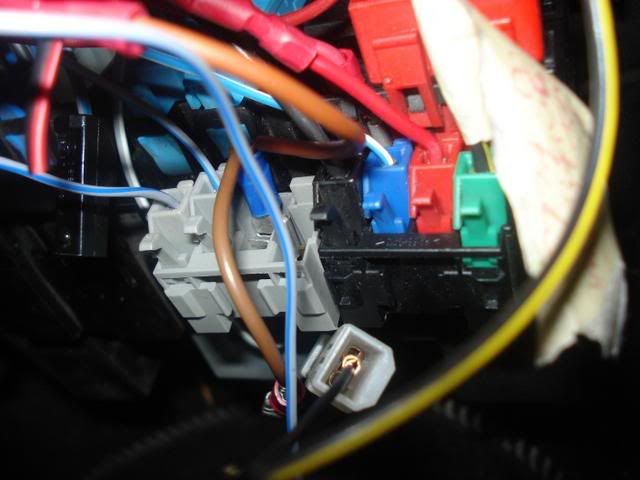
Junction Boxes fitted (made some extra little adapters so I could run my gauge feed and sunroof motor feed etc off of these, making it both tidyer and more sensible.. and OEM+


Job 2: Fit pads to seats.
So for this follow the standard procedure to strip a seat. Turn the seat upside down, undid the wire at each end, lifted the 2 tabs in the middle, pulled the ins pout, lifted the foam base and rolled the cover back. Undid the crossbar in the seat to give more flexibility and room to get my wrist through with the pad. Slid the pad into place and pulled the wire out through the back corner so it was hanging free. Refitting is a reversal of removal.
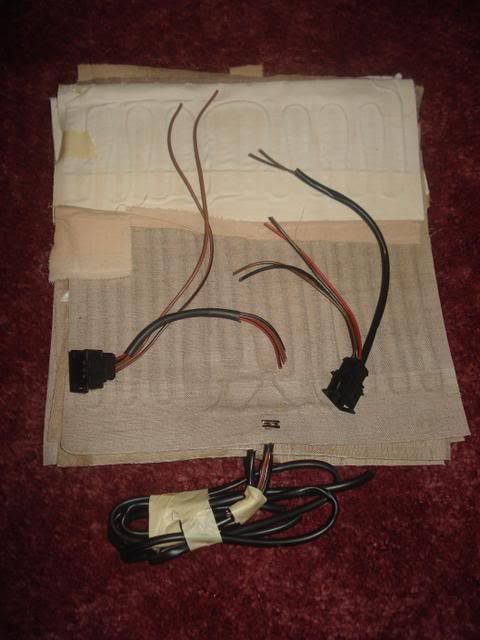
Again this follows the same trend with the backrest, lifting the 4 clips along the base, then rolling the cover up the seat, sliding the pad in, cable down below and wrapping the cover back, down around. This left the 2 bare wires hanging ready to be connected to the relay plugs. To do this I used bullet connectors between the 2 after stripping the ends, then hid the relays and loom up in the underside of the seats.
Pads and Plugs:
Job 3: Fit Relays and complete plumbing in of switch loom.
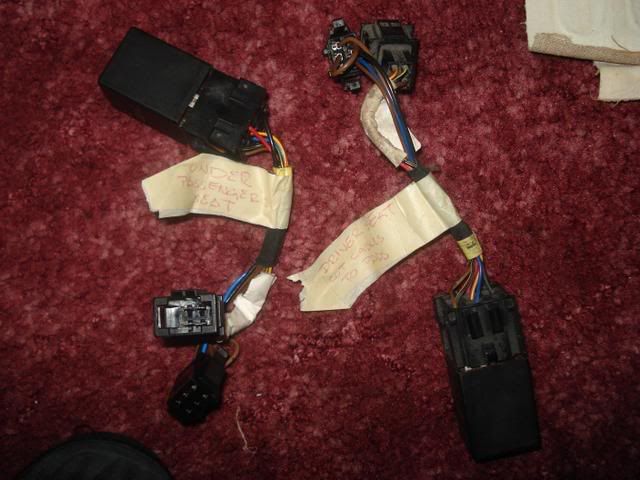
To do this I used bullet connectors between the 2 after stripping the ends, then hid the relays and loom up in the underside of the seats. the relays have a 6 pin and a 4 pin plug hanging from their bases and sue a relay number 59.
Relays:
To plumb i the switch loom, I routed itbelow the dash across below the clocks to the factory dash location, currently using a passat switch which will soon be replaced with an OEM Mk2 double dial switch.
Switch Loom, with dash illumination, link to 12V line on main loom, earth, 7 pin plug to dash switch and 4 pin plug onto main loom.
One all fitted, I realised whilst driving to work I had turned on the heat for the left hand seat (apparently) Yyet I was getting nothing, than gave it a moments tohught, touched the passenger seat and realised, It's a LHD loom. So the far end plug was classed as left.. passenger, and everything was in reverse to the switch.
Graphic representation:
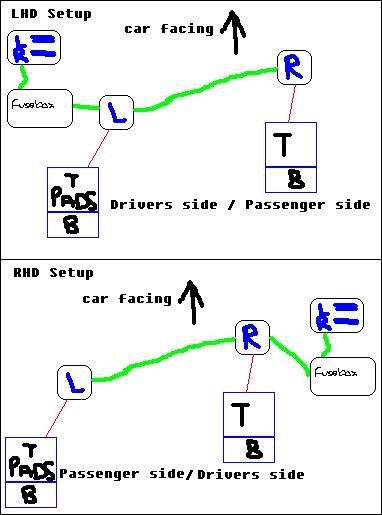
Bentley Loom diagram shows where everything is routed, proving swapping of just 4 wires will make it possible to make the dials work as if it were a RHD loom.. Which it basically is with the swap.
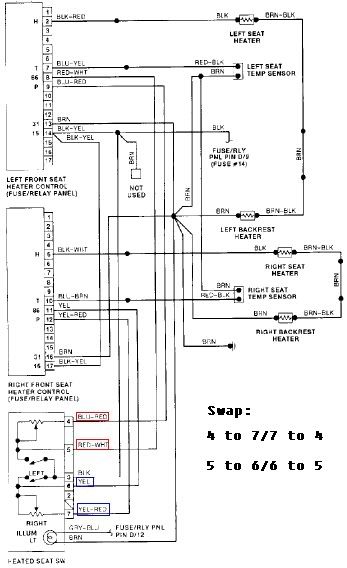
These are the wires at the plug which when swapped, will put the signals to the correct sides.
1 is Dash illumination, 2 is Earth, 3 is 12v, 4 and 5 are one side, 6 and 7 the other. These are the ones to be swapped around (4 and 7, 5 and 6) whilst remaining the same at the other end as to send the correct signal and keep the wiring continuity, changing at the switch is the best point.
Switch plug:
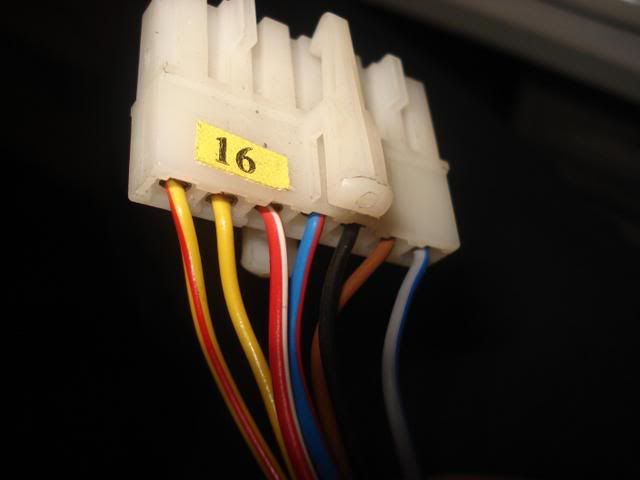
Joining main loom:
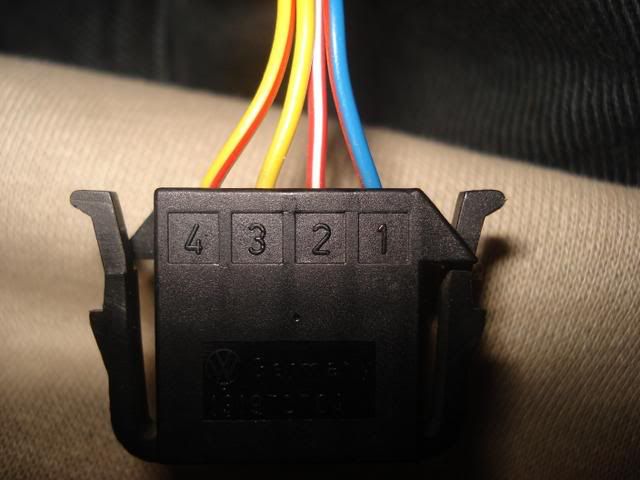
Until I ge tthe tool form VW for doing these plugs, I've given up, a needle and watchmakers screwdrivers have been attempted and I've not managed with both, even tohugh I have previously! Buying the tool (VAS1978-4A) will make it a 2 minute job and I can keep it for the future
