Author Topic: mattneck - mk2 ryder  (Read 63259 times)

Offline mattneck(Beavis)

  • I live here
  • *****
  • Posts: 1,909
  • Bristol's Own (DJ) Beavis ;-)
Re: mattneck - mk2 ryder
« Reply #100 on: 18 September 2008, 20:15 »
Build me up Buttercup..


Sig Removed. No Longer Applicable. New Sig? Nah. Not Yet..

Quote
Sharpo says: (16:57:39)
to be honest i dont doubt that half ggti users have a shortcut on their desktop for sharpie's last posts

sharpie

  • Guest
Re: mattneck - mk2 ryder
« Reply #101 on: 21 September 2008, 01:06 »
write yourself a feckin contents page at the start lad.

trim this comment out later

Offline mattneck(Beavis)

  • I live here
  • *****
  • Posts: 1,909
  • Bristol's Own (DJ) Beavis ;-)
Re: mattneck - mk2 ryder
« Reply #102 on: 21 September 2008, 21:46 »
Not been well since friday so no real pics or progress..

This is sort of how i left it friday arvo..


I've got the conenction for the breather to inlet boot from a mk3 coming from VW on tuesday. Hopefulyl this will be swappable and a bigger bore than the snapped off ISV elbow currently in palce. thus a snugger more secure fit.  :smiley:

Oh.. also fiddling a bit with a gearbox and 5th gear, or 2..


That' s a 5th in a 2Y vs CHE vs diesel's.

Have recieved a CHE box for free courtesy of Diamond Hell, with a dodgy reverse so it's currently being liberated of its taller 5th to go in the 2Y I'll invest in to hook up to the engine for better motorway cruising. The costs and machining to make the .75 or .71 work will outweigh the effort as its only an extra 200 or 350 rpm drop. Getting the 0.80 for free is what swayed me to bother in the end! Plus that almost 500rpm drop will see better MPG and elss nosie cruising at 70 on the M-way  :smiley:

:wink:
Sig Removed. No Longer Applicable. New Sig? Nah. Not Yet..

Quote
Sharpo says: (16:57:39)
to be honest i dont doubt that half ggti users have a shortcut on their desktop for sharpie's last posts

Offline mattneck(Beavis)

  • I live here
  • *****
  • Posts: 1,909
  • Bristol's Own (DJ) Beavis ;-)
Re: mattneck - mk2 ryder
« Reply #103 on: 22 September 2008, 17:10 »
Details, details..


Silver will be dropped into the engraved sections to bring everything out.. kind of reverse of the polished with black detail way  :cool:

Oh and 5th gear was liberated today..


VW Tool 3059 - £29+VAT

Circlip pliers which fit down in the two notches? - £00 (Dad's toolbox)

Guess which I used in the end :grin: This is basically the tool which turns the selector rod, so that the selector fork gradually moves up and lifts off the shaft.  :smiley: (visible on the right hand side of the last pic below)
 
Had to lock the flanges as I hadn't opened the selector shaft to lock it in to 2 gears. Using a VERY strong high torque impact gun still resulted in it taking a lot of force and eventual chkchkchkchkchking for the bolt to release its locked thread. It's fair to say it was boiling hot when it go pinched out with me fingertips. Oh and a screwdriver sorted the locking the box problem..  :grin:


This is what i was left with, 5th liberated..


That's my 0.80 set ready to be refitted to a new home now  :smiley:
Sig Removed. No Longer Applicable. New Sig? Nah. Not Yet..

Quote
Sharpo says: (16:57:39)
to be honest i dont doubt that half ggti users have a shortcut on their desktop for sharpie's last posts

Offline mattneck(Beavis)

  • I live here
  • *****
  • Posts: 1,909
  • Bristol's Own (DJ) Beavis ;-)
Re: mattneck - mk2 ryder
« Reply #104 on: 24 September 2008, 19:34 »
Bish, bash.. BOSH!

So the TDC window and selector shaft cover have a 27MM recess on.. not a socket job.. no allen key that large.. Bodgery time..


Looks a bit like the VW tool in the previous post at the right angle  :grin:

This meant the box was split and many bits removed from it..


Revealing a very ddogy reverse idler.. no wonder this box was a whiner!


Next was to attempt to put together the mk2 ISV elbow bit and the Mk3 breather.. size here became an issue.. but some jiggerypokery seemed possible..


So the plan was cut off the Mk3 one, plastiweld/glue it to the smaller Mk2 item and have a big to small adapter.. Dremel time..


Biggie smalls is ressurected!  :grin:

Now it fits the boot perfectly. This will now sit no troubles on the throttlebody and couple up to the Mk3 rocker breather  :smiley:


Not bad for a couple of hours!

Next jobs: Powdercoating wheels, subframe, rear beam, rocker.. maybe a couple of other bits. Get the 5th into the new box and new seals all over it, get clutch on, and bolt up box.. before stashing it and uni taking its priority..?  :wink:
Sig Removed. No Longer Applicable. New Sig? Nah. Not Yet..

Quote
Sharpo says: (16:57:39)
to be honest i dont doubt that half ggti users have a shortcut on their desktop for sharpie's last posts

Offline phil88

  • GTI forum regular
  • ***
  • Posts: 213
Re: mattneck - mk2 ryder
« Reply #105 on: 28 September 2008, 20:13 »
Quote
Phil - I did have one, may still ahve one laying around ive used one now but ill see what ive got.. Gasket for breather also? Its came in a block set.. you mean the funny shaped one that goes around the outside of the box sect?


no problem about the shift rod, gonna mission round some scrappy when im bak for christmas.

yeah thats the one, i cant find one anywhere, think im just gonna make on myself out of some gasket material. it will be a whole load cheaper than going to the stealers.


Offline mattneck(Beavis)

  • I live here
  • *****
  • Posts: 1,909
  • Bristol's Own (DJ) Beavis ;-)
Re: mattneck - mk2 ryder
« Reply #106 on: 28 September 2008, 20:57 »
Quote
Phil - I did have one, may still ahve one laying around ive used one now but ill see what ive got.. Gasket for breather also? Its came in a block set.. you mean the funny shaped one that goes around the outside of the box sect?


no problem about the shift rod, gonna mission round some scrappy when im bak for christmas.

yeah thats the one, i cant find one anywhere, think im just gonna make on myself out of some gasket material. it will be a whole load cheaper than going to the stealers.

dont know how optimal that would be, mine was amde out of a kind of tinware thing! 026, or 028-115-441A is what you need. depends on chassis/year though.. 026 is about a pound. 028 about 2 or 3..  :wink:
Sig Removed. No Longer Applicable. New Sig? Nah. Not Yet..

Quote
Sharpo says: (16:57:39)
to be honest i dont doubt that half ggti users have a shortcut on their desktop for sharpie's last posts

Offline mattneck(Beavis)

  • I live here
  • *****
  • Posts: 1,909
  • Bristol's Own (DJ) Beavis ;-)
Re: mattneck - mk2 ryder
« Reply #107 on: 29 September 2008, 00:46 »
Wheel weight time.. Just to check I'm not outweighing the odds with the other rims  :wink:


All seems well enough to me  :cool:

Sig Removed. No Longer Applicable. New Sig? Nah. Not Yet..

Quote
Sharpo says: (16:57:39)
to be honest i dont doubt that half ggti users have a shortcut on their desktop for sharpie's last posts

Offline mattneck(Beavis)

  • I live here
  • *****
  • Posts: 1,909
  • Bristol's Own (DJ) Beavis ;-)
Re: mattneck - mk2 ryder
« Reply #108 on: 01 October 2008, 17:45 »
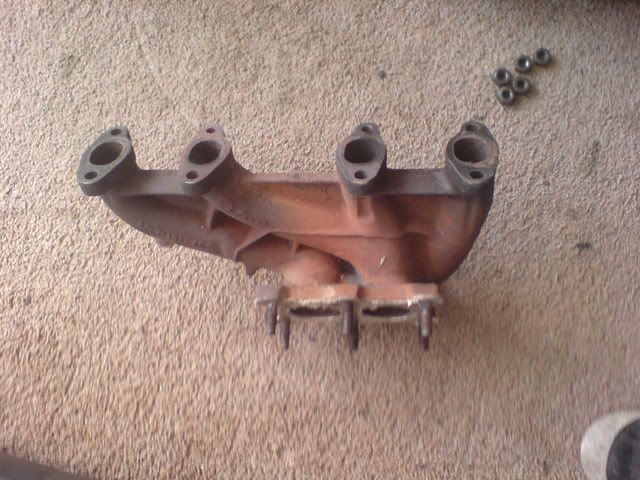
So a few bits today! The misus was round to paint canvas' and that so I sat and fiddle with the new downpipe and manifold whilst we were round there..

Split the 2 rather easily, suprisingly everything just undid in no time! Gasket faces were covered with crap so have been scraped down with a screwdriver and then emeryed, awaiting new gasket! Can't decide if it's worth upping to a 16v DP or not atm, will the extra .25" actually be worth the extra cost, when the possibility of it being mated to a 2.25, or even 2.5" system is there.. hmm? Anyone care to suggest?  :wink:

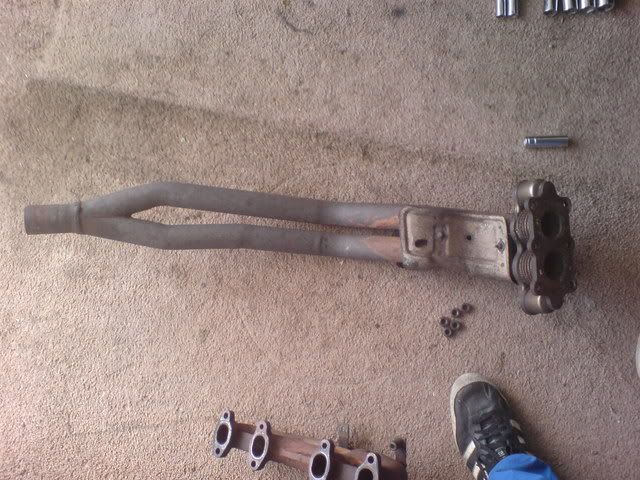
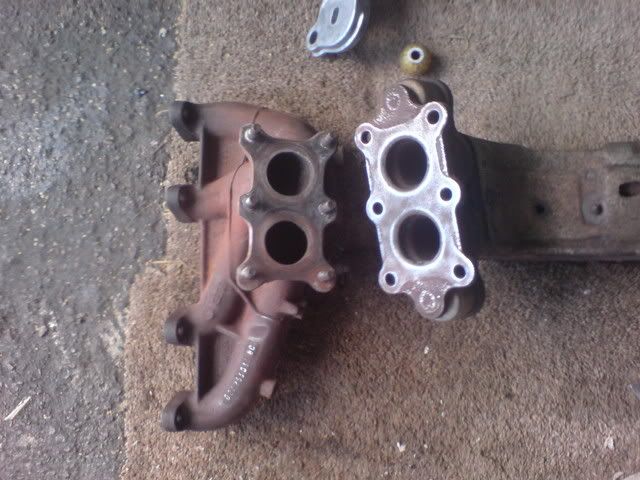
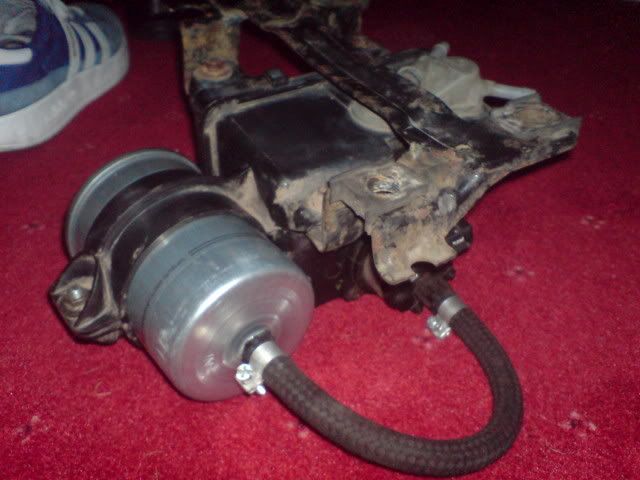
Manifold and downpipe pre and post cleanliness..


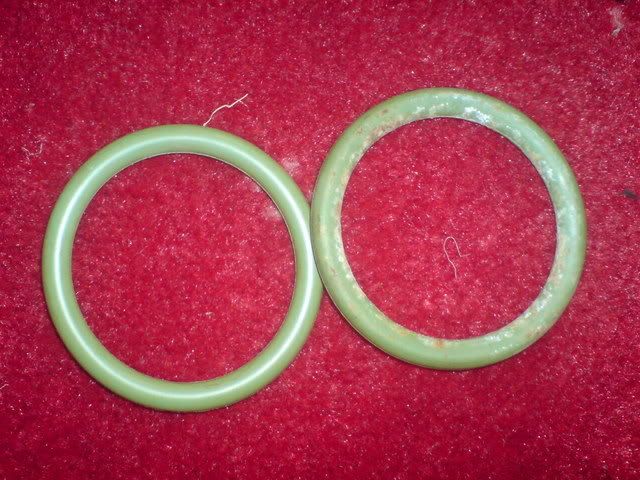
Fuel pump seal, old and new. The old one was seeping slightly so was replaced, it had gone quite soft and was covered in dirt as was the inside of the housing aroudn the mating faces. After a good clean up and scrub out, the new seals in and a new filter bolted onto the side..

Old vs New


Reassembled..


Have also got my gearbox finally, with starter to follow.. It's a late 8V box afterall, not the 16V 2Y but an AUG. No second crunch, very clean looking, though it will get seals and whatnot as a matter of course with me..

Using this box still means I can use the CHE 0.80 gear I had waiting to fit but will not be using the locking clip to fit the grooved face of the gear, but will need to use an 8V shaft circlip instead.. BrokeVW.com details the swap and has this bit of information regarding such swaps:

Quote
16V codes and MK3 codes up to June 1st, 1997 will only accept the 0.80 and 0.91 5th gear sets. Those gears are the ones that use a deep groove in the top face of the gear for the output shaft, which secures the special locking clip. The locking clip has a tab that fits into the groove to stop it from sliding off. If you get a gear and machine a groove into the face for the special clip to lock in, it'll work just fine.

For 8V shafts, they use the circlip, because the groove is 16.5mm OD. The 16V gears fit the 8V shafts no problem, as the circlip can secure the 16V gear just fine. So, why not use a circlip with the 8V gear in your 16V? Because the circlip is too big to fit the 15.5mm OD groove in the 16V shafts. If you find a suitable circlip for the 15.5mm groove, the correct thickness, and hardness, then you'll be able to rig something up. Until then, you're forced to use the 15.5mm locking clip on the 16V shaft, and that forces the use of a deep groove gear set.

So now I require a new circlip as wlel as the 5th bolt I've already purchased which luckily isn't too much of a hassle! Have also tried revving around 3.5k, 3.0k and 2.8k on the current 1.3/085box combo in 5th. The difference in noise and revving from 3.5k to 3k is very significant to my ears so should make things more comfortable. Wether the 0.80->0.75 rev drop (200 or so more rpm) makes any more difference is not really noticable if at all though.

So next will to be to get the 5th housing off, clean up, swap gears, reassemble with the new gasket, seals, circlip and bolt on top of the 0.80 pair. Then bolt up to engine with clutch and fly! As I previously had a 16V clutch kit to take advantage of the pressure plate, the friction disc then became irrelevant due tot he fact I needed an 8V one, 24 down to 22mm input shaft size being the changing factor. So a quick call picks me up a fresh friction disc for £13, swapped into the kit for the 16V one means everything is ready to go on with new pressure plate bolts et flywheel bolts  :smiley:

Then it cna be shoved into the corner out the ay whilst I wait for bits to come in from Germany.. oh and of course Uni will now take prime seat!  :smiley:
Sig Removed. No Longer Applicable. New Sig? Nah. Not Yet..

Quote
Sharpo says: (16:57:39)
to be honest i dont doubt that half ggti users have a shortcut on their desktop for sharpie's last posts

Offline mattneck(Beavis)

  • I live here
  • *****
  • Posts: 1,909
  • Bristol's Own (DJ) Beavis ;-)
Re: mattneck - mk2 ryder
« Reply #109 on: 14 October 2008, 19:50 »
Oooh ah just a little bit..

So the 2Y route wasn't followed.. Ended up with an AUG box instead from a Mk2 8v, no crunches, no leaks though it's getting seals anyway.. and now.. no 5th!  :grin:

From this:


To this!:


So the 0.80 gear off the CHE box is going in. Just need to put 150Nm through the bolt and get the spring clip on somehow.. Joy of joys that will be attempting to fit..

Bunged the clutch on, with new bolts.. note the factory threadlocking


And the bodge locking to torque them up! :grin:


New metal cambelt cover:


And this is kind of where it got left..


I've since taken the cambelt end pulleys ETC off. checked the vernier and the cam for wether or not tis TDC markings were true which luckily they were, checked everything on the bottom lines up for TDC correctly including crank int. shaft and rotor arm - check. need the tappets to go in to bolt the cam down and get the cambelt on properly now though  :smiley:

Couple of other bolts need finding and fitting such as those holding alternator and whatnot. Exhaust has had a new manifold->downpipe gasket and I've sourced a pair of driveshafts and a starter for it!  :smiley:

Also being over-preparing inclined the shafts will all be recieving a good clean, new grease, and new boots.. Before being bolted up  :wink:

So this should see box mated to block soon! Then only a couple of tiny bits on the main engine and box setup need completing before it can be filed under 'complete'!

Next thing will be to get it in and improve on my currently quite odd 25MPG from the weber on the 1300.. It's never been like this..  :shocked:

More pics to follow in the next couple of days  :smiley:
« Last Edit: 15 October 2008, 02:26 by mattneck(Beavis) »
Sig Removed. No Longer Applicable. New Sig? Nah. Not Yet..

Quote
Sharpo says: (16:57:39)
to be honest i dont doubt that half ggti users have a shortcut on their desktop for sharpie's last posts