Author Topic: DIY U.S Rubstrip 100% finished  (Read 8377 times)

Offline mcgee9t2

  • I live here
  • *****
  • Posts: 3,289
Re: DIY U.S Rubstrip
« Reply #20 on: 19 February 2012, 16:12 »
i was going to start doing this yesterday :D

but im gonna wait till ive been paid and hopefully get it all done in a few days and have the bumper sprayed :)

Offline jamie1989

  • I live here
  • *****
  • Posts: 1,174
Re: DIY U.S Rubstrip
« Reply #21 on: 19 February 2012, 16:43 »
I have a bora bumper with this already done peeps for £20 collected  :wink: check out the for sale ads.
Good for those who want to go down the Bolf route...
1.6-1.8t AGU K03s, Forge actuator, Forge 007p, turbo back exhuast, Ths front mount, Catch can, 5 piece silicone boost pipes and creation sports tip. Stage 2 atm 232bhp 270lbs. Waiting for custom mapping :-)

Offline AD1.8T

  • I live here
  • *****
  • Posts: 1,486
Re: DIY U.S Rubstrip
« Reply #22 on: 19 February 2012, 19:26 »
COPIED OFF UK-MKIVS


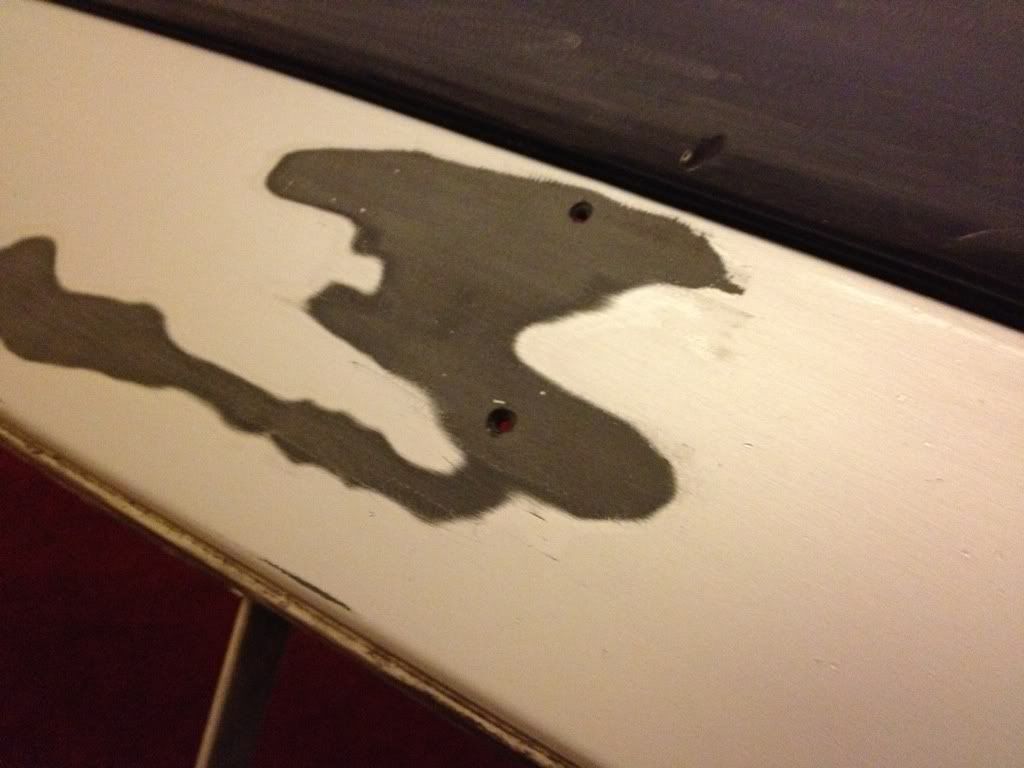
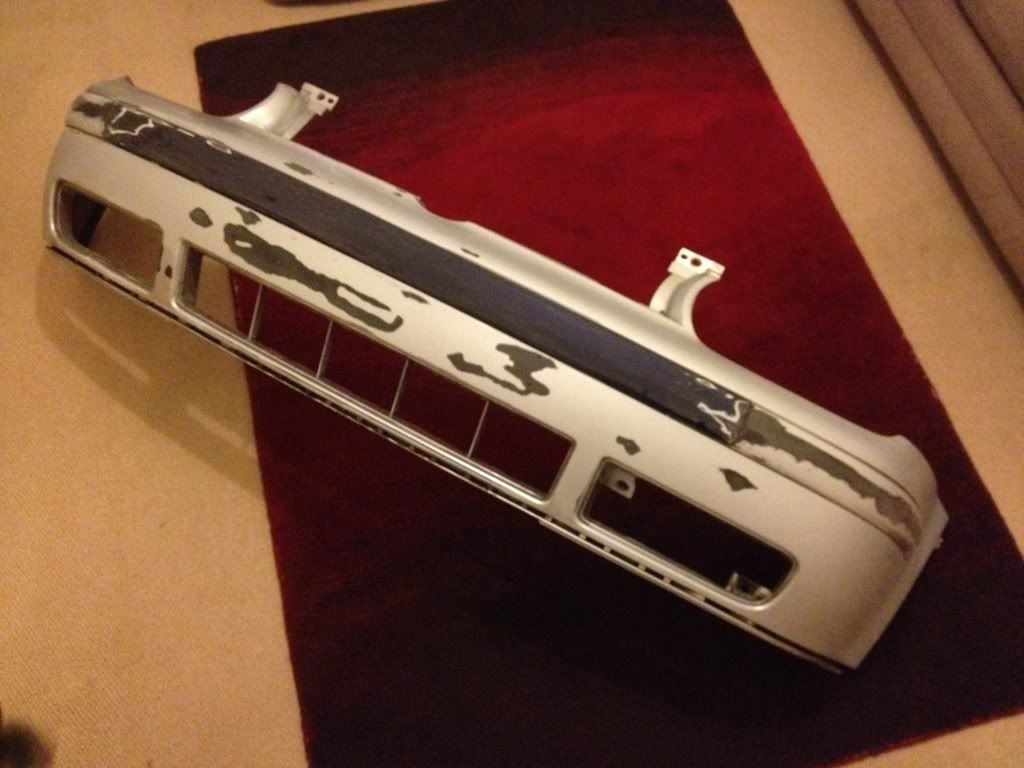
Bit of an update i didnt like my plastic welds as i took the strip off and they were abit flexi so put a strip of fiberglass on the rear to strengthen it up abit and its done the trick will put another layer of weave on tomoz rather than the matt i used today and it will be industructable ...... When its on the car lol also i was planning on blending the spraying i do in but i had a proper inspection of the bumper there was loads of bodgy chip repairs and dents from stones so i thought F*** it il spray the whole lot :) ive sprayed mirrors grilles and spoilers before and theyve all come out very good so hopefully the bumper will be just as good (famous last words) Also ive attempted to smooth out the groove on the golf strip ......

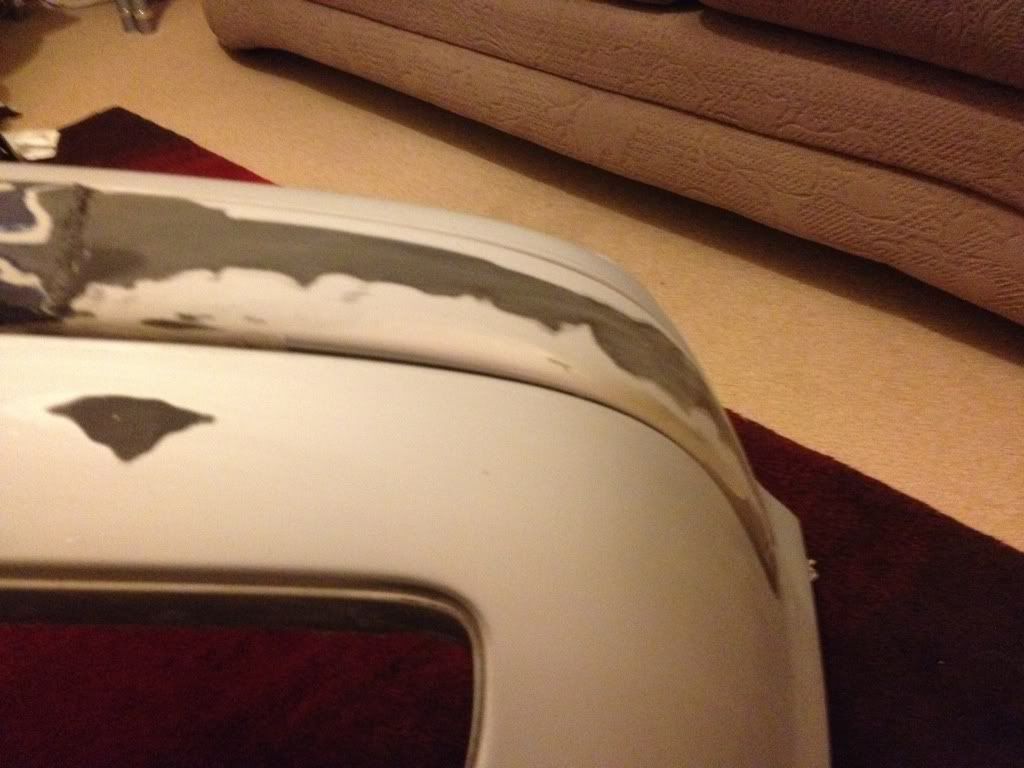
Why oh why do people screw number plates on there was 6 in total !!!!


My plan of attack is going to be;

2 layers of plastic primer 

1200 grit it flat

Filler primer where needed

1200 gritt flat

2 more layers of primer then flat back again

2 layers of colour then flat with 1500

2 layers of colour then flat with 2000 gritt

3/4 coats of laquer flat again and polish the shizen out of it !!! 

What do you reckon anni valance or a new black one

Offline AD1.8T

  • I live here
  • *****
  • Posts: 1,486
Re: DIY U.S Rubstrip
« Reply #23 on: 04 March 2012, 16:24 »
Little update on this
Bumper primered


More fiddling with rubstrip


2 coats of paint


I wasnt happy with the rubstrip so i picked up a complete bumper of ebay for 99p to be able to use my car and have another attempt at the rubstrip


This time ive cut the recess out of my old rubstrip and used jb weld to stick it on ! Then im going to counter sink some screws in for the sake of it really even though the jb weld is strong enough sand it flush then shape it all up with bumper filler


Offline AD1.8T

  • I live here
  • *****
  • Posts: 1,486
Re: DIY U.S Rubstrip
« Reply #24 on: 16 March 2012, 18:56 »
 :cool:

Half polished

Freshen up these

It litterally just fell in the bumper which i was happy about (no hammer this time)


Just waiting for the strip to fully harden and it shall be done along with its first clean of 2012  :laugh:

Offline turbokid23

  • I live here
  • *****
  • Posts: 968
Re: DIY U.S Rubstrip 90% finished
« Reply #25 on: 16 March 2012, 23:30 »
Ups of had it matching silver bottom aswell but looks good so far

Offline AD1.8T

  • I live here
  • *****
  • Posts: 1,486
Re: DIY U.S Rubstrip 90% finished
« Reply #26 on: 17 March 2012, 11:25 »
Na not keen on colour coding the gti valances .... I like the black it breaks it up abit buttttt mwwwaaahhhhaaaa all fitted  :evil:

Offline AD1.8T

  • I live here
  • *****
  • Posts: 1,486
Re: DIY U.S Rubstrip 90% finished
« Reply #27 on: 17 March 2012, 13:32 »


More pictures to come :)

Offline mcgee9t2

  • I live here
  • *****
  • Posts: 3,289
Re: DIY U.S Rubstrip 100% finished
« Reply #28 on: 17 March 2012, 13:39 »
looking good :)

however not a fan of those lights sorry  :sick: but each to there own and that  :smiley:

Offline Wazzzer

  • Moderator
  • 10k hero
  • *****
  • Posts: 11,172
  • Golf GTI 1.8T AGU
Re: DIY U.S Rubstrip 100% finished
« Reply #29 on: 17 March 2012, 13:40 »
that's two things I need to come over and rob off your car now, the wheels and the rubstrip


1999 1.8T: R-Tech remap - 225bhp/256lb/ft : K03s : THS FMIC : THS PCR pipe : 2.5" stainless exhaust : THS FR3 Engine mounts : G60/VR6 clutch : Calibra Yellow injectors : VR6 MAF : Devils Own WMI : Forge 007p : Carbonio CAI : Leon Cupra R Brembos : FK AK Street coilovers : Votex skirts : Anniversary front : click ---> http://www.golfgtiforum.co.uk/index.php?topic=92175