A good comparision of the oem to the R LEDs

Here is a google english translation of how he did it.
LED Normal (light)
1x 5K0 945 093 R (LED Links Inside)
1x 5K0 945 094 R (right LED interior)
1x 5K0 945 095 K (LED External Links)
1x 5K0 945 096 K (right LED exterior)
Golf LED R / R-Line (dark)
1x 5K0 945 093 P (LEDs Links Inside)
1x 5K0 945 094 P (LEDs right inside
1x 5K0 945 095 L Links (External)
1x 5K0 945 096 L (LW)
The regular list price is 579 euros for all 4 lights but the price is the same whether LED "normal" or LED Golf R / R-Line
You can, however, even with the lights FrankDux here in the forum to order at a preferential price of 400 EUR + postage. You then get a proper invoice from the dealership and have full warranty.
How to install the new LED taillights and anschliesen to your needs 4 adapter for each light one. These adapters are available at the time but not yet ready to buy, either in Kufatec still at VW.
So let us build it yourself because you can buy almost all the parts needed for each VW dealer.
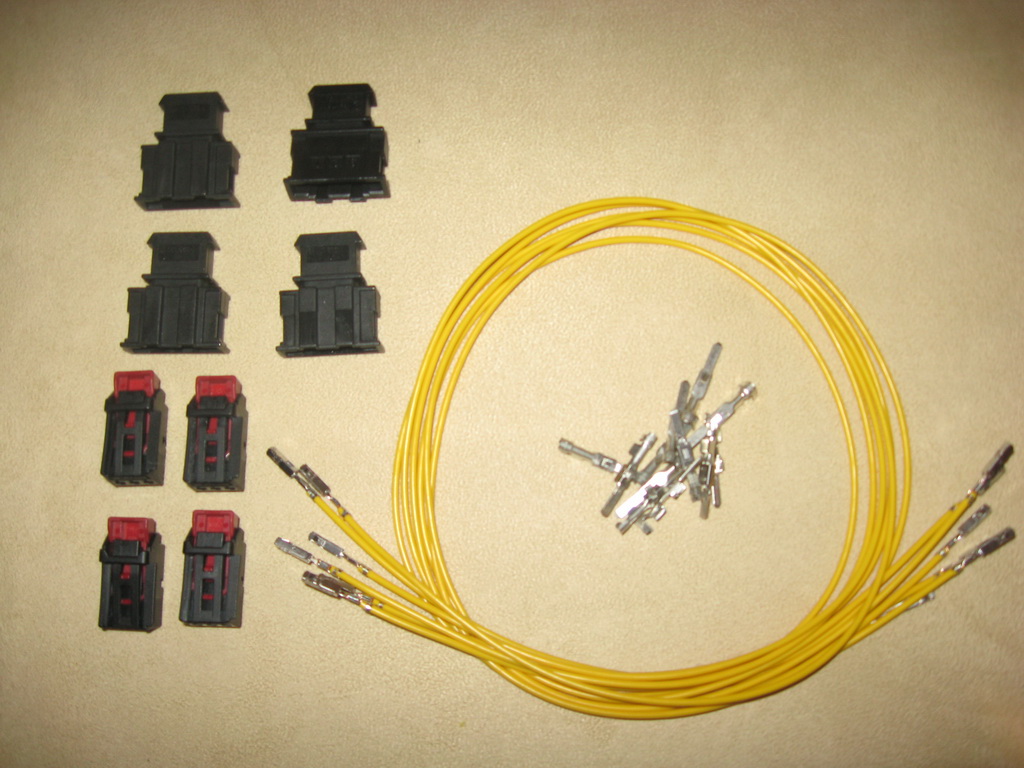
The adapter requires the following items: 4 x 7N0 972 703 Male LED Lighting
4 x 191 972 713 Flachsteckergehäuse (jacks for org. Wiring harness)
6 x 000979150 EA Individual Lines
Price: about EUR 40
12 Crimp of Herth + Buss Artk. Number: 50251858
Price: about EUR 6
The Crimp unfortunately does not get you at VW but at every BOSCH service. These are usually sold in 50 bags, but when you get this service BOSCH also einzelnd for 50 cents apiece.
 Step1 fixture:
 Players will now have the 6 single wires (000979150 EA) are available to you. This cuts your just in the middle of each half or by cable. Now you have before you are 12 cables, each with a flat connector on one side and on the other side without the connector.
These 12 cuts your cable now even to about 12 cm so that the adapter may not be so long.
fixture Step2: Now the 12 cable with the flat plugs into the LED connector 7N0 972 703) (inserted. The plugs must be properly seated then you can snap them correctly.
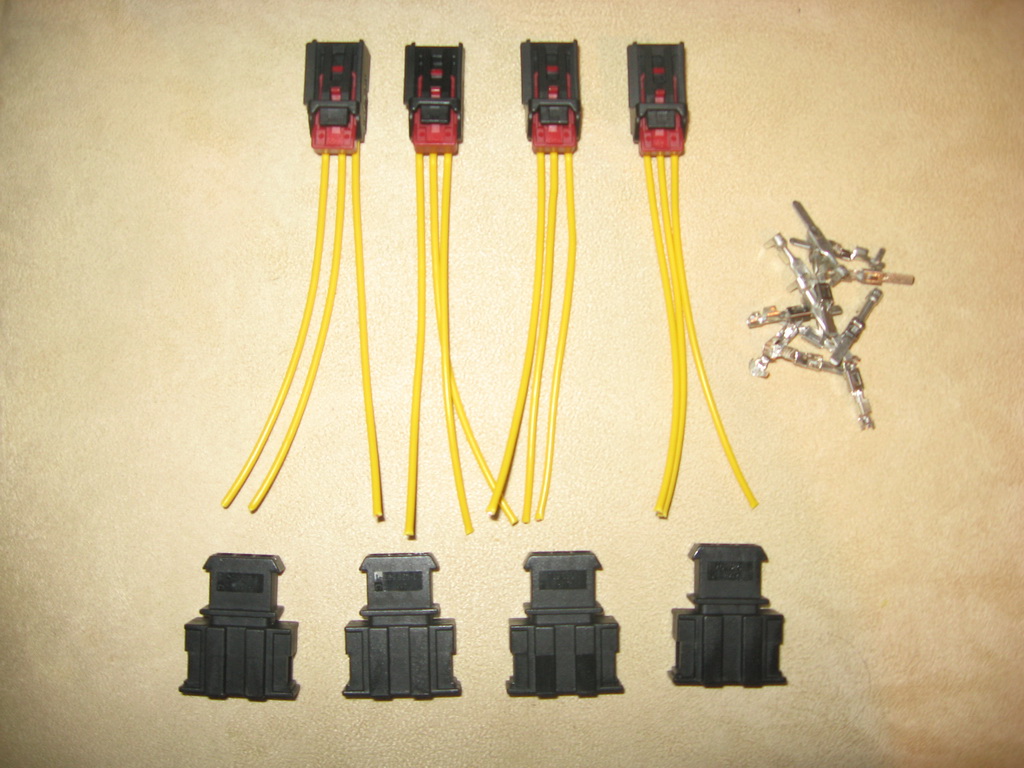 fixture Step3:
 Now we need the 12 Crimp which we attach neatly to the other end of the cable with a crimping tool. Here, attention should be paid to the LED connector with the red locking faces up and that all are roughly aligned Crimp the wires are not the same after twisting are too.
fixture Step4: Ok now we have 4 LED connector with cable and a flat connector. The flat pins are now being put into the Flachsteckergehäuse (191 972 713).
This includes your orientation you at the picture of the finished adapter. The pins are assigned 1:1. Best to always makes sure that the LED connector with the red lock to show up and the Flachsteckergehäuse with the side chamber where the numbers (are visible 1 2 3) to also show up.
WARNING: Watch out when you can snap the flat plug the well documented 1:1 if you have missed you it is quite difficult without the plug again rauszubekommen release tool.
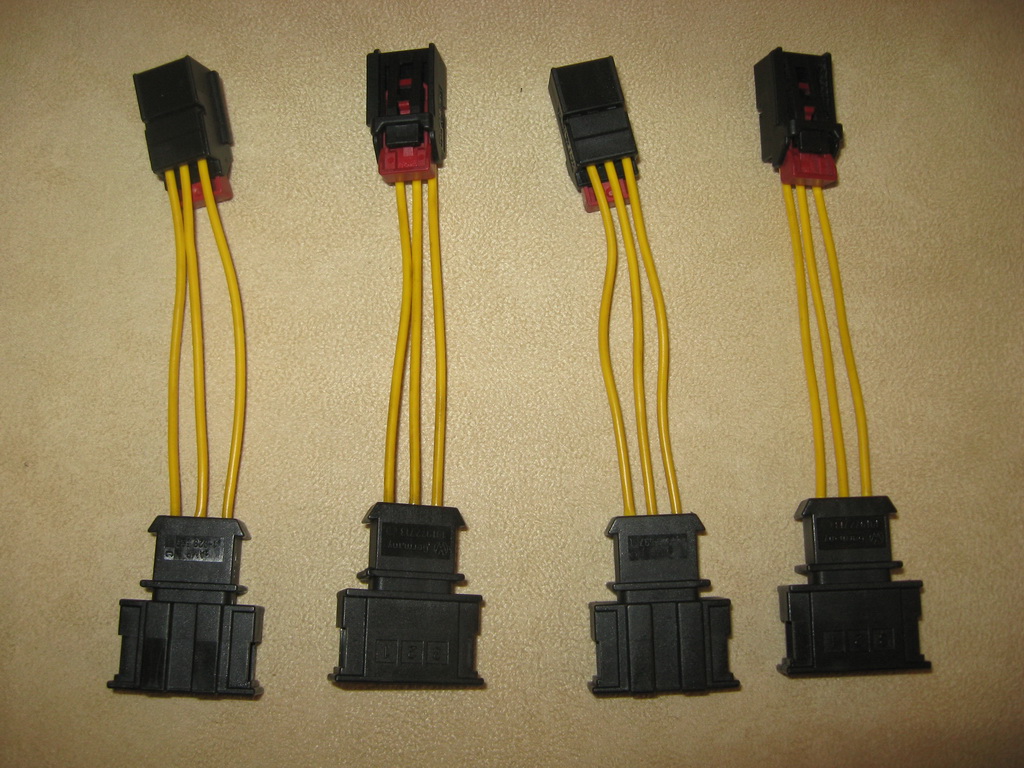
Finish: Now you have 4 adapters before you lie about the ausssehen then this:
 order or installation of the lamps:
 The interior lights can be removed only by means of screws 2 each 8ER nuts do the two plastic tabs on the tailgate and release the nuts. Then you can easily and install the lights out again.
The exterior lighting will be held only with a large white plastic thumb wheel with integrated spring. To get at this you must pull out the Kofferauminnenverkleidung a little. The thumbscrew is then simply rotated out and you can herrausnehmen the lamp.
In the log, this process is also more accurately described again.
code: If you have now installed the lights and switches on the ignition you will immediately greeted with 5 errors in the MFA:
Left rear brake light
Right rear brake light
Parking light, rear left
Parking light, rear right
Fog light
Despite these errors, the lights work but that is 100% You can also go so already. To get rid of the error an encoding must be made. You can do this yourself if you have a Diagsnosegerät VCDS or let someone do it from the VCDS has, or can you also to your:) go and let him do the coding.
When coding, only the last byte is 18 in the Bordnetzsteuergrät (BCM). To this end, the bit 2 is set to 1 or enabled.
Byte 18 factory setting = 00 HEX
Byte 18 = 00000000 binary factory setting
18 LED byte encoding HEX = 04
Byte 18 LED binary encoding = 00000100
Amazingly, you can then no error after more available bytes are put 18 back to factory settings and still no error messages come any more.
Conclusion: The new LED tail lamps especially in the R style so the darkened give the Golf GTI, very sporty look, I think. In direct comparison, the R LED lights are also a bit darker than the standard cherry-red GTI halogen lamps which indeed have been blacked out.
Here's a nice quote from Vmax.de:
Every darkened rear light is composed of two light corners of eleven diodes, each of which delimit a marked LED center outwards. This characteristic light signature of the strongest golf of all time with his total of 48 LEDs, even in darkness shall be identified clearly.
The LED tail lights are more than a clear signal for a
casual golf: They are virtually maintenance free and persuade to 0.2 seconds with a better response than conventional incandescent bulbs. This difference can save lives: At a speed of 100 km / h, equivalent to at least 5.6 meters.
