What is the best route to go down when arranging collection of a new car?
Just ask them to peel the stickers of and hose it down ?
I went one step lower than that.  Dealer was asked to only:
- Peel off stickers (so they can PDI it), but leave glue residue on (imagine them scrubbing away with industrial solvent to get the glue off.
 )
)
That was it. No hosing down.
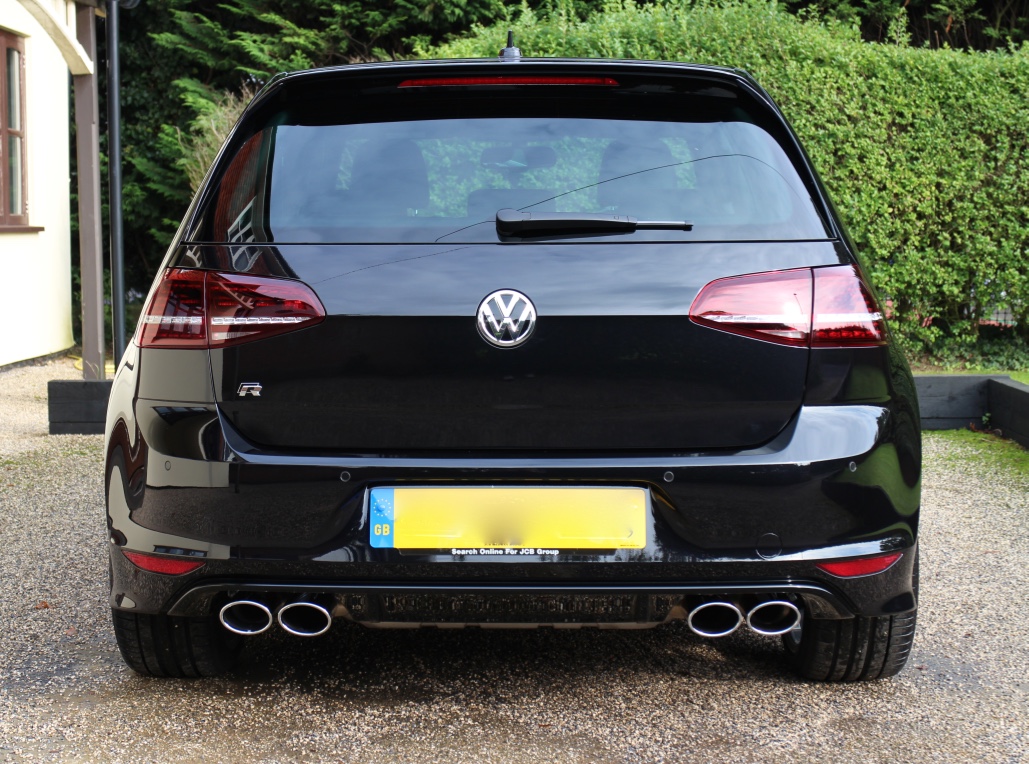
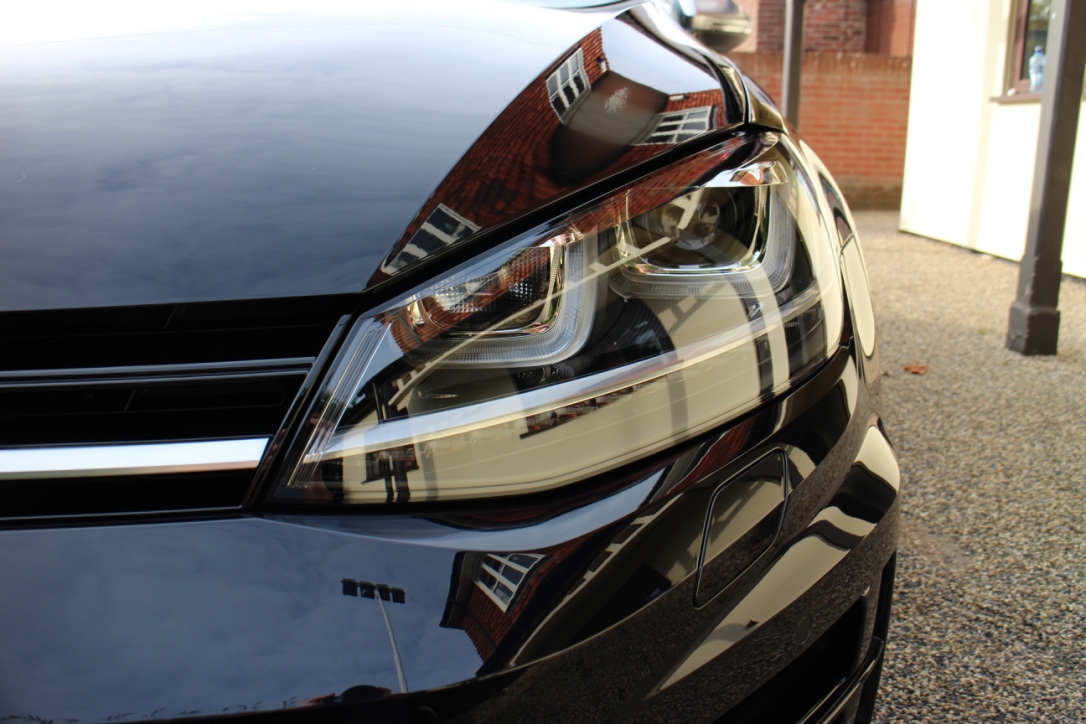
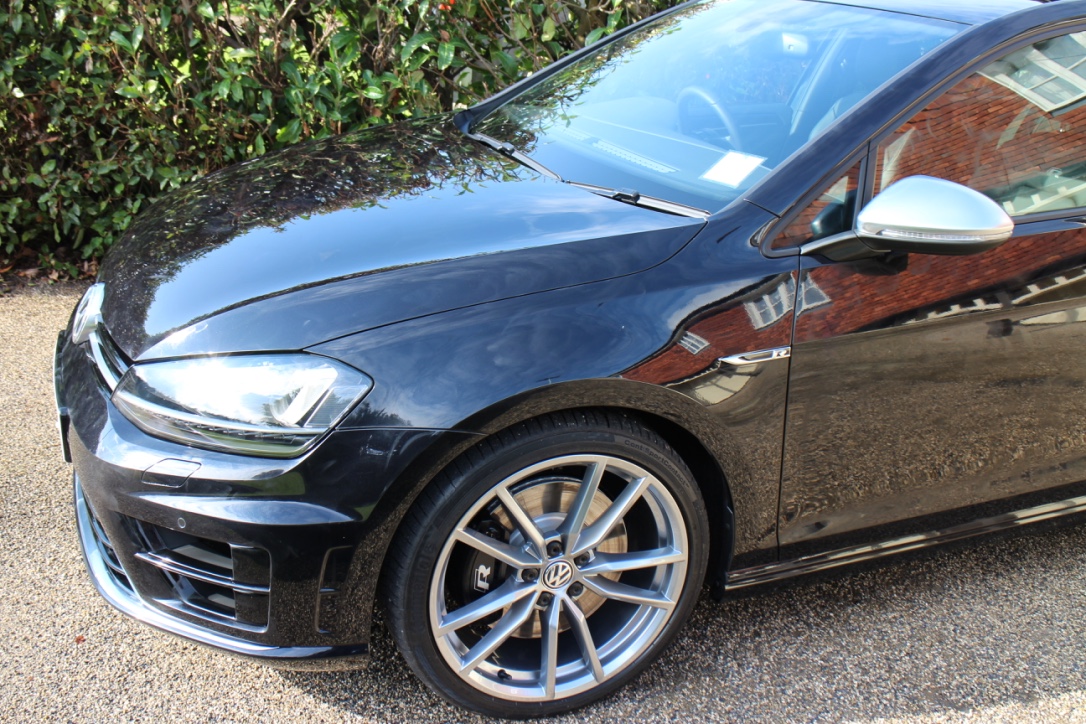
I collected the car - it was dirty, covered in glue residue (mainly along roofline and sills), windscreen has marker pen writing on it, and sticker marks. But the paintwork was totally swirl and scratch free. I drove it home and sorted it out myself.
Obviously if you want the whole 'unveiling' experience the above approach is not going to work, but if you value your paintwork it's worth forgoing the ceremony IMO.
Hi Rebecca.
What was the process you undertook when you got your car back home?
I'm sure you've posted the procedure on the detailing thread somewhere but if you don't mind going through it here it would be much appreciated 
I've never properly detailed a car before so don't want to balls it up
kalimon, as you have predicted it is documented in a thread.

I'm not going to write it all down again from scratch but will repost it below (pic heavy). Once I collected it I drove it home and washed it, but Sod's Law I was going away that weekend (in the car) so it had to wait until I got back before I could detail it, and even then it had to be done over 2 weekends! Anyway here's what I did:
R's First Detail (first posted Oct 2015)
After having my R a couple of weeks now, I've finally managed to complete its first detail. Had to be done over the course of 2 weekends but now complete.
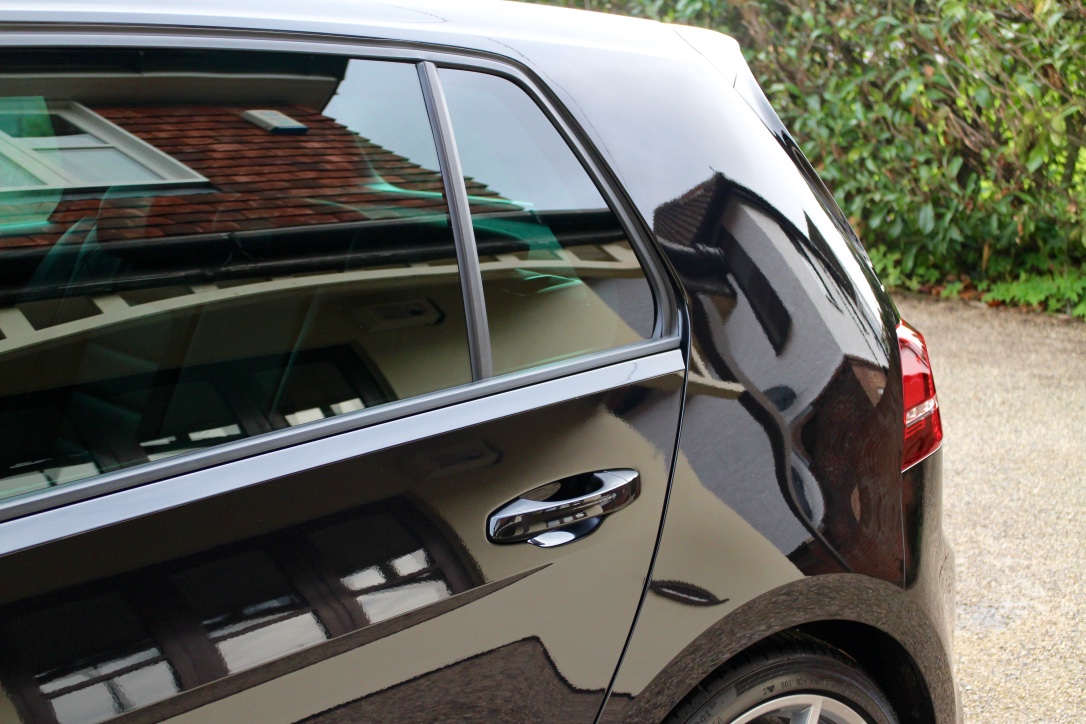
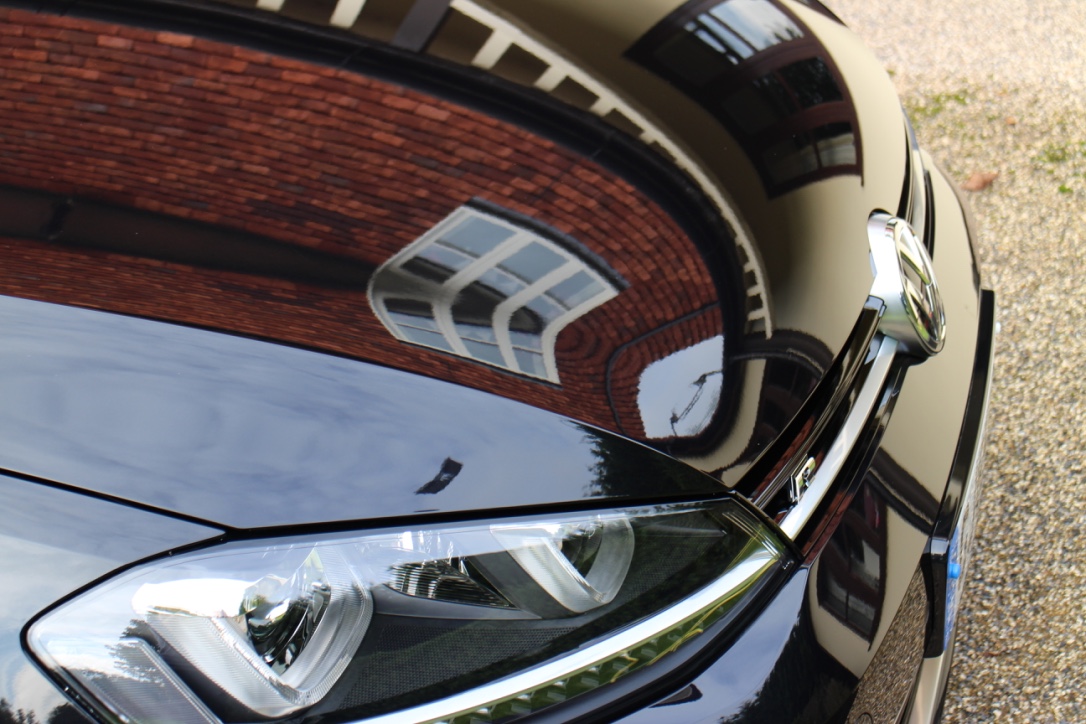
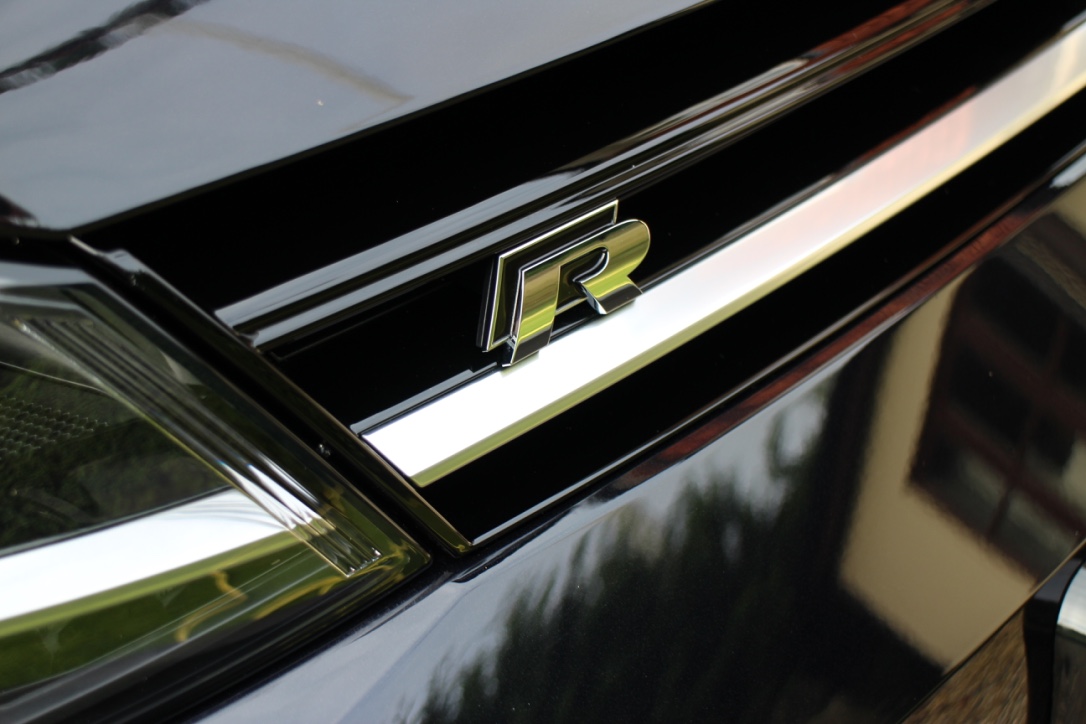
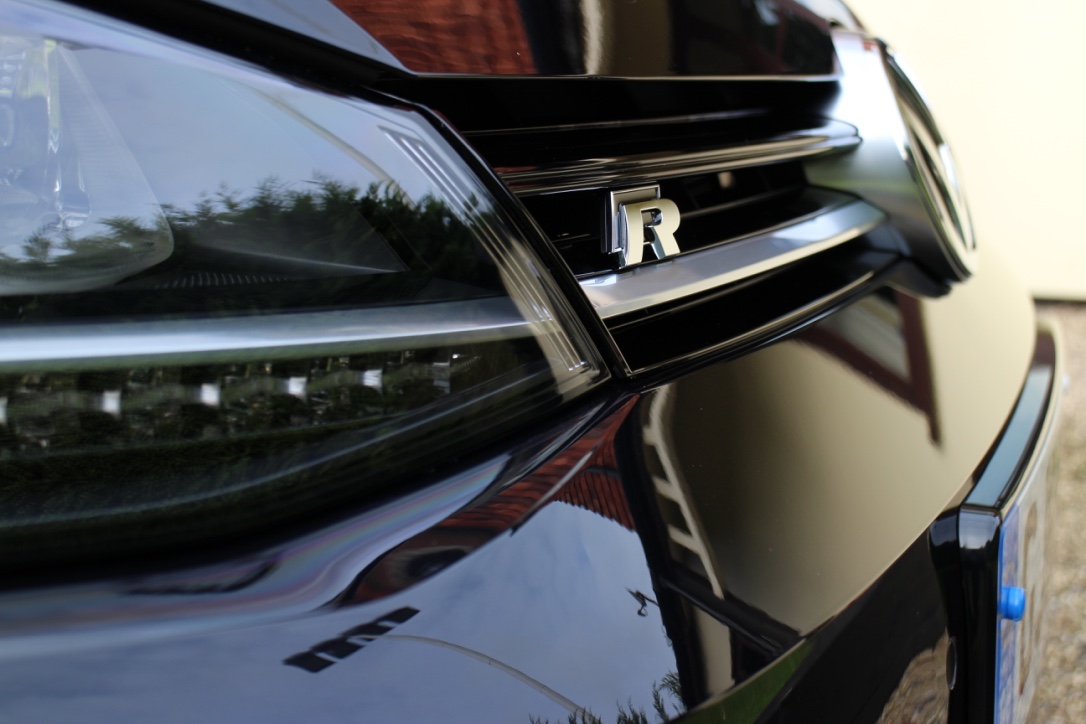
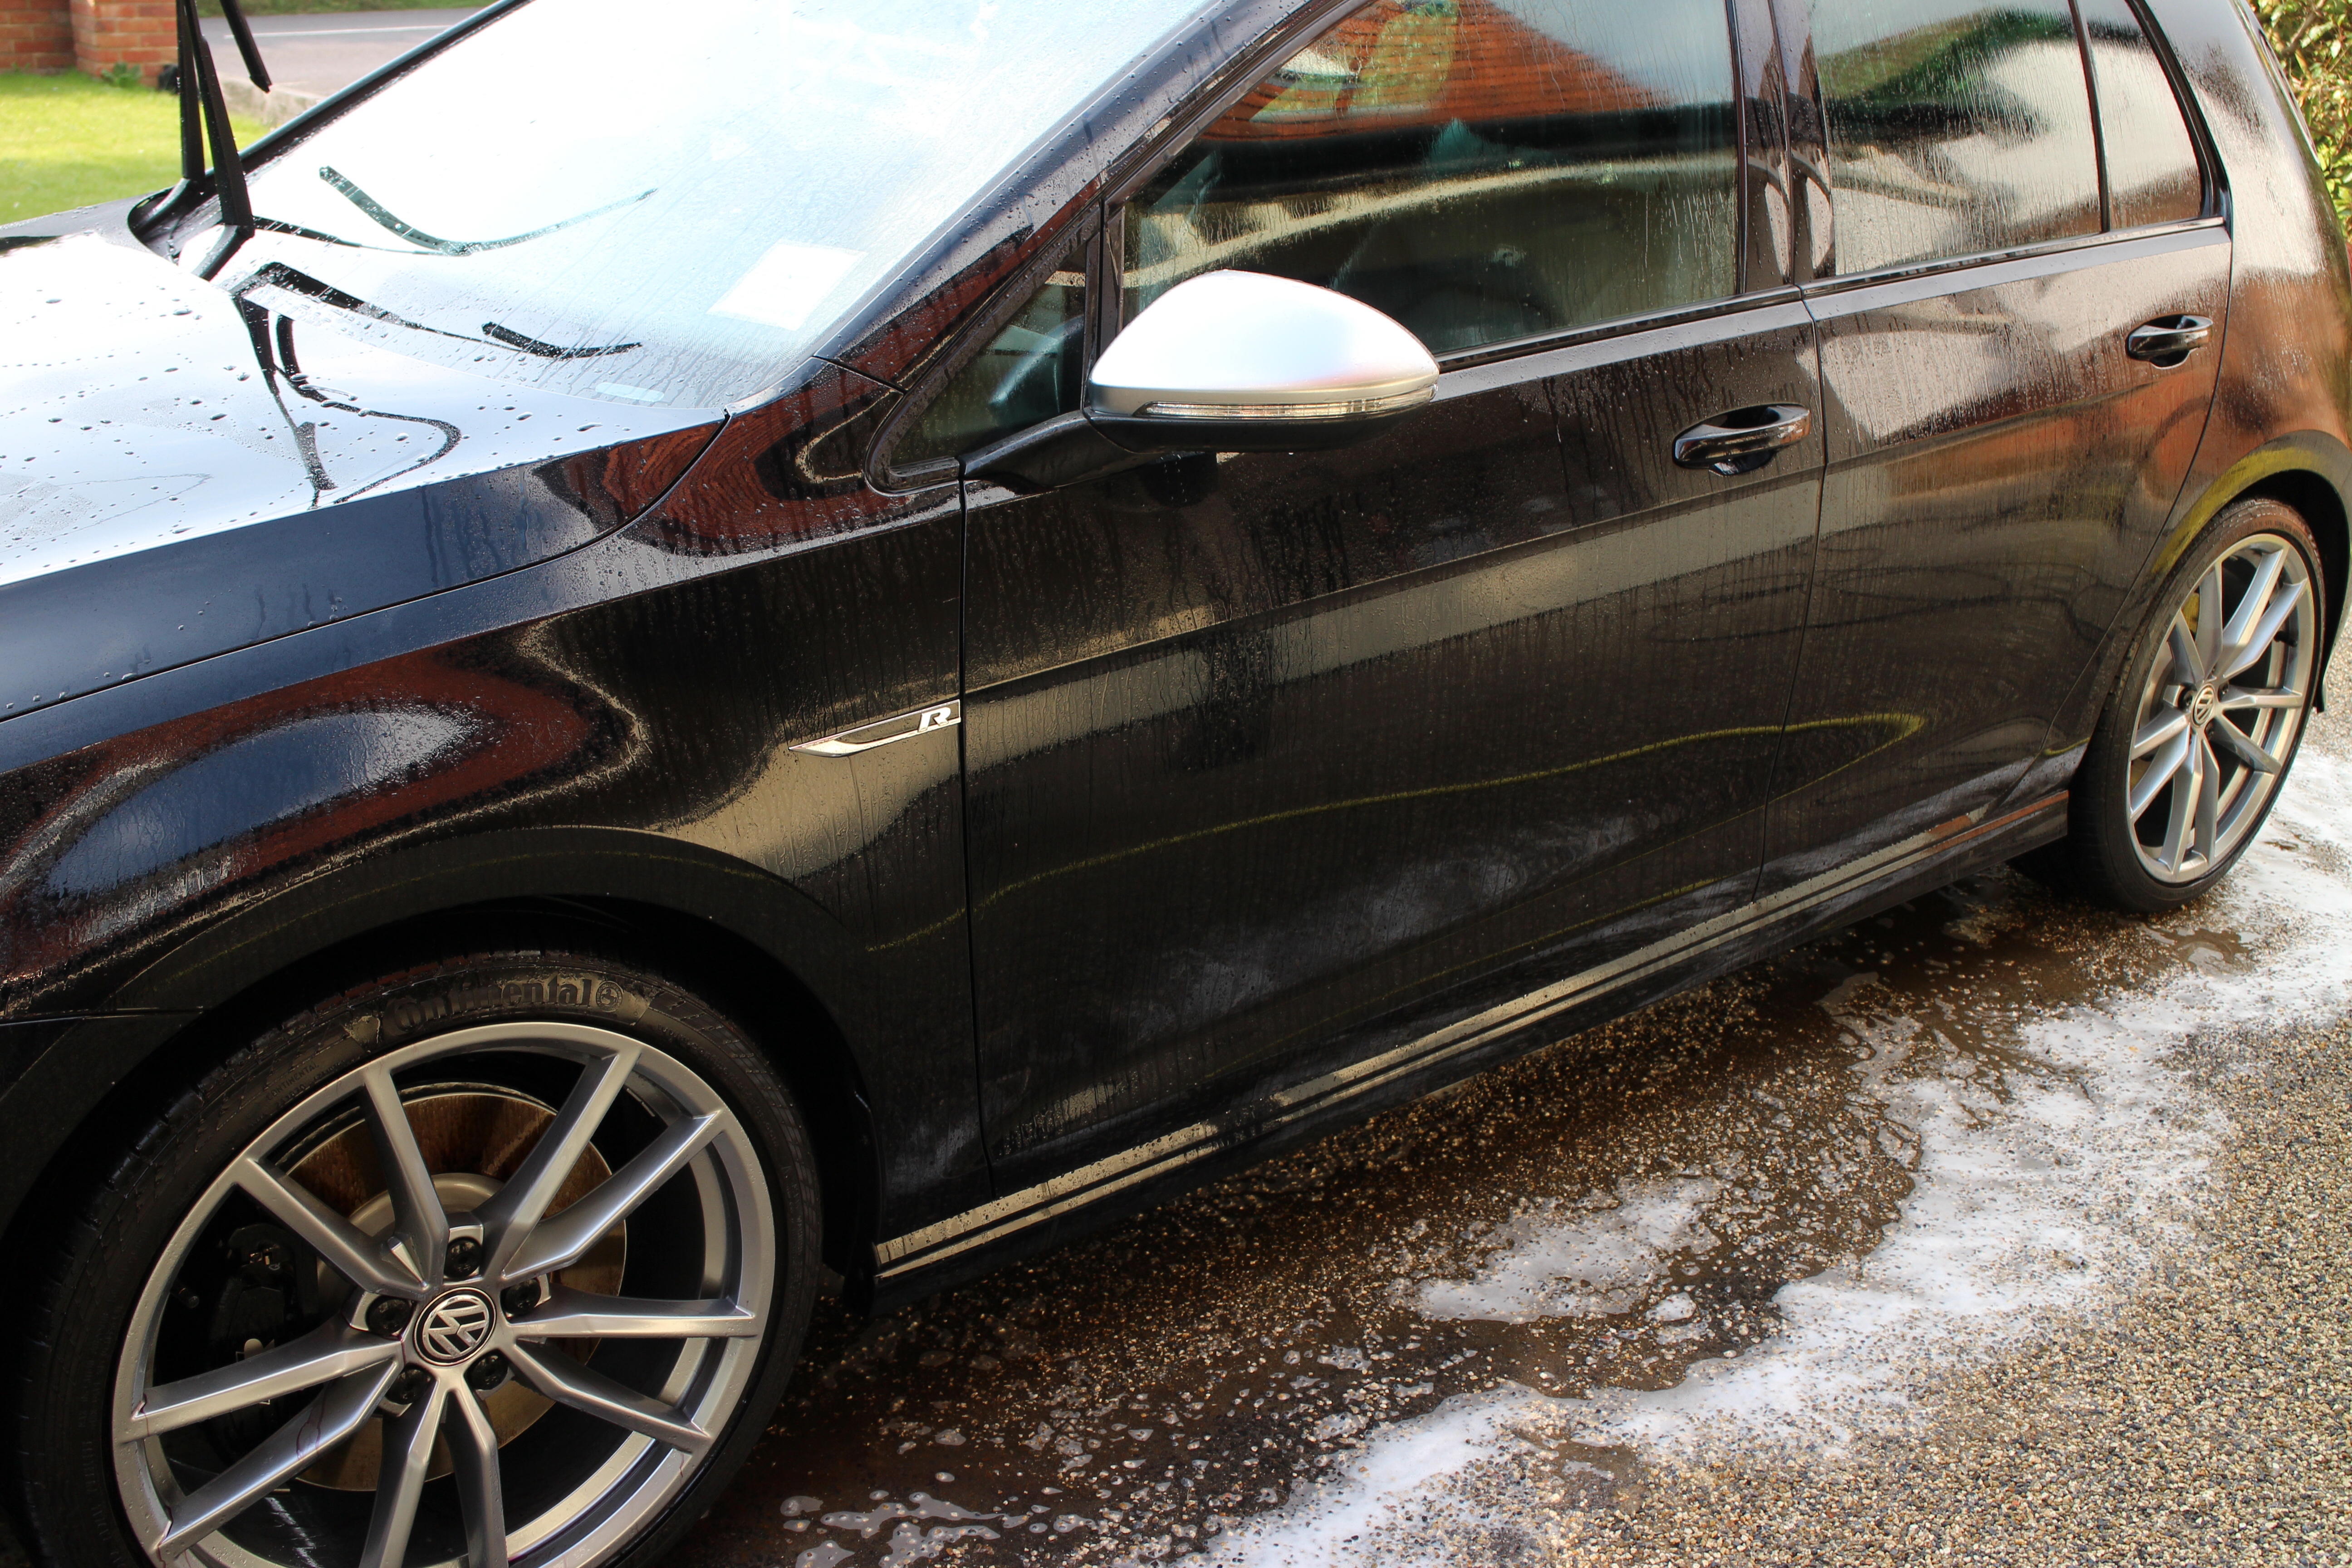
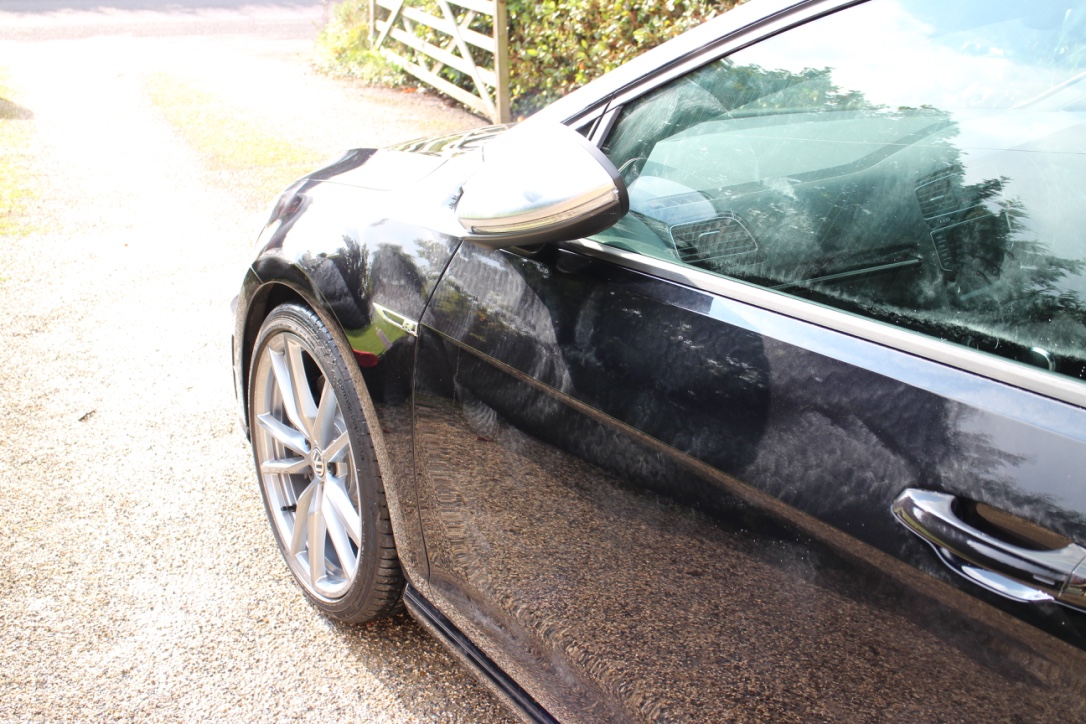
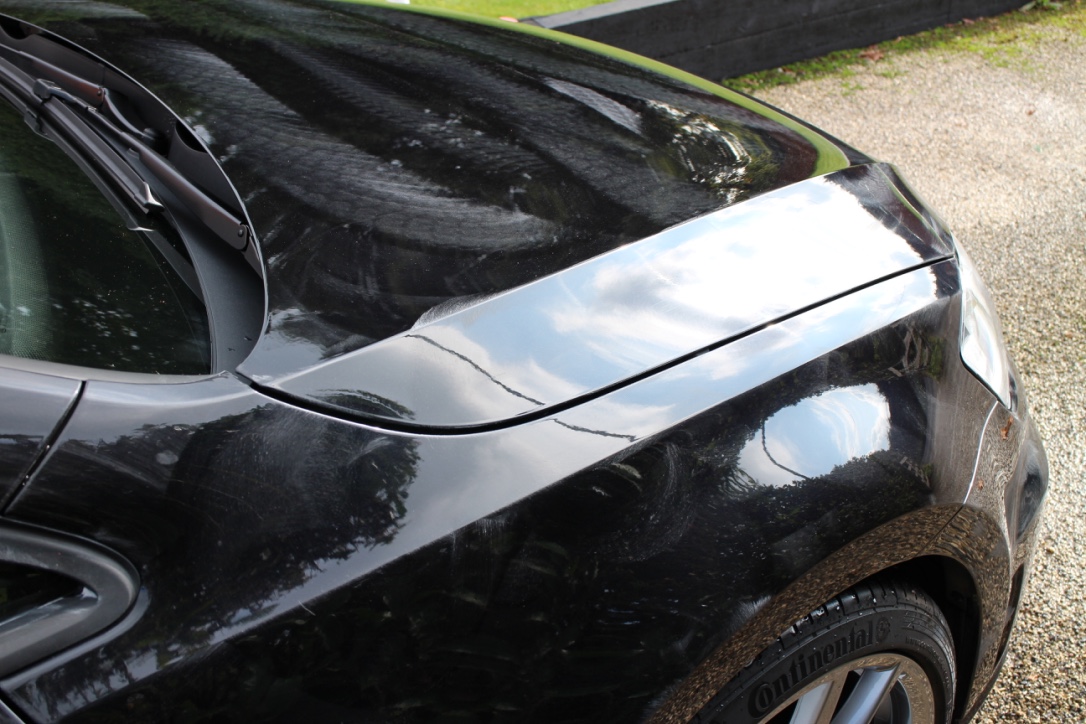
Prior to collection, I'd asked the dealer not to touch it after removing transport stickers, so there was a lot of glue residue along the roof line, lower sills B pillars, and on the windscreen. All that came off with the decontamination phase - wash - IronX - Tardis. Was going to clay it but not necessary. Instead the car will be clayed and polished next spring after a winter of salt and grime has taken its toll.
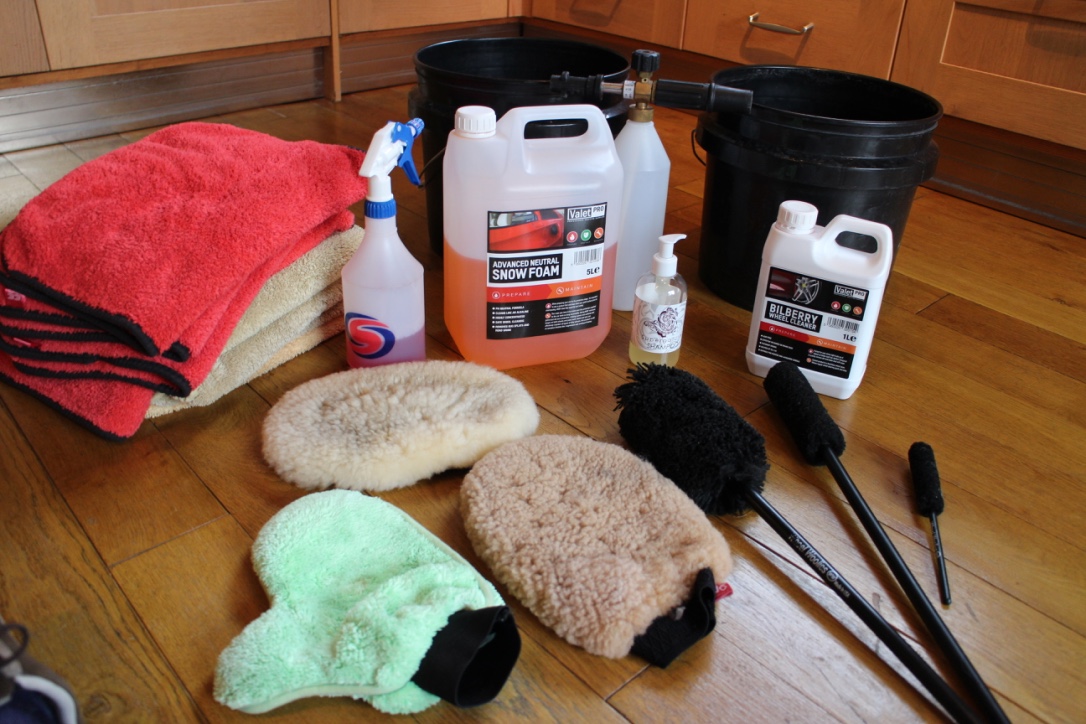
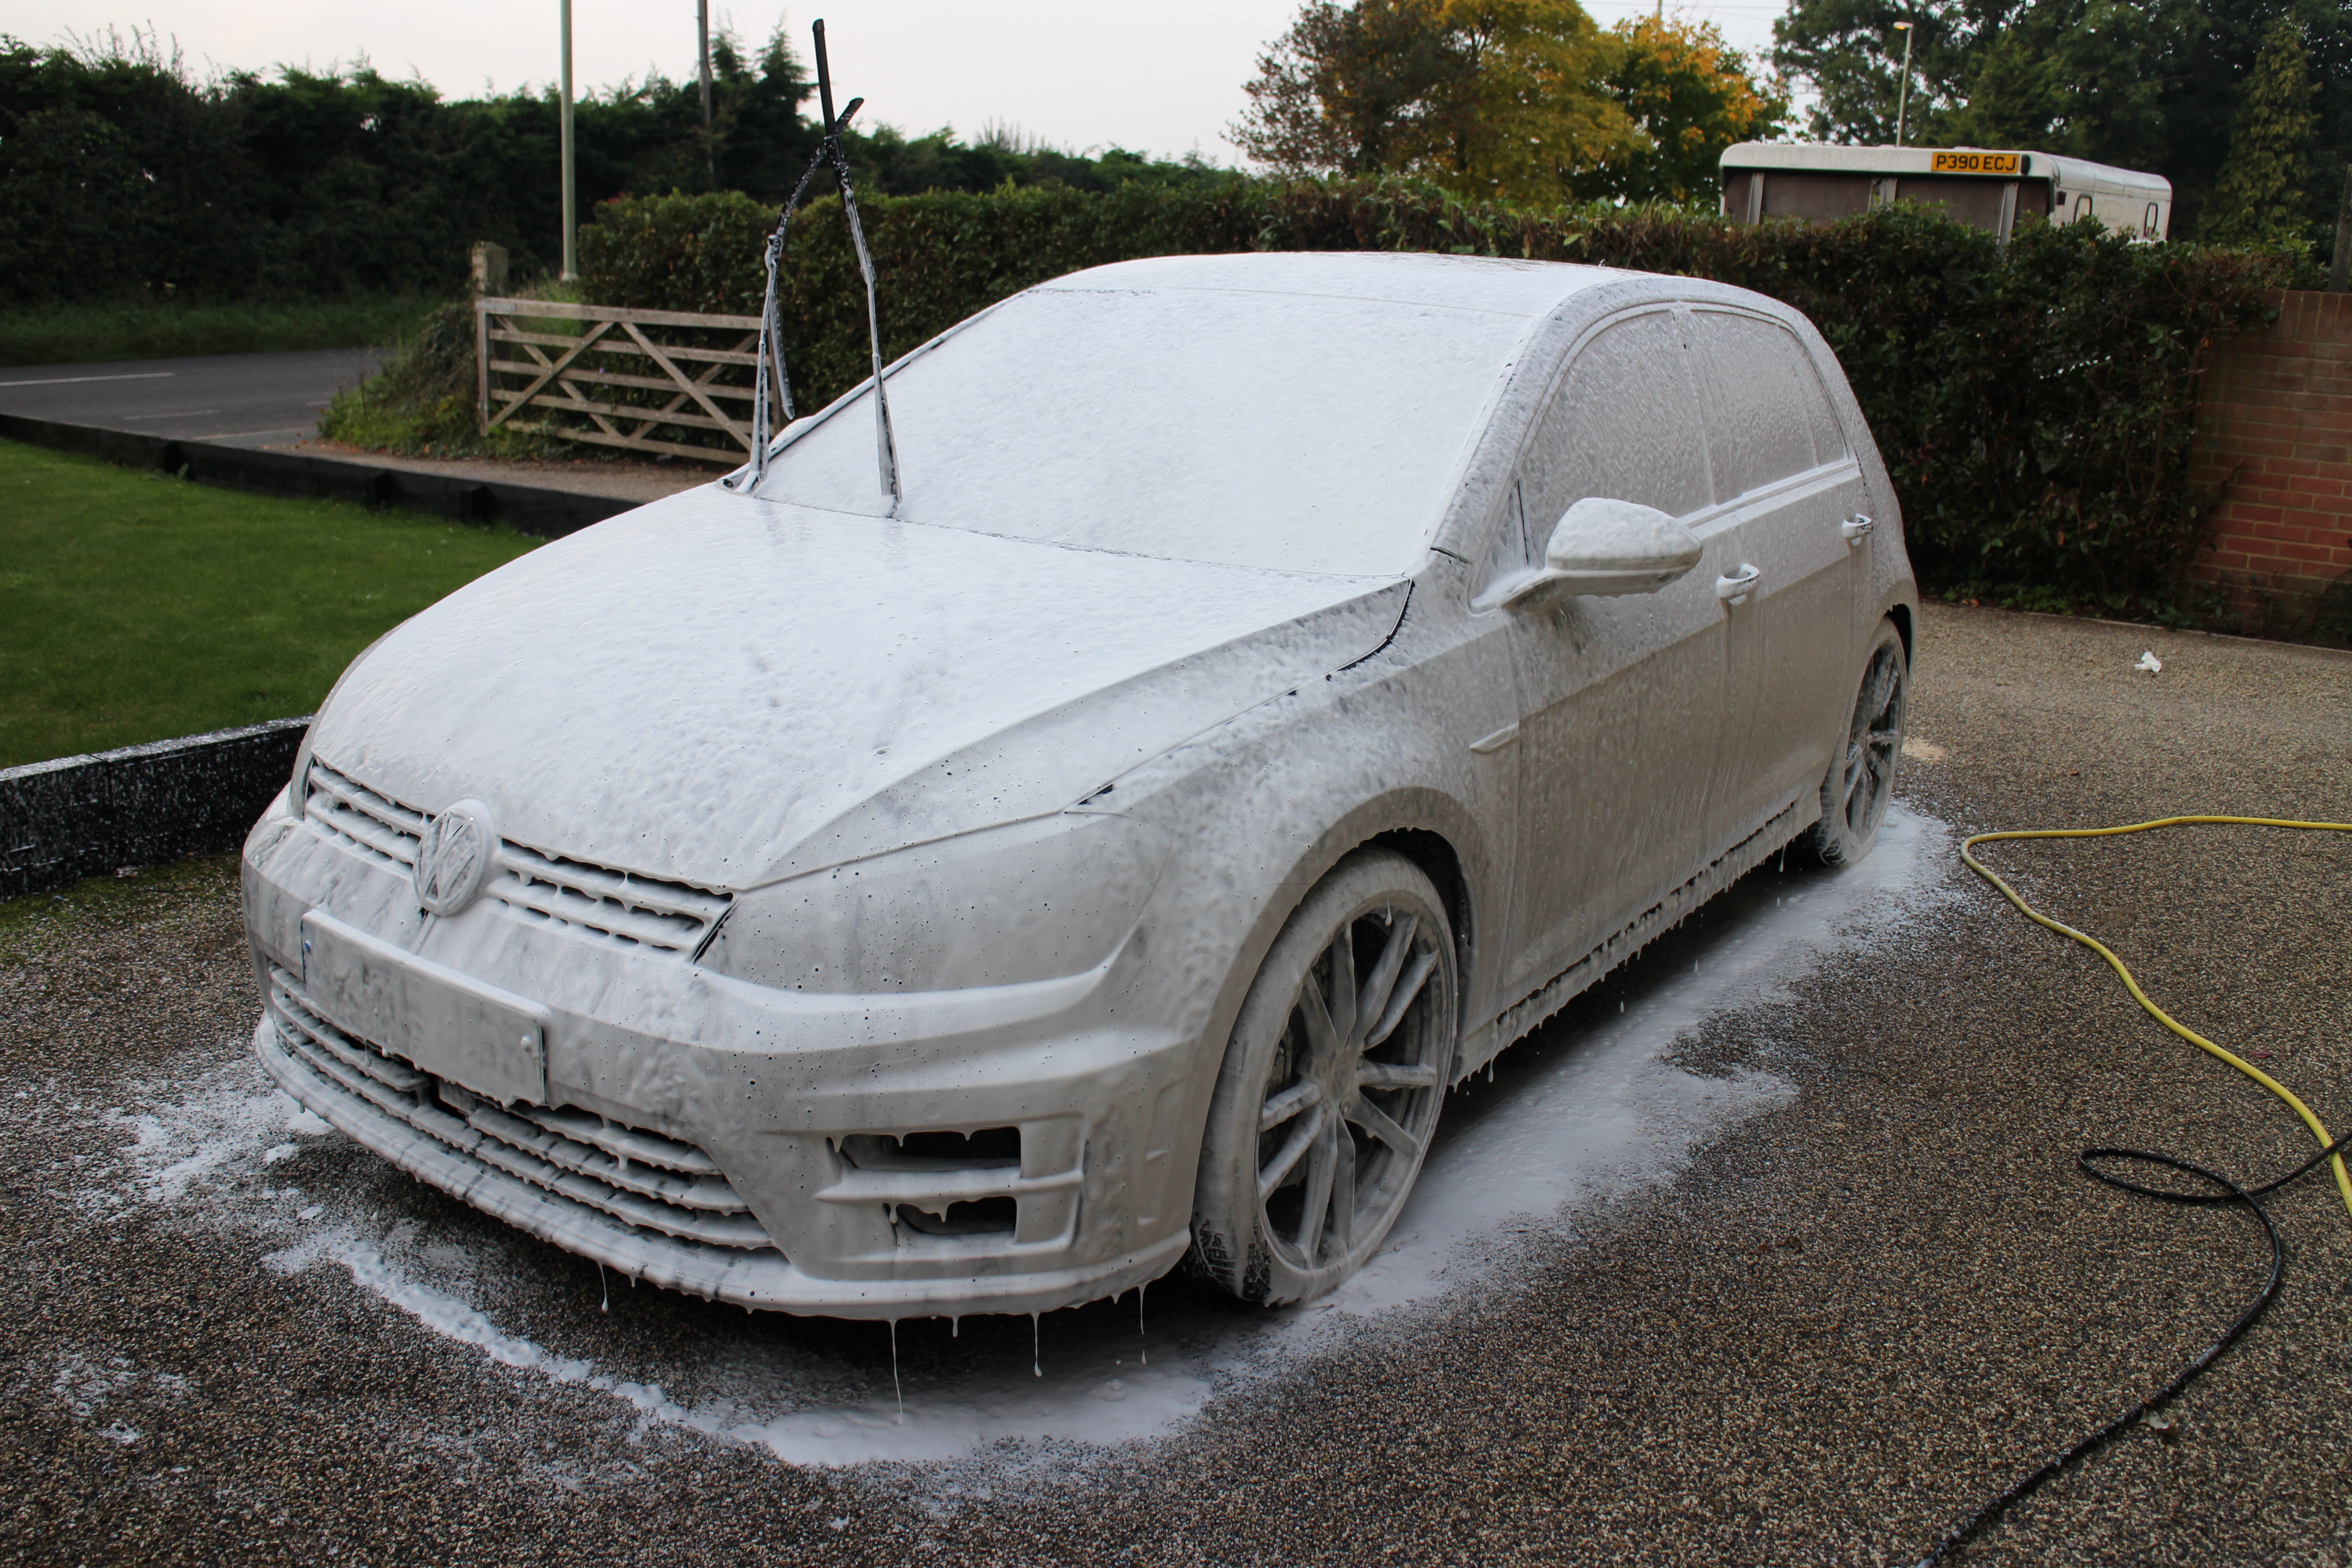
Stage 1 - Wash and Decontamination:Snow foam pre-wash
2 bucket wash (actually 3 buckets)
Tar and glue removal
Iron and fallout removal.
I started out by giving the car a thorough clean starting with snow foam pre-wash, followed by a 3-bucket wash.
Products used for the wash/cleaning
 Washing
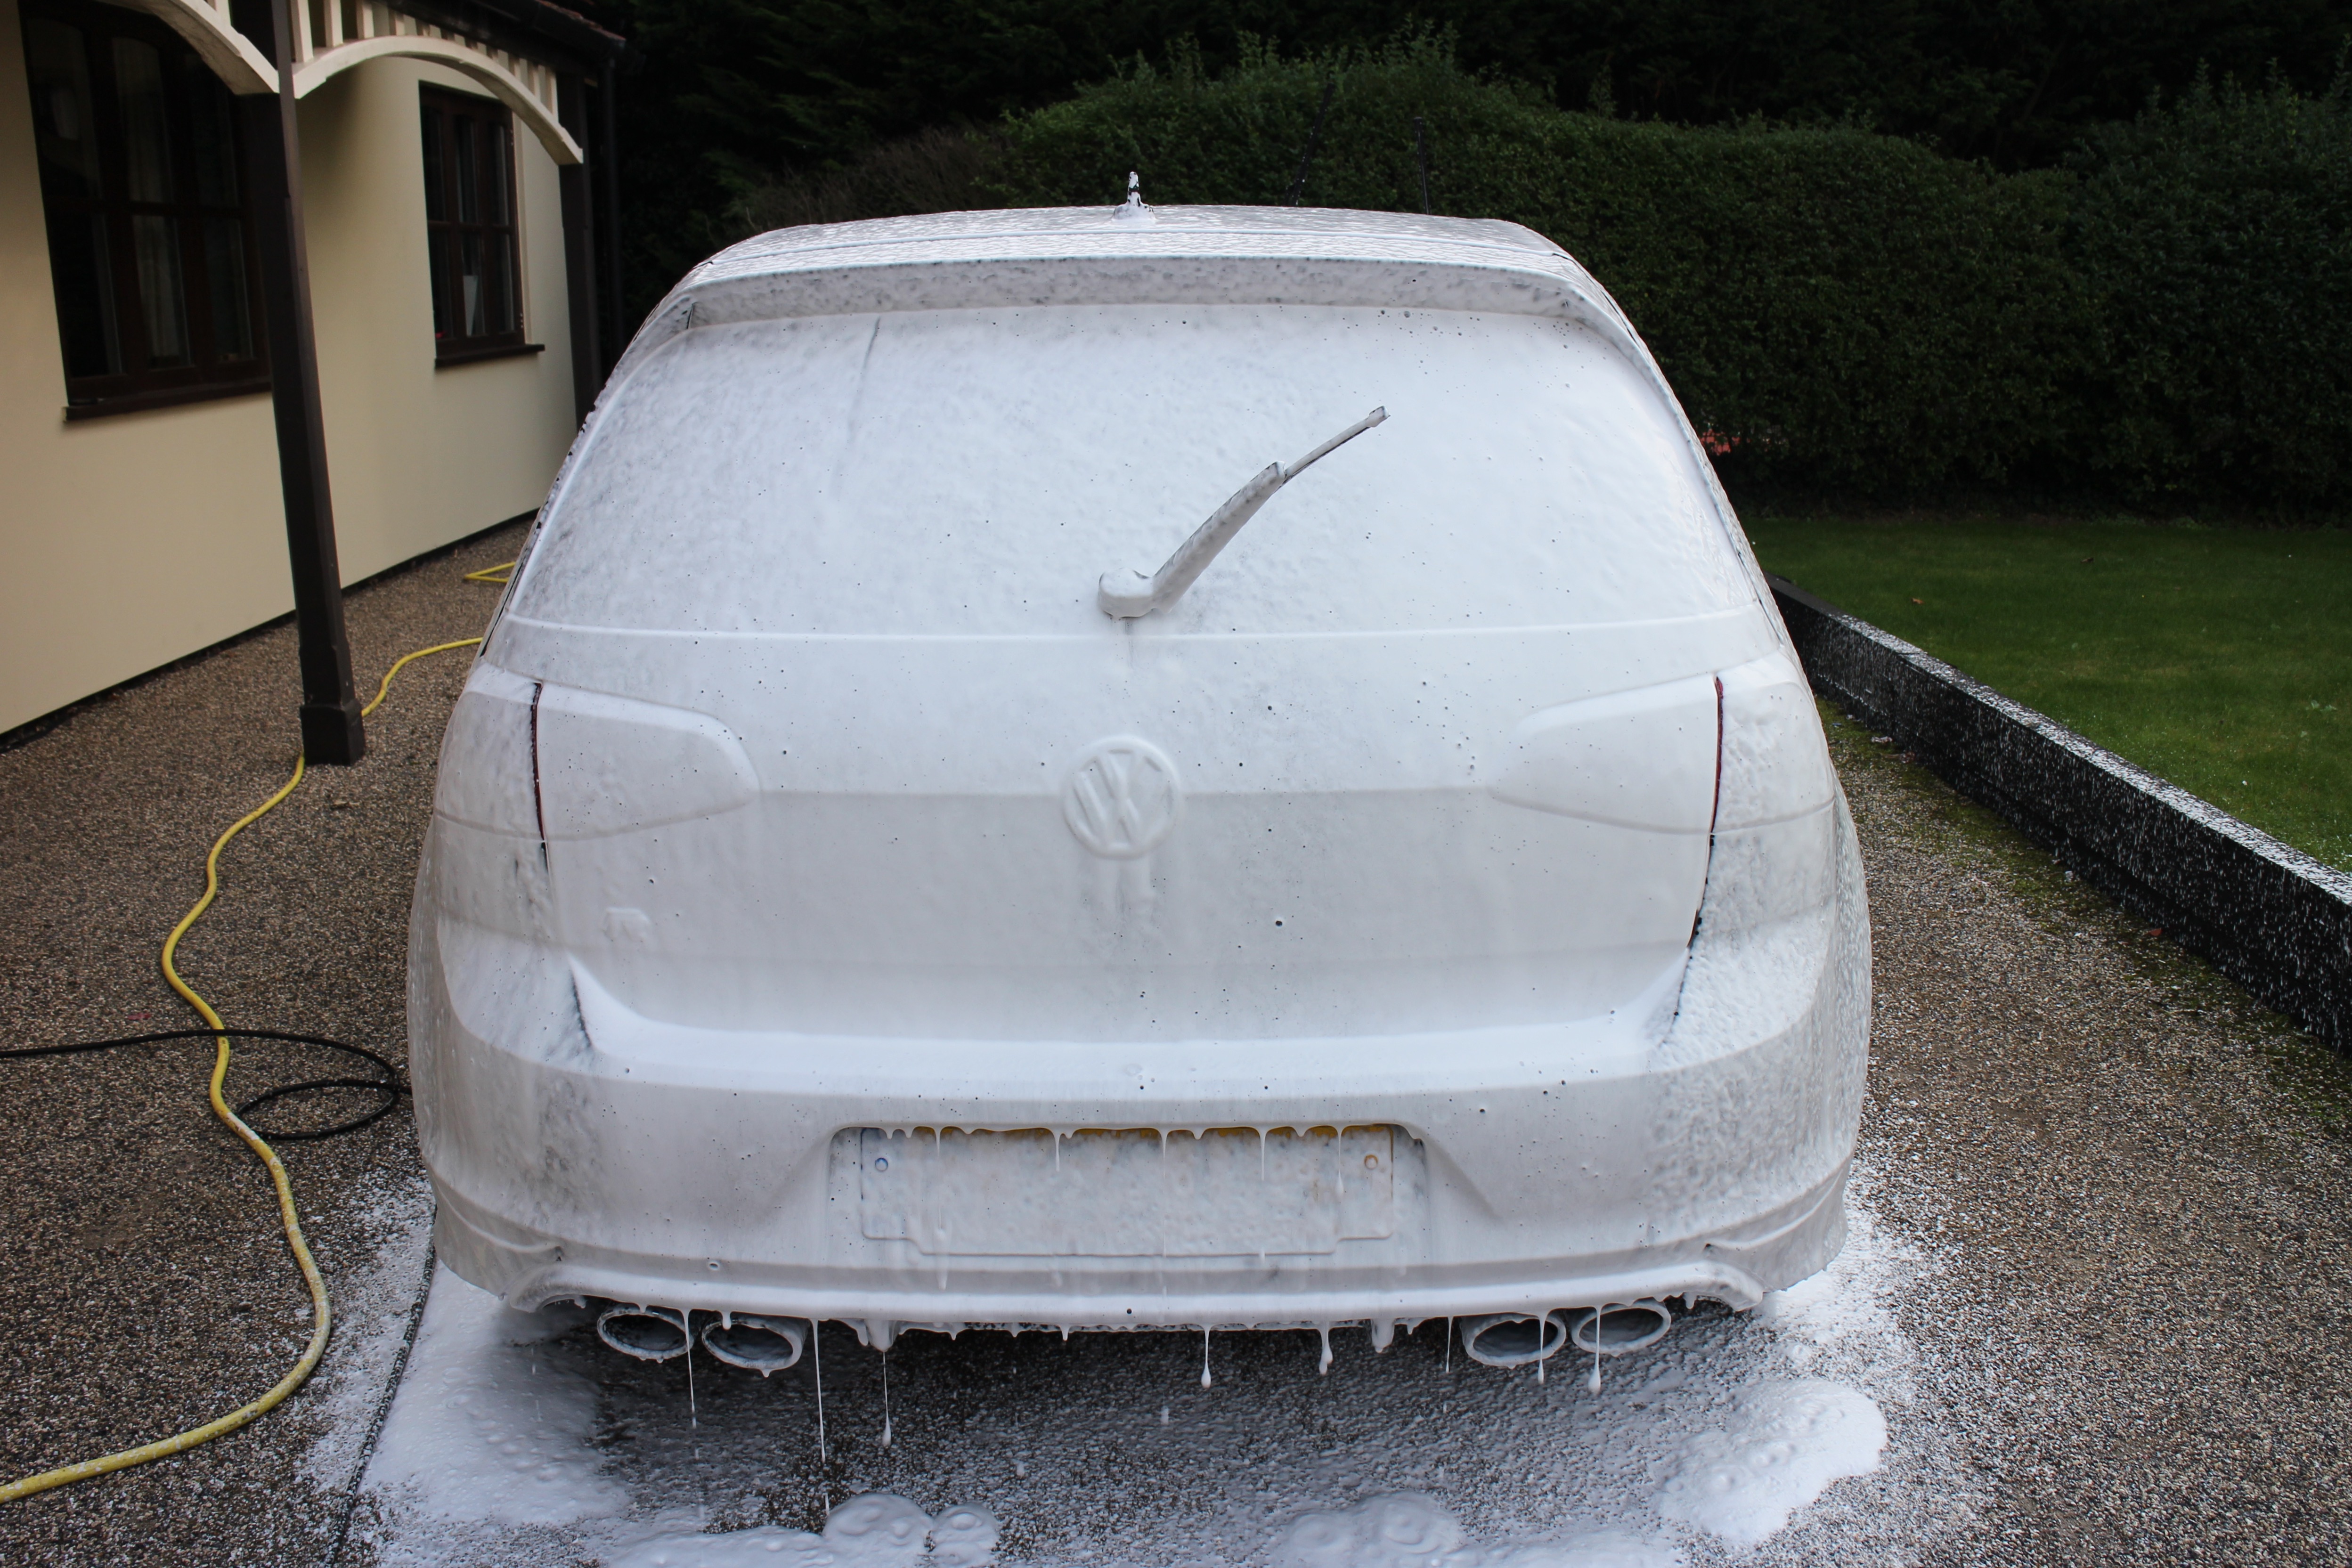
When first starting out with detailing, the important thing is to get into a good washing and drying regime first, before moving onto other stages. The main aim is to have ‘minimum contact’ with the paintwork to keep swirling and marring to a minimum. A poor technique can inflict a lot of damage to the paintwork. A good technique can prevent unnecessary damage to the paintwork. To help achieve this, I always start the process with snow foam using a proper lance, many skip this stage but I think it is a crucial first step.
Snow foamValet Pro Advanced Snow Foam
AP Snow Foam lance
Karcher pressure washer
As said I always start my cleaning regime with snow foam. IMO it’s the best ‘no contact; way to shift the initial dirt and grime on the surface of the car. First I give the car a quick spray with water using the jet washed on low pressure, just to wet the surface. Using about an inch of snow foam shampoo, I top up the lance bottle with tepid water and attach to the jet washer. After adjusting the dilution dial and spray nozzle, I snow foam the entire car and let it dwell for about 5 minutes. Whist the snow foam is doing its work, I fill up my - shampoo, rinse and wheel buckets ready for the hand wash. After 5 mins, I jet wash off all the remaining snow foam starting from the roof down and ensuring the car is well rinsed. The jet washer lance is kept at a 45 degree angle to the car and a few feet away to reduce the risk of any damage.
Valet Pro Advanced Snow Foam
 3-Bucket wash
 Valet Pro Bilberry Wheel Cleaner
Dodo Juice Supernatural shampoo
WoWo lambswool mitt
Wheel Woolies
WoWo Wheel mitt
I have 2 buckets with grit guards – one for shampoo, the other plain rinse water. 3rd bucket is shampoo used for the wheels only. Grit guards are optional but they help to release grit embedded in the wash mitt and ensure that the grit stays at the bottom of the bucket instead of swirling around risking getting back into the mitt and therefore back onto the paintwork.
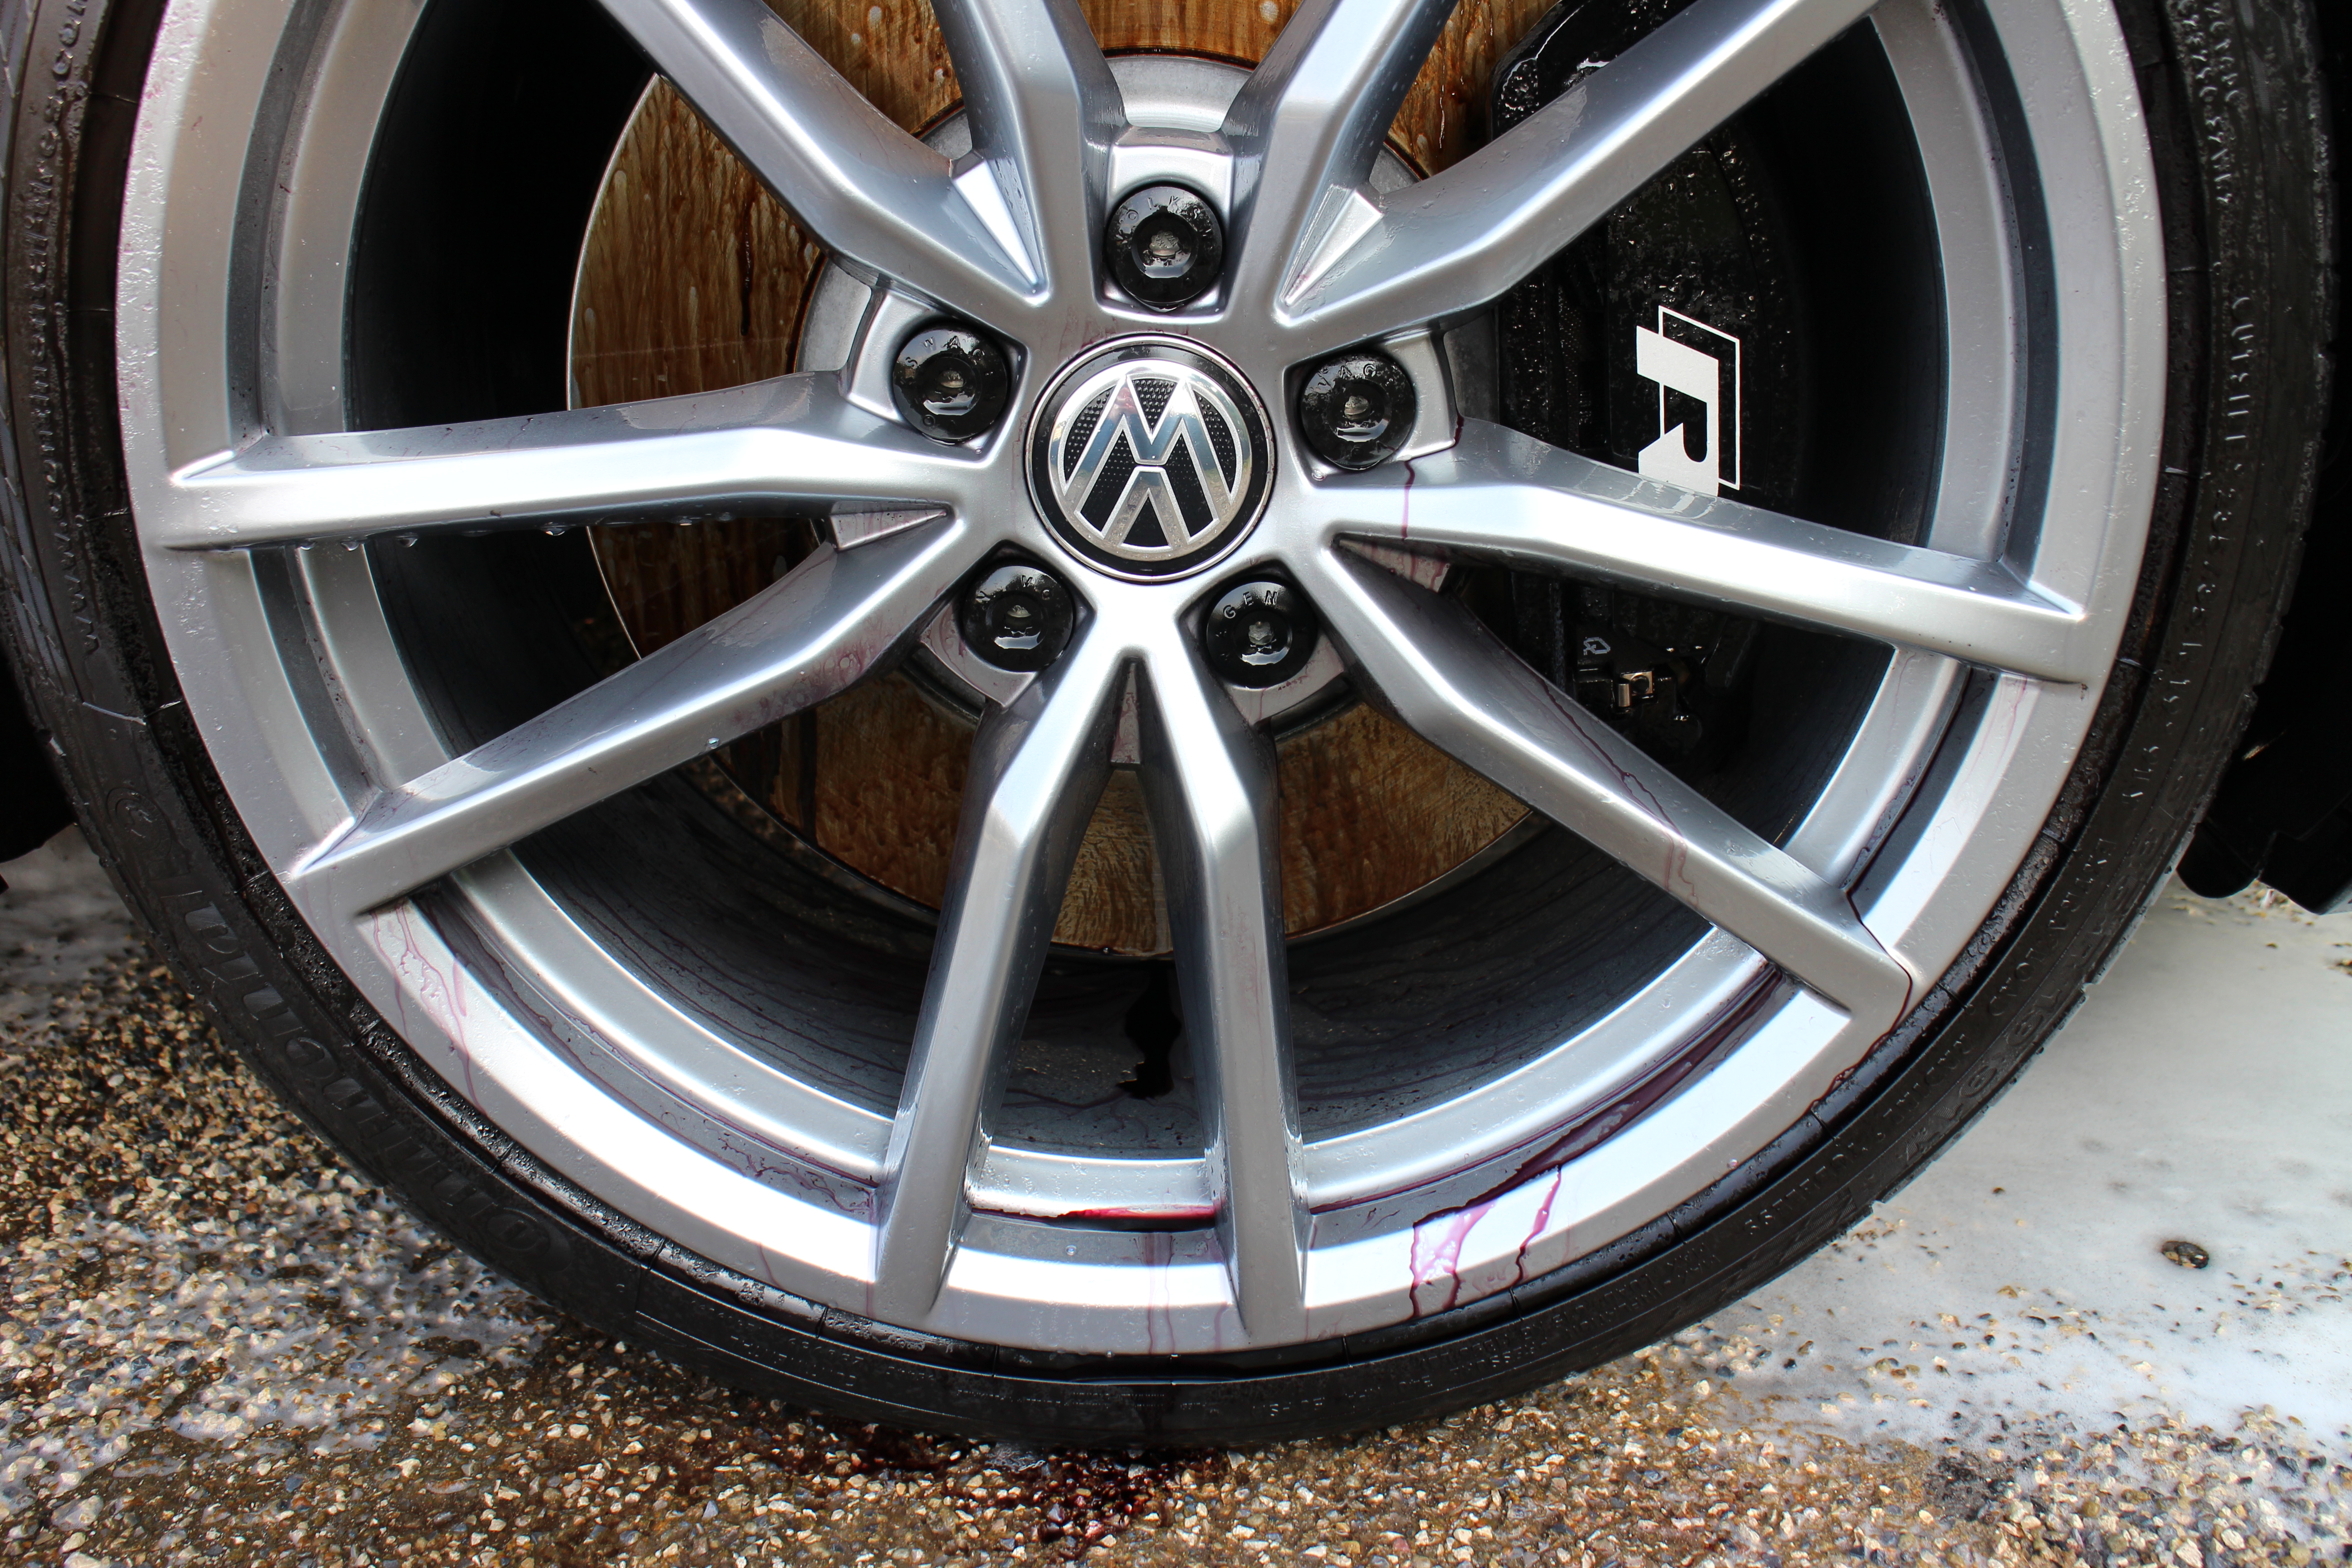
Wheels
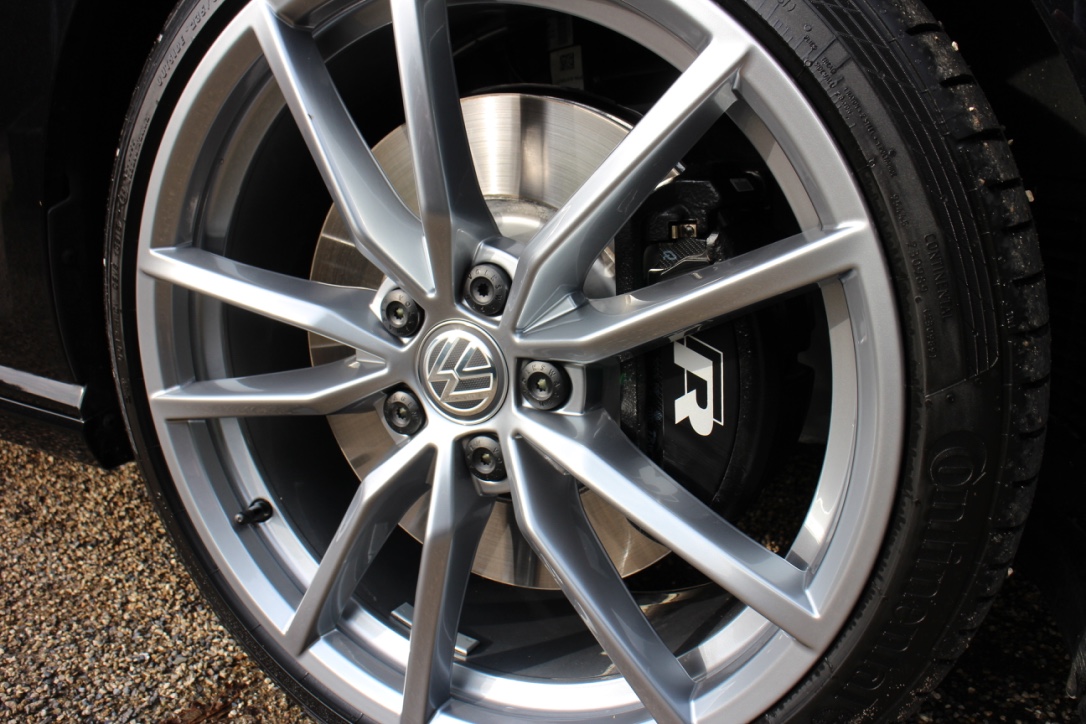
I always start with the wheels first. This way you avoid wheel debris getting onto the body of the car, once it’s clean. I spray wheel cleaner all over the wheels and leave for a few mins. Then, using the wheel mitt and wheel woolies, I clean the wheels, wheel wells, brake discs and calipers, reaching right through the spokes to the other side of the wheel.
Bodywork wash
The starting point is good wash mitt and a decent shampoo. I favour lambswool as the deep pile will gently clean the paintwork whilst any taking away grit and surface contaminants away from the surface. Plenty of decent ones on the market. I use many different shampoos, preferring those that offer good lubricity.
Wash the whole car using the lambswool mitt soaked in shampoo. Using a very gentle side-to-side gliding movement, start at the roof, then rear windscreen boot lid, front windscreen, bonnet and upper sides, upper wings. Lastly I do the lower sides, lower wings, lower rear, tailpipes, diffuser and the lower front end. I shampoo a panel at a time, and rinse the mitt after each panel, ensuring I run it across the grit guard to loosed and release any grit and debris.
Once the car has been washed it, it needs to be very thoroughly rinsed. Rinse from roof down with jet washer (45 degree angle) until all shampoo is off. Then using an open-ended hose (no attachments), Rinse again as before. The open-ended hose rinse makes the water ‘sheet’ of the car reducing the amount of standing water and so less to dry off with towels or dryer. This is the stage to use a ‘rinse aid, or quick detailer spray which can further reduce the drying time, if desired.
DryingDrying method is very important as a poor technique can result in scratching paintwork. I use quite a few good quality soft micro fibre towels. After the final rinse, starting with the roof and working downwards, gently blot the water up with the towel by just laying it on the panel, don't rub. A good MF towel will absorb a huge amount of water. I use several towels around the car. I also use a Master Blaster Sidekick Dryer for wheels and other ‘water traps’. It’s not powerful enough to do the whole car but is a very useful bit of kit. The majority of the car is dried using the MF towels.
Then I moved onto the decontamination phase.
Iron XI started with the roof first, then one side of the car, including the wheels, then the other side, the rear and front. You can do it a panel at a time but I find a few at once is fine. I sprayed the Iron X on, let it dwell for 5 mins (less time if it's sunny), gave it a gentle rub over with a very soft micro fibre and then rinsed off thoroughly and dried it off as the next step - tar remover needs to be applied to a dry surface. Then onto the Tardis.
TardisSimilar procedure, applied to a dry car, either sprayed on directly or applied with a very soft Micro Fibre cloth a panel or two at a time, then wiped over gently with a MF, and rinsed off thoroughly. Important not to let the solvent dry on the car, I wiped over almost immediately and concentrated efforts on the areas where I knew there was glue residue from the stickers. The residue melted off easily so there wasn’t the need to ‘scrub’ away at it, just apply a little extra Tardis to the areas where the glue is evident and wipe over gently until it has dissolved away. No abrasive action was required at all. Then I rinsed off very thoroughly.
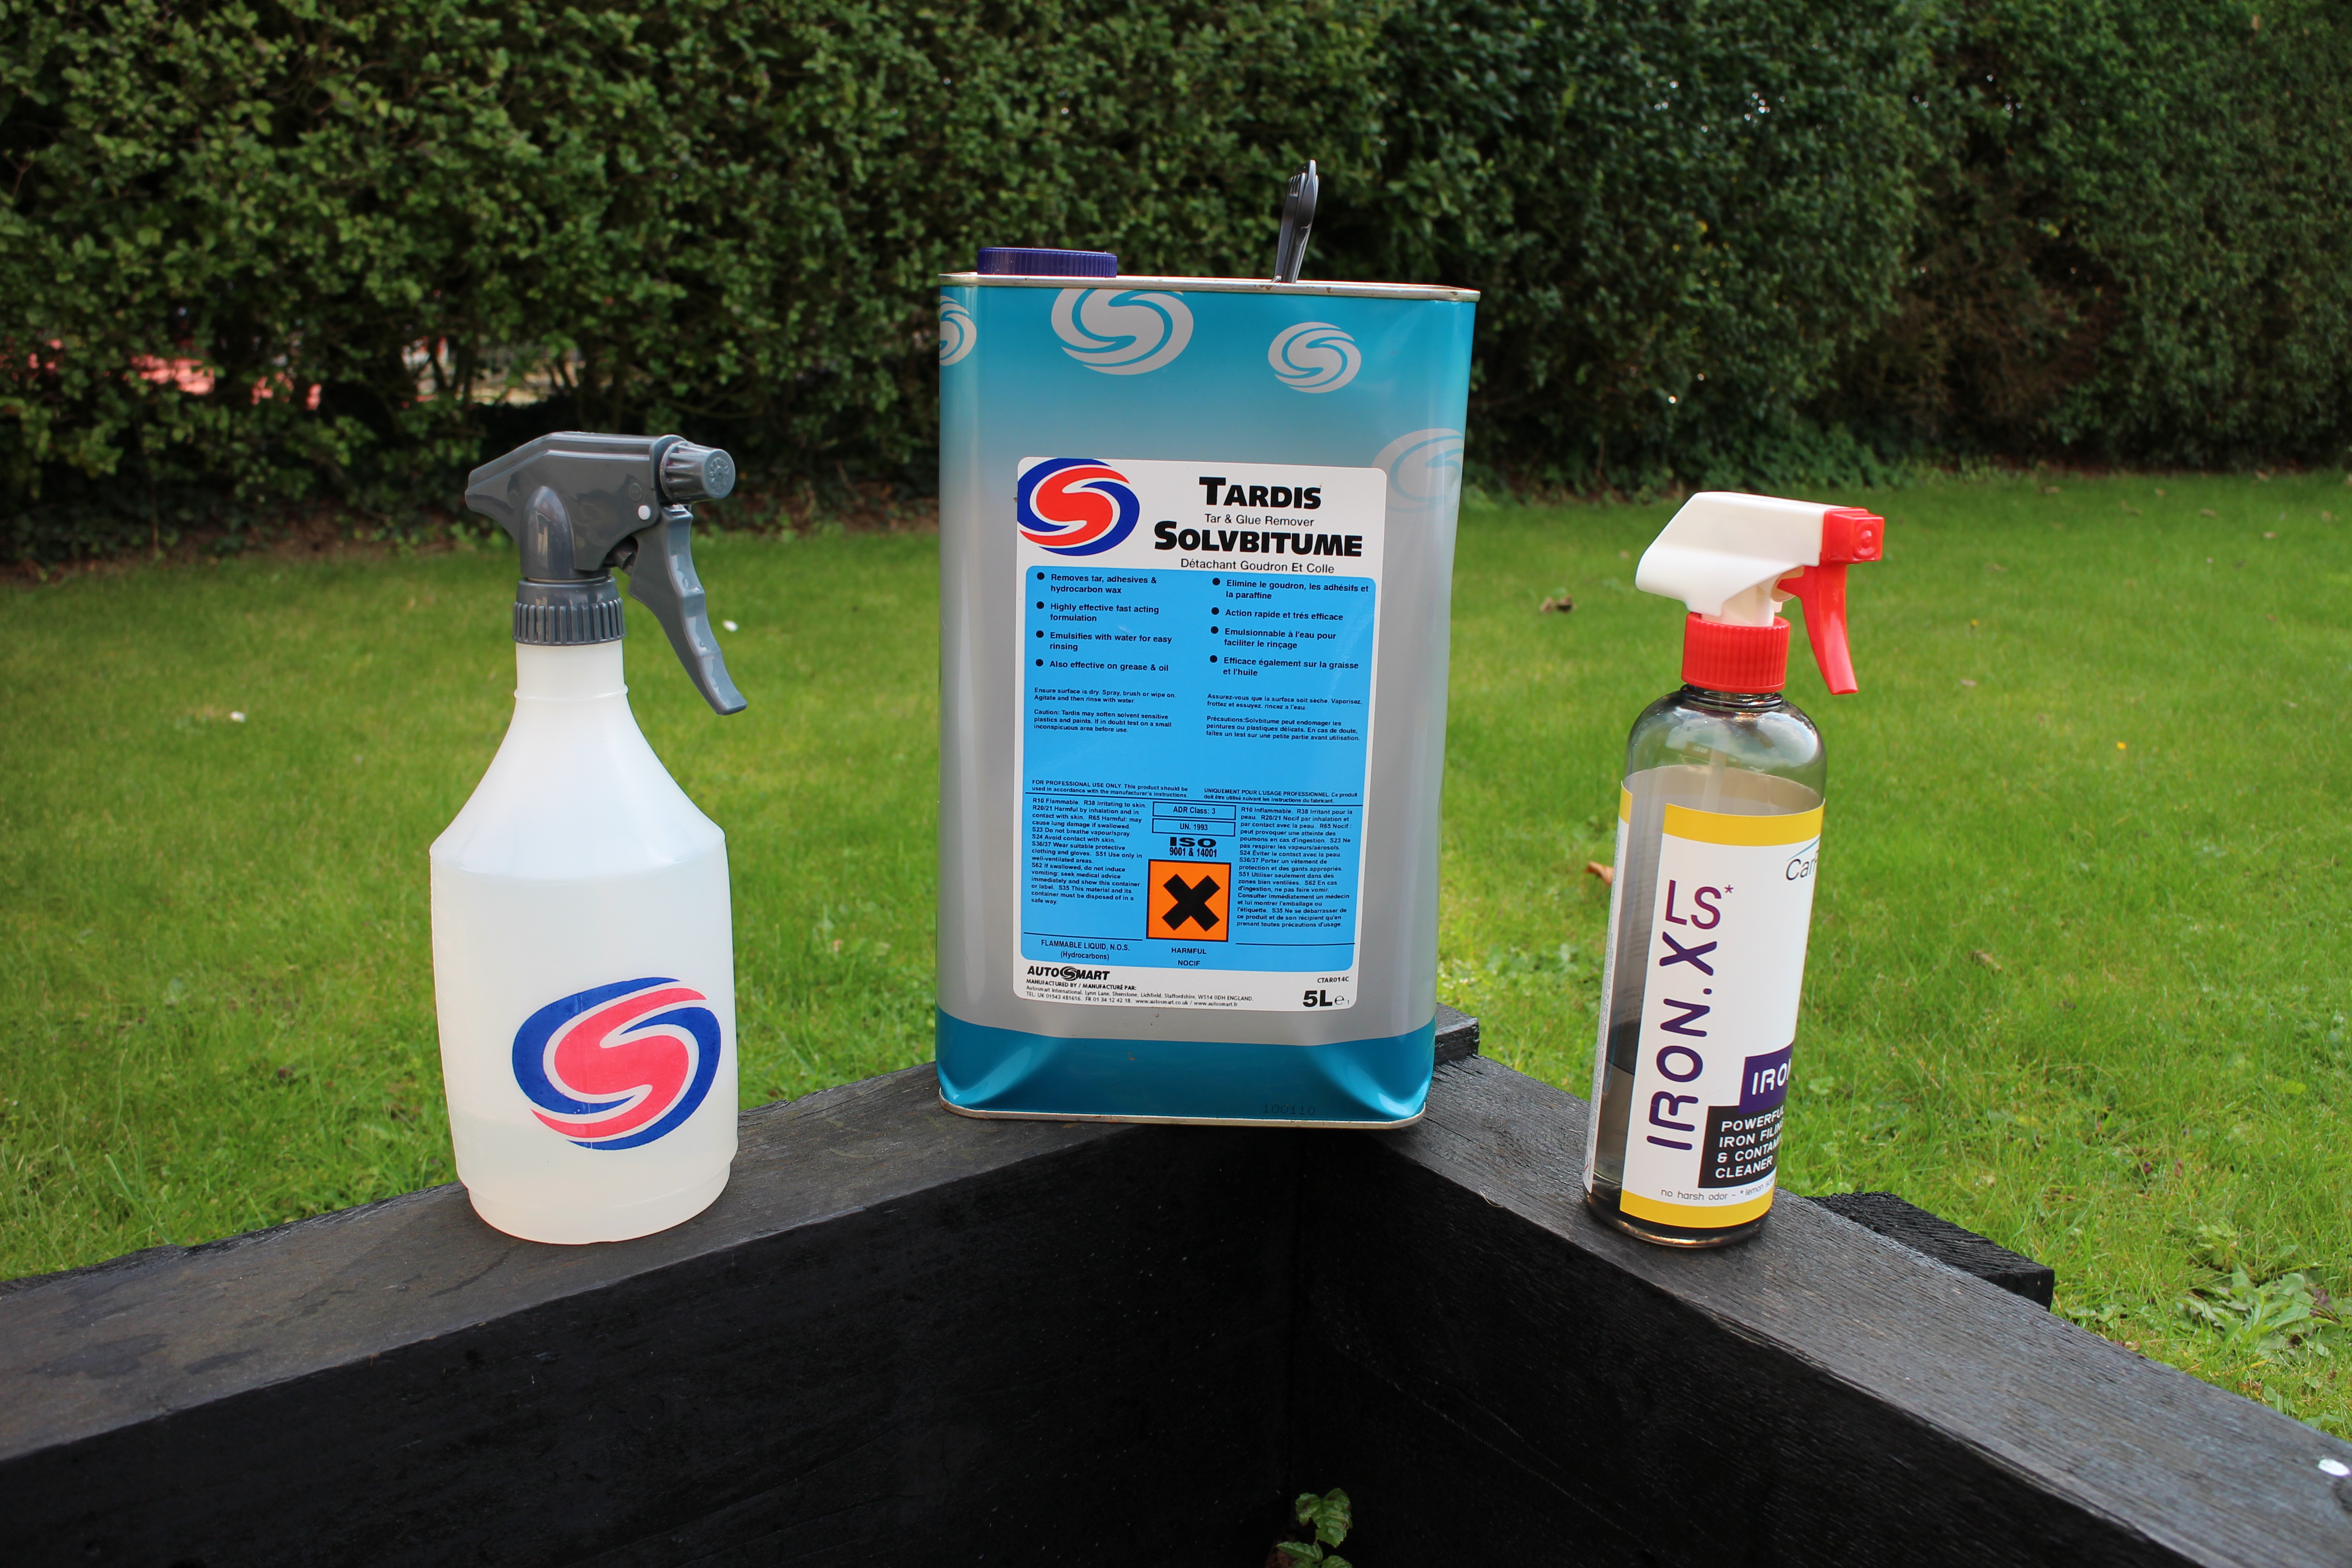
IronX iron remover


Finally I washed the car, rinsed and dried.
I did the 'sandwich bag' test to see if much contaminant was left on the car - put your hand inside a sandwich style plastic bag and run the flat of your palm over the paintwork. This serves to emphasis anything left on the car. In this case the car felt completely smooth and free from embedded contaminants. So I moved onto the next stage - to get some protection on the car.
Stage 2 - Protection:Snow foam
3-bucket wash
Sealant
Wax
As I had to follow up from the decon phase the following weekend, prior to getting protection on the car, I gave it another full snow foam and wash as before. Then onto the sealant.
Products used for protection
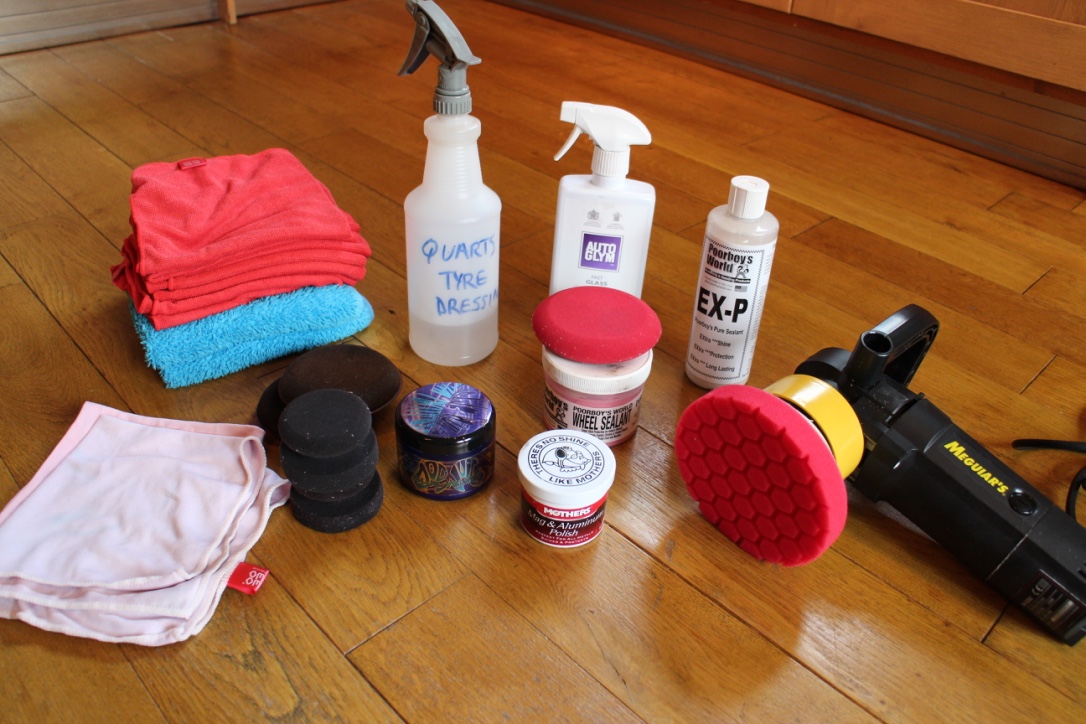 Seal
SealPoorboys EX-P sealant
Poorboys Wheel Sealant
Mothers Mag and Aluminium Metal Polish
Sponge applicators
WoWo and Dodo Juice Micro fibre buffing cloths
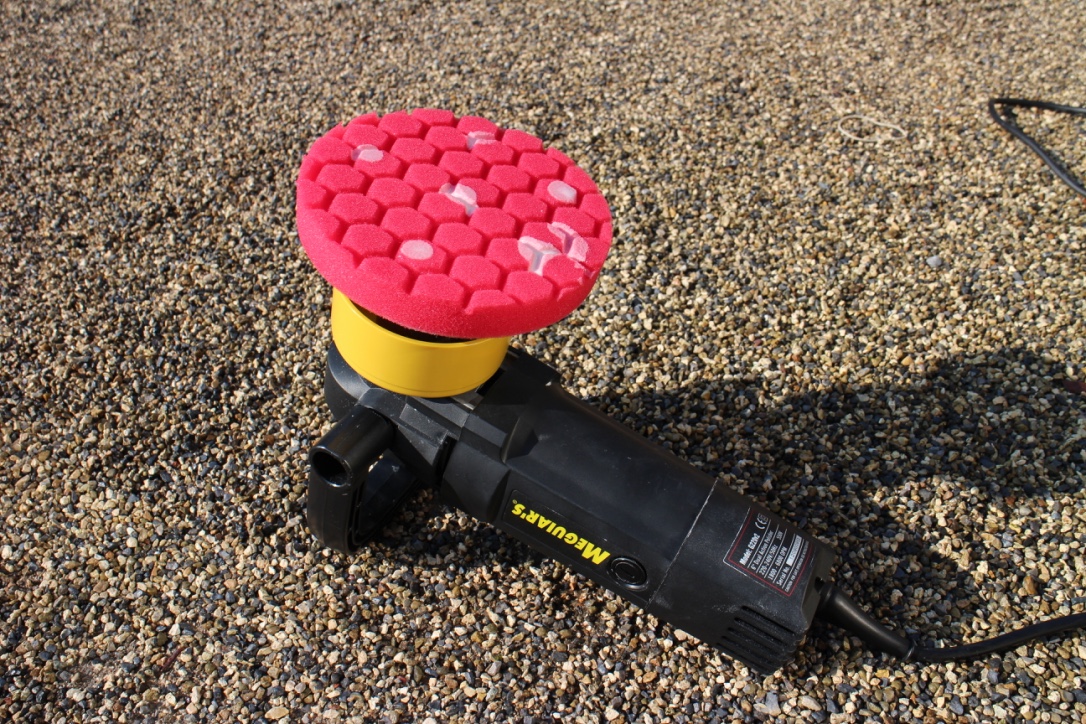
Meguiars Dual Action Polisher
Chemical Guys Hex Logic Red pad
Quarts Tyre gel
After a good wash and dry I moved onto the sealing phase. On this occasion I decided to use the DA to apply the sealant. It could equally be one by hand using a sponge applicator. I used a DA as you get a nice thin, even spread of the sealant. Using the DA on a slow speed setting, I dotted sealant around the pad and laid the pad onto the paintwork before switching the DA on. If you switch the DA on before placing the pad on the car, sealant will fling everywhere making a mess.
I apply sealant to the bodywork and all glass, EXCEPT the front windscreen, which I always leave clear of products. I workaround the car and apply the sealant to each panel and leave it to dry to a haze for 30 mins. I then buff it off each panel using the MF buffing cloths, and give the whole car a final buff over.
Sealant applied
Wheels
I apply wheel sealant to the wheels, leaving it to haze for 10 mins, then buff off.
Tailpipes
Apply metal polish to the 4 tailpipes and left for 10 mins, then buff to a high shine.
Glass
AutoGlym Fast Glass
WoWo glass cloth
Gave all glass a clean, except the front windscreen.
WaxDoDo Juice Blue Velvet Pro wax
Sponge applicators
WoWo and Dodo Juice Micro fibre buffing cloths
After the sealing phase, I move onto the last stage protection (LSP) and the application of wax. Having selected my favourite hard carnauba hybrid wax, I use a sponge applicator to apply a thin layer of wax to each panel, starting with the roof and working down. I apply using a circular overlapping motion. I apply it to the whole car, including the glass, EXCEPT the front windscreen and wheels. After applying it I leave it to haze for 10 mins and then buff of with a very soft MF buffing cloth. I then give the whole car a final gentle buff.
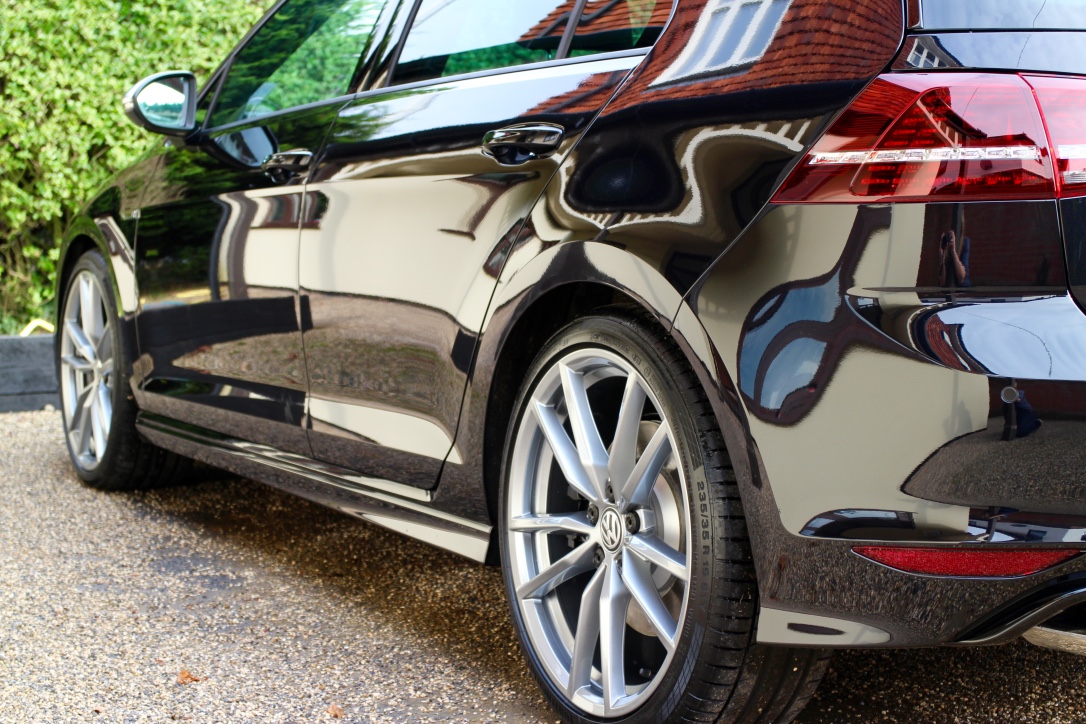
Wax applied
 Tyres
Tyres Quarts tyre gel
Sponge applicator
Finally I spruce up the tyres with a couple of applications of a decent tyre gel.
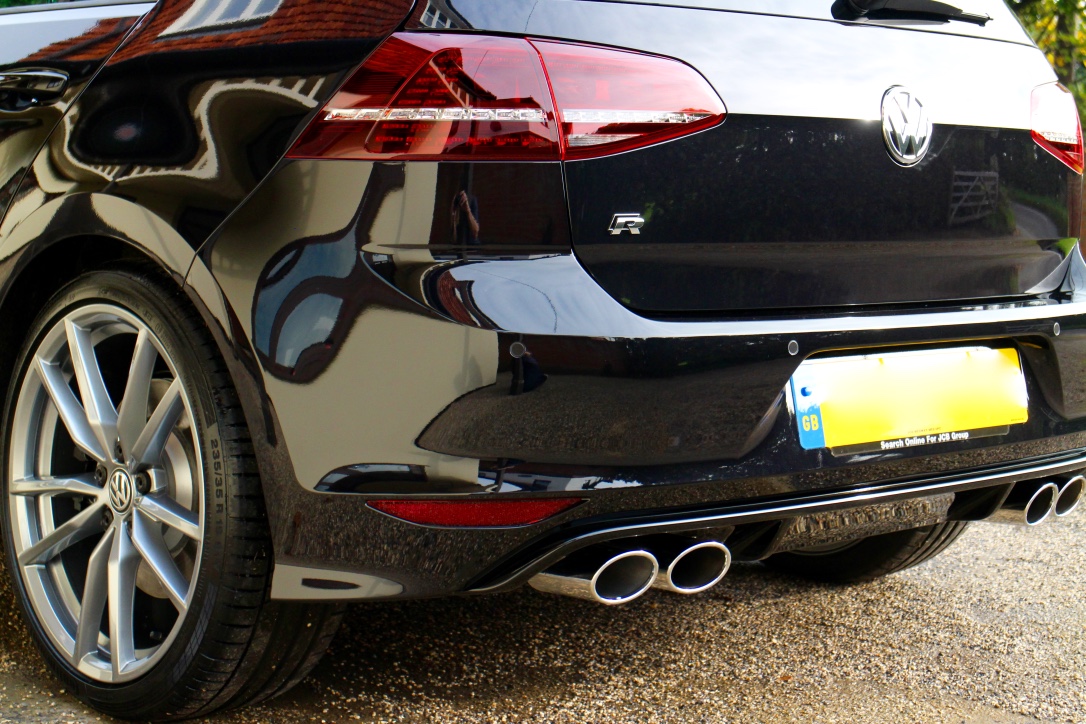
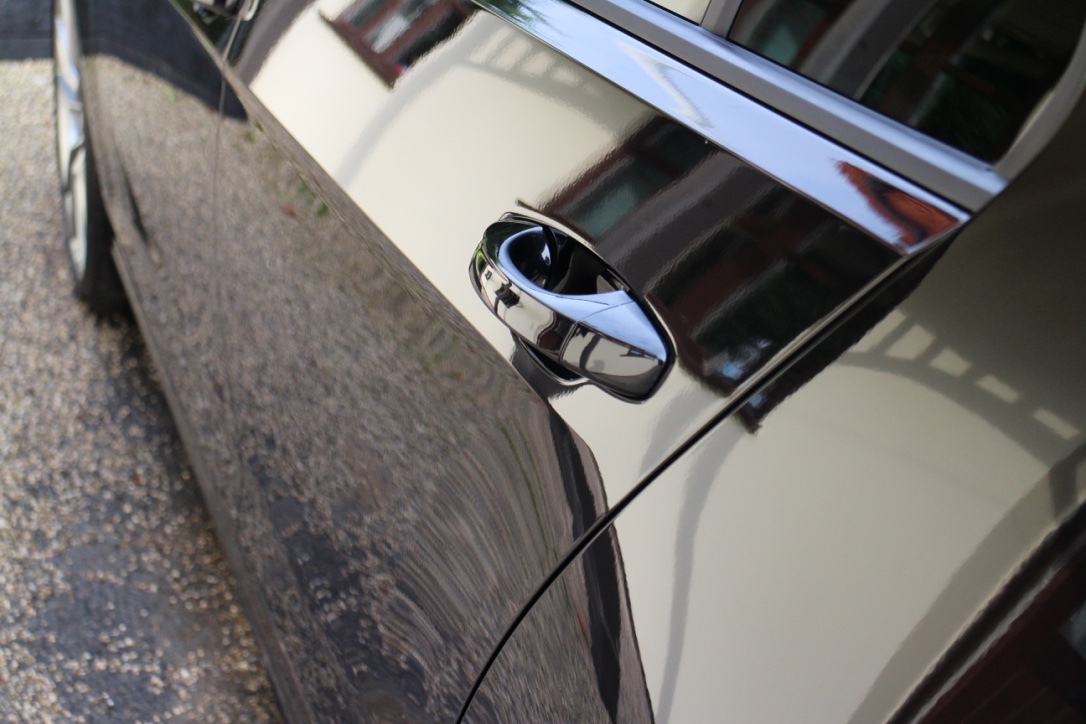
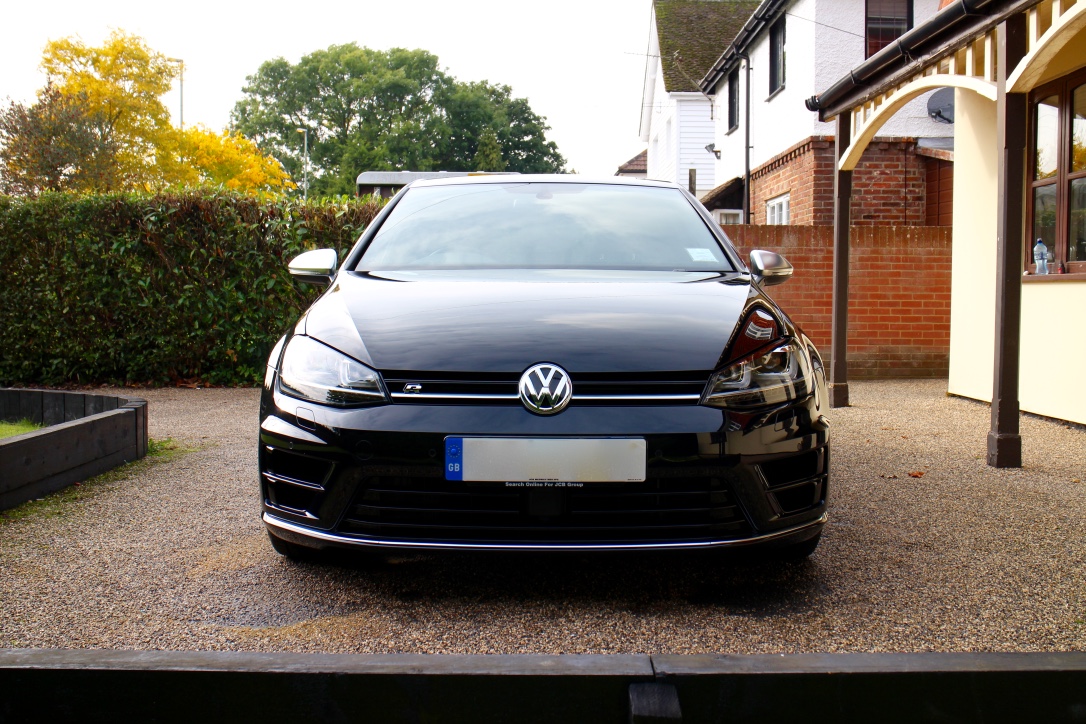
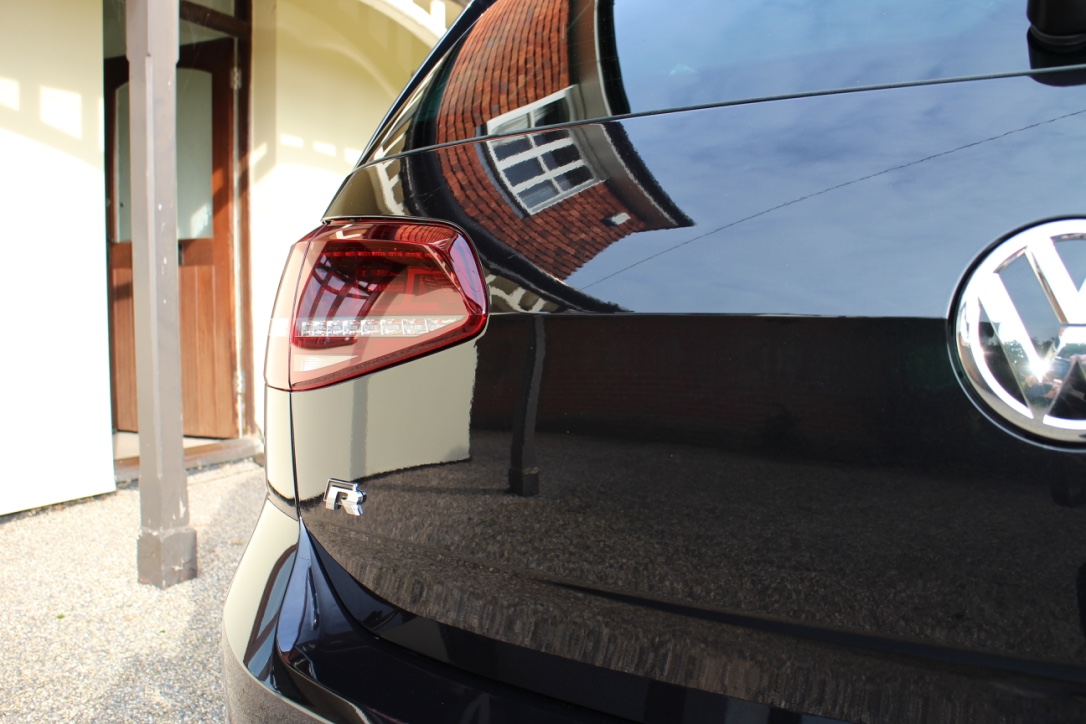
The results (pic heavy)
Needs another coat of wax (next weekend) but turned out pretty good I think.