Instruction for fitting a multi-way power adapter to provide a switched power supply for Dash Cams, GPS devices or any other device needing to be plugged into a Ciggy socket and to avoid trailing wires to the centre console.
DISCLAIMER - This mod is carried out at your own risk, I accept no responsibility for you not carrying out your own assessment of your level of skill and common sense as to whether you can or should use this guide to help you do something similar.
Background:
I was going to place the adapter in the glove box but there is no easy way to route the accessory cables into the glove box so I decided to fit the adapter into the drivers side cubby hole/drawer. This meant that I had to run a live wire from the fuse box behind the glove box on the passenger side across the car into the cubby hole.
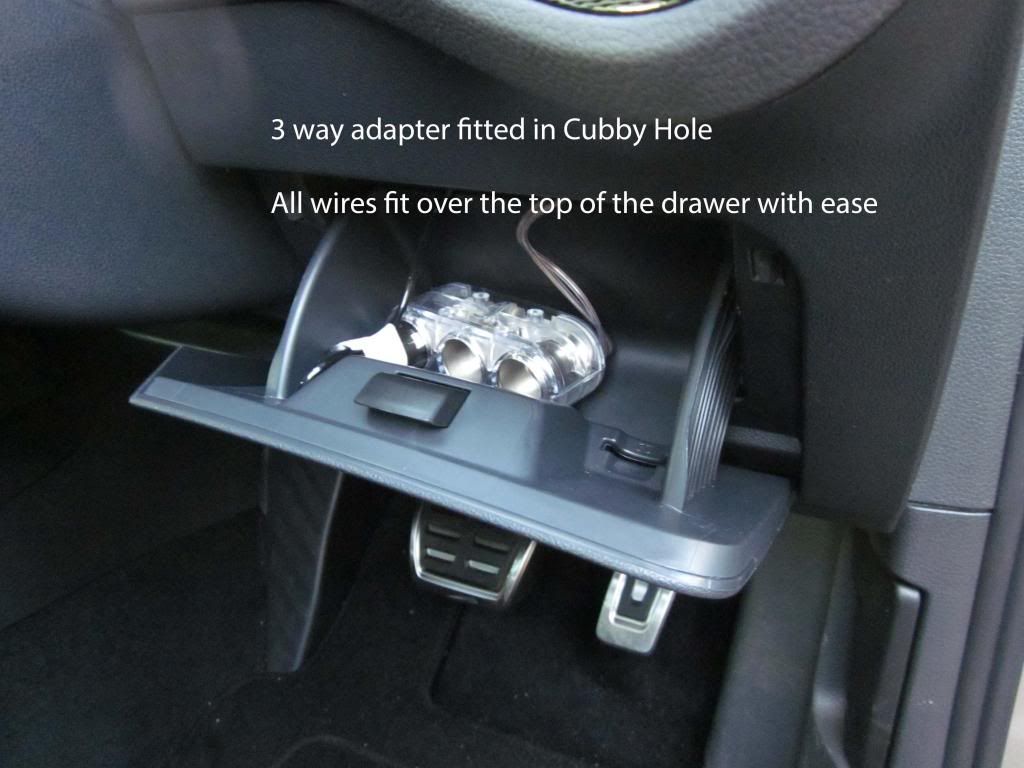
I used a standard 3 way adapter, which are getting hard to source, rather than one with a USB power feed as virtually all the integrated USB power feeds are only 500ma which is too low to power and charge most modern devices. Separate plug in USB power feeders are available giving over 2 amps, dual feed ones are also available giving separate 1 and 2amp USB power feeds. There is space to fit a 4 way adapter if required - the choice is yours, but be sure to by an adapter which has a wire connection and not the newer integrated plug version.
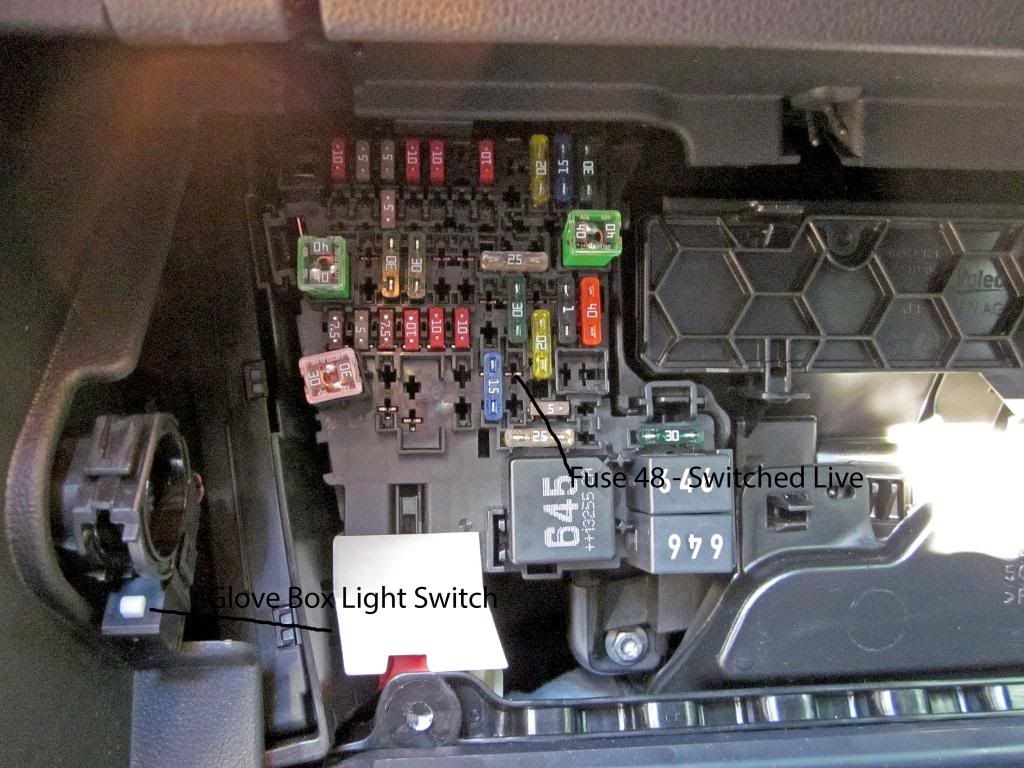
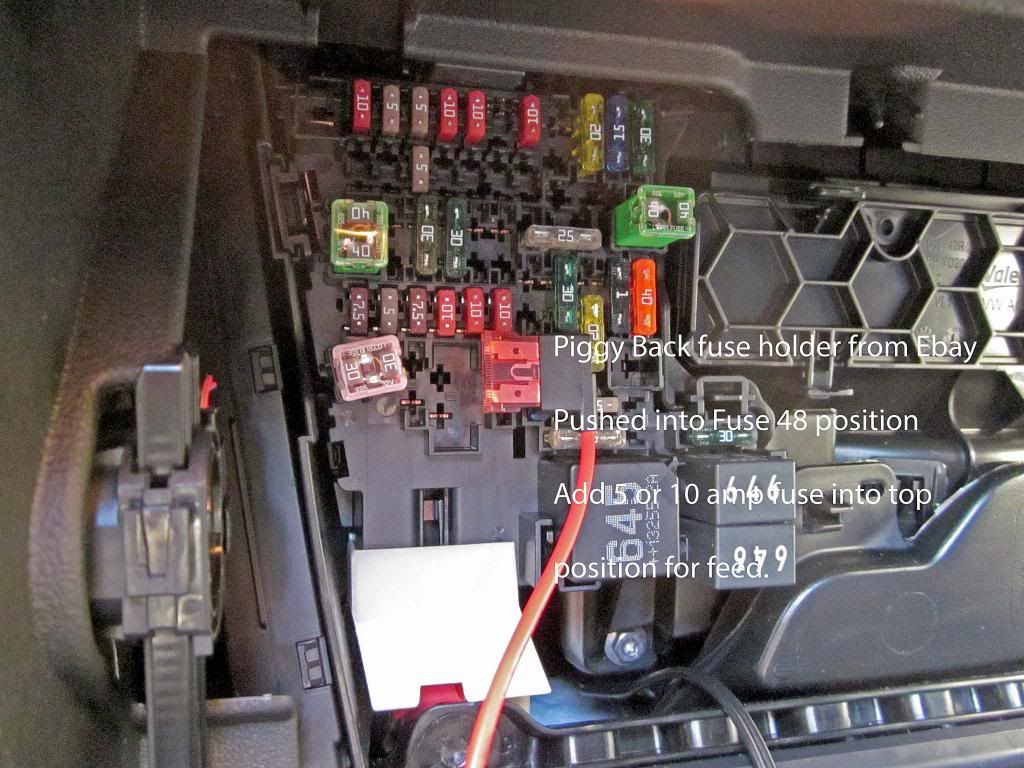
I identified a switched live in the fuse box - Fuse 48 - which is not used or listed in the manual and decided to use this as the supply. I do not know what this fuse might have been destined to supply but using it has not thrown up any fault codes and everything appears to be working correctly.
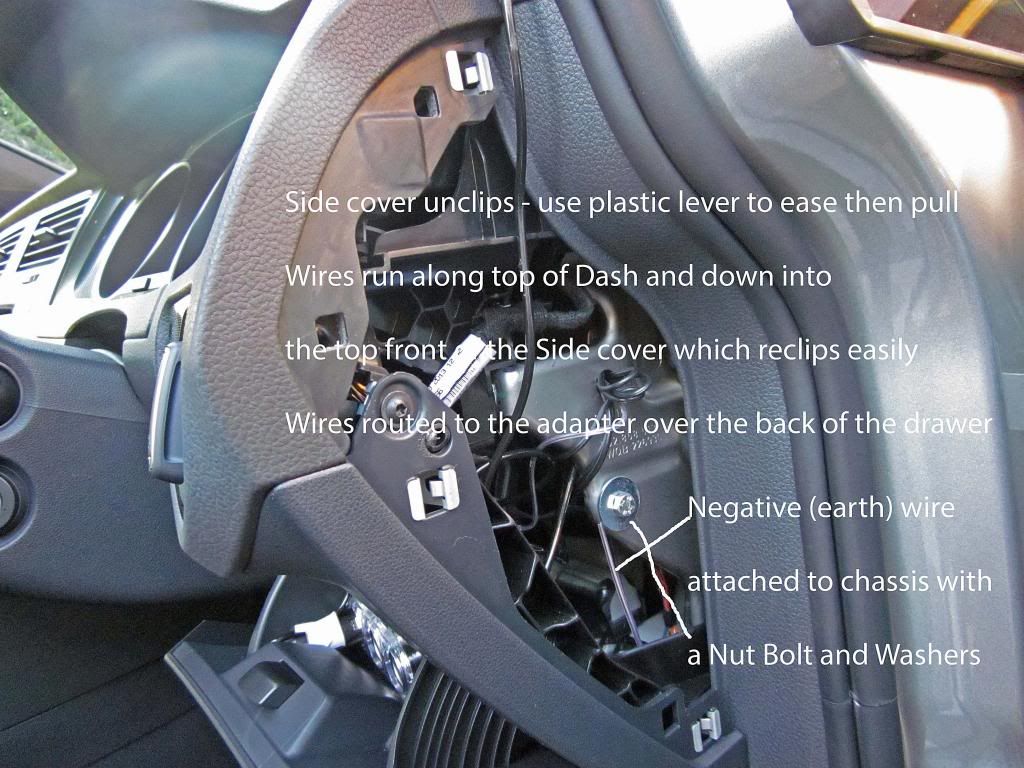
The Negative, earth, supply was provided by bolting the negative wire of the adapter to the metal chassis just behind the drivers side cubby hole, easily accessible by removing the dash end cover.
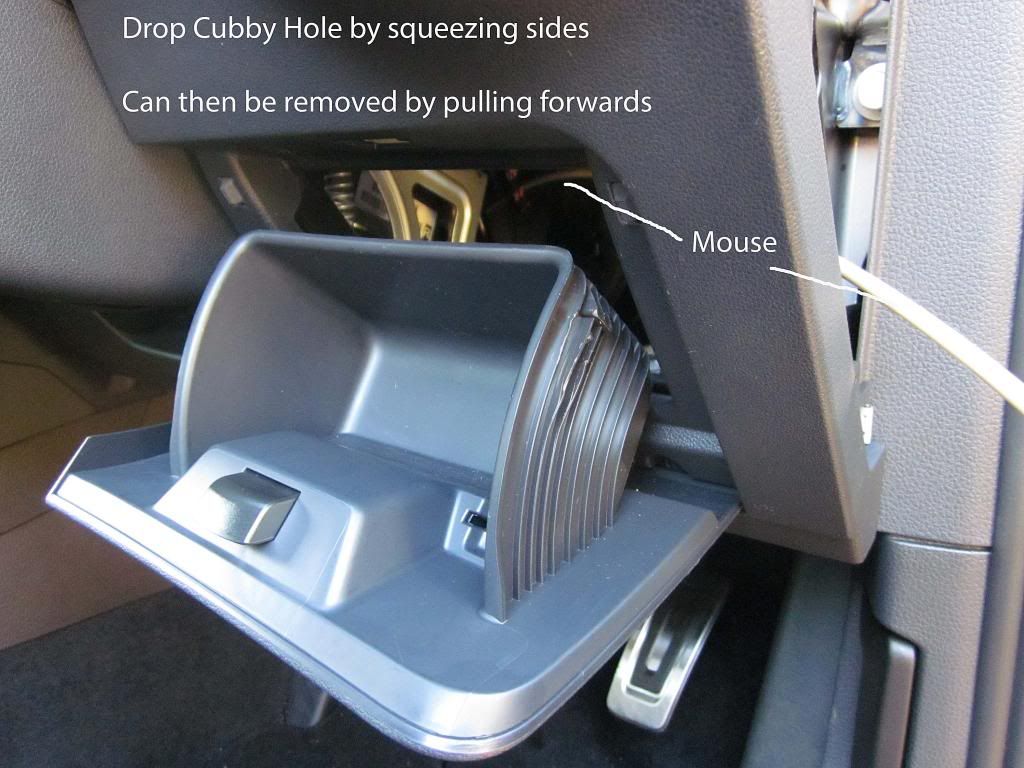
The Cubby Hole can be dropped and removed by squeezing its sides to drop it forward and then pulling forward to remove it. I found that it was much easier to attach the nut and bolt for the earth wire once the drawer was removed - risk of dropping the nut/bolt/washers otherwise through restricted access space, since the diagnostic port is directly below where the earth wire is bolted extra care should be taken not to drop anything metal into the back of the port.
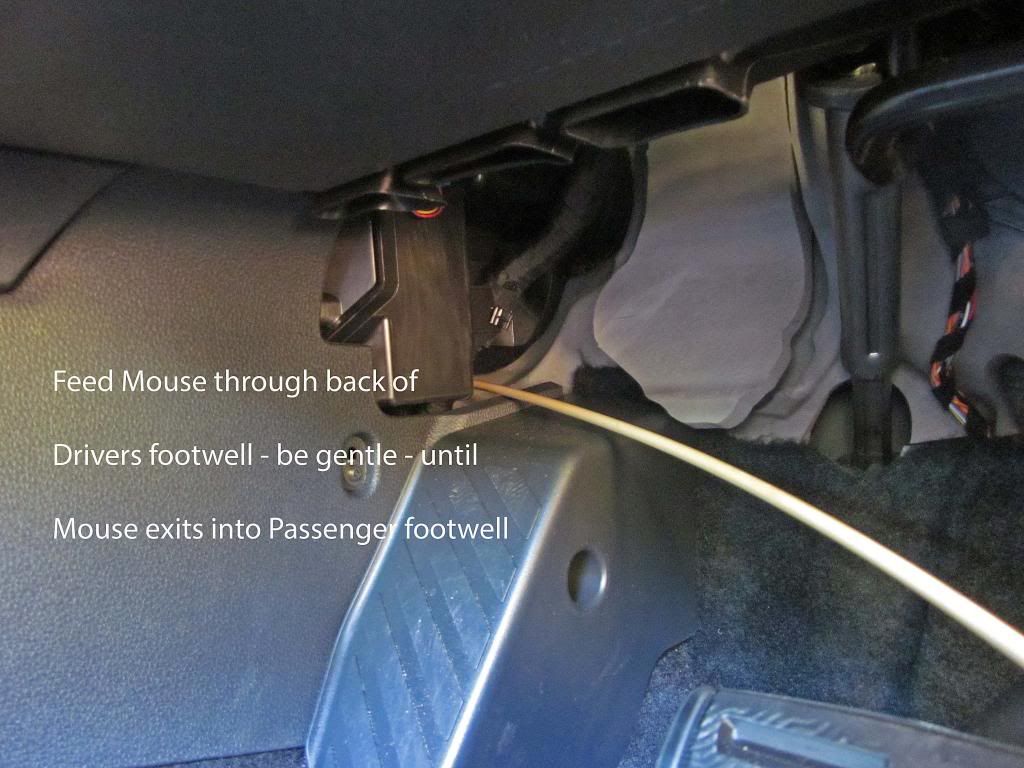
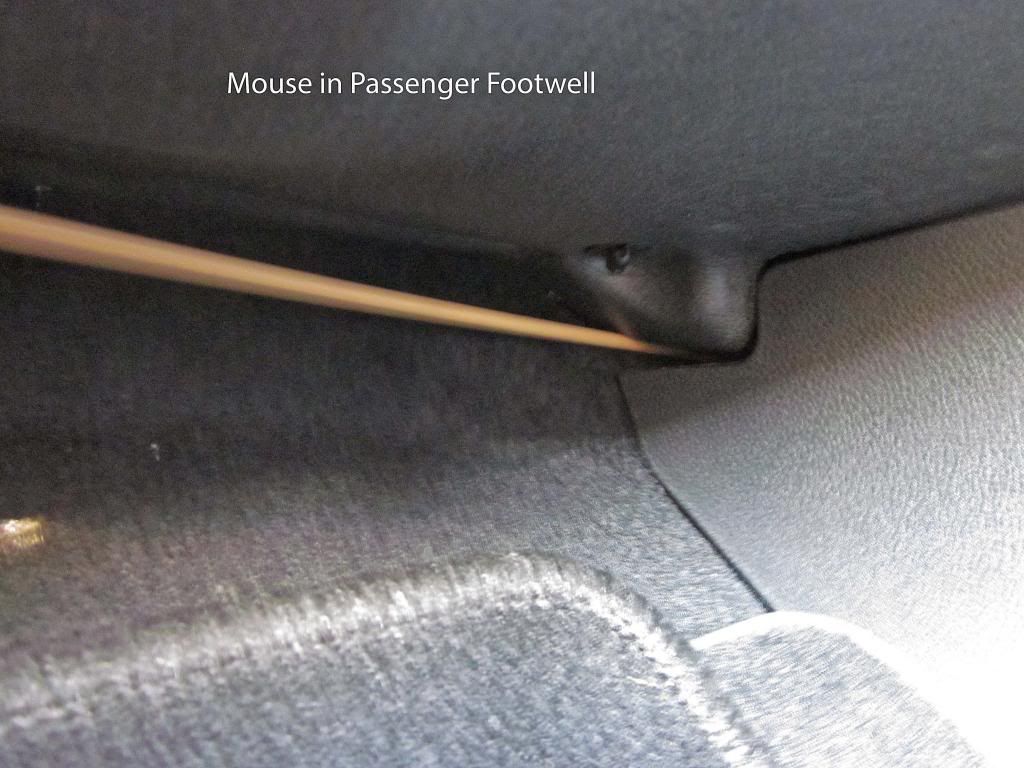
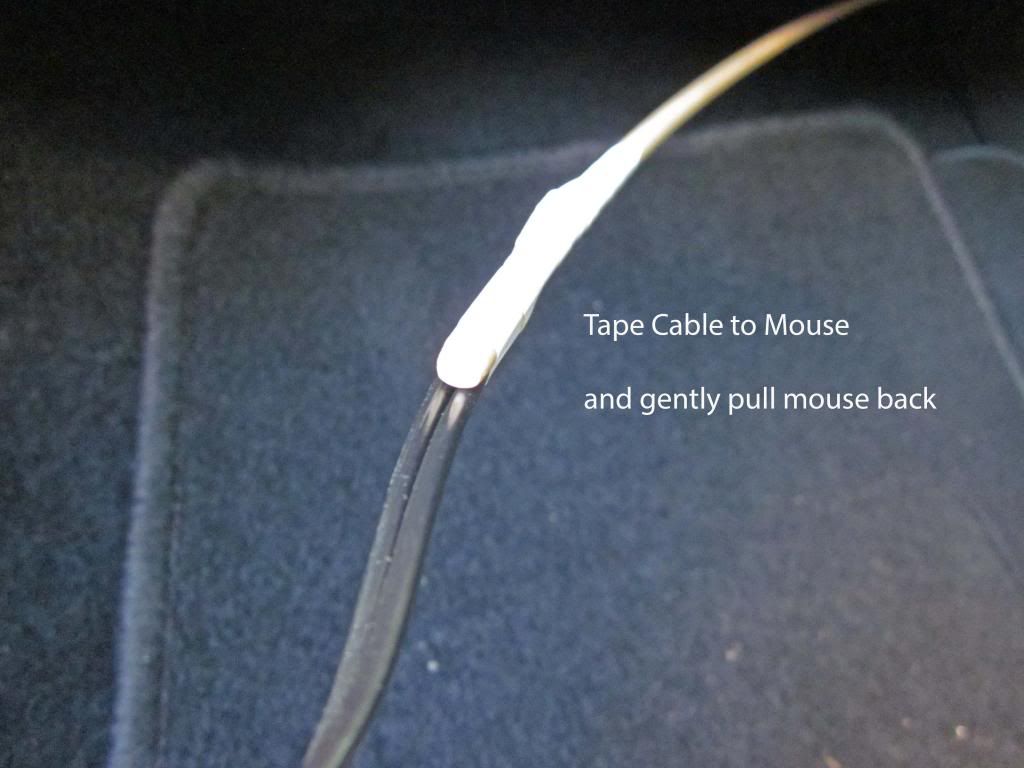
To draw the cable across the car I used a 'Mouse' in my case a semi flexible plastic rod but you could possibly use a long stiff wire. A mouse is needed as it is impossible to feed a flexible cable from footwell to footwell. Once the mouse has been successfully fed through - see photos - then the feed wire is taped to the end of the mouse and the mouse carefully pulled back bringing the cable with it.
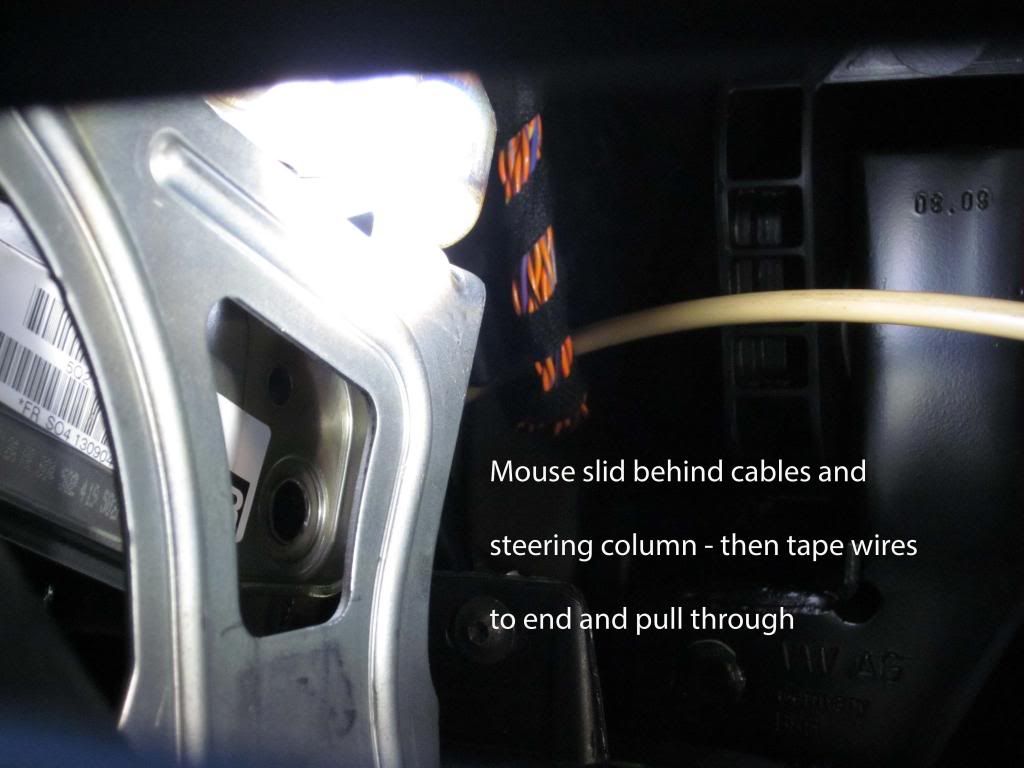
The Mouse is used a second time to draw the wire up behind the dash to the back of the cubby hole - see photos.
OK - the Steps.
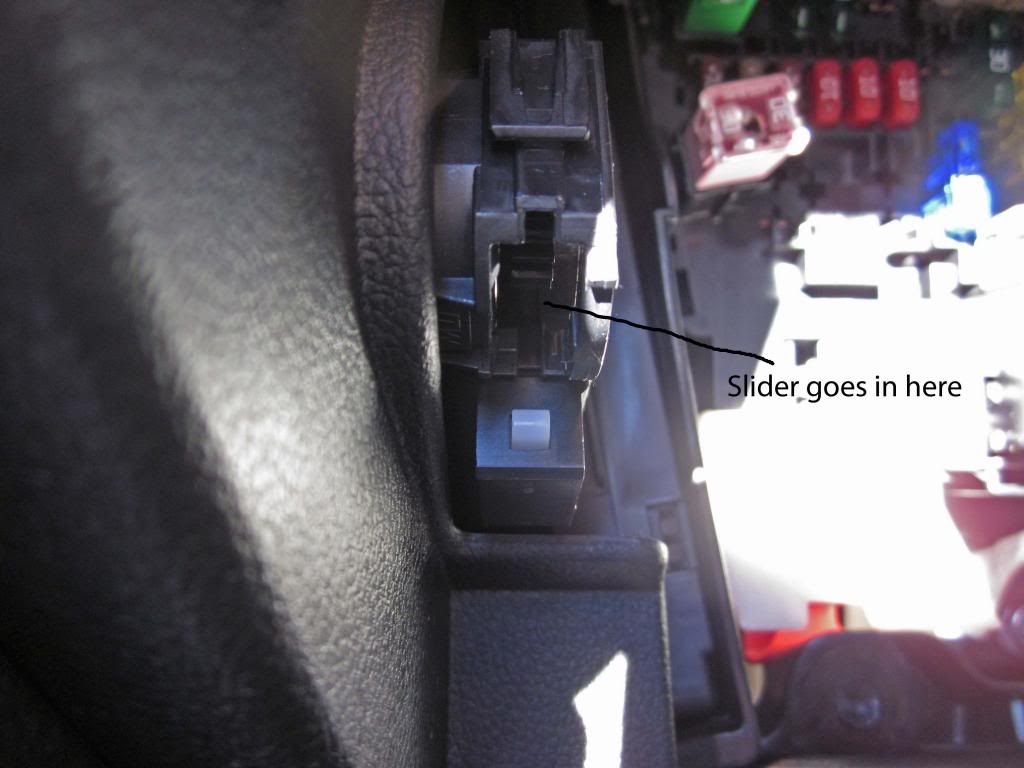
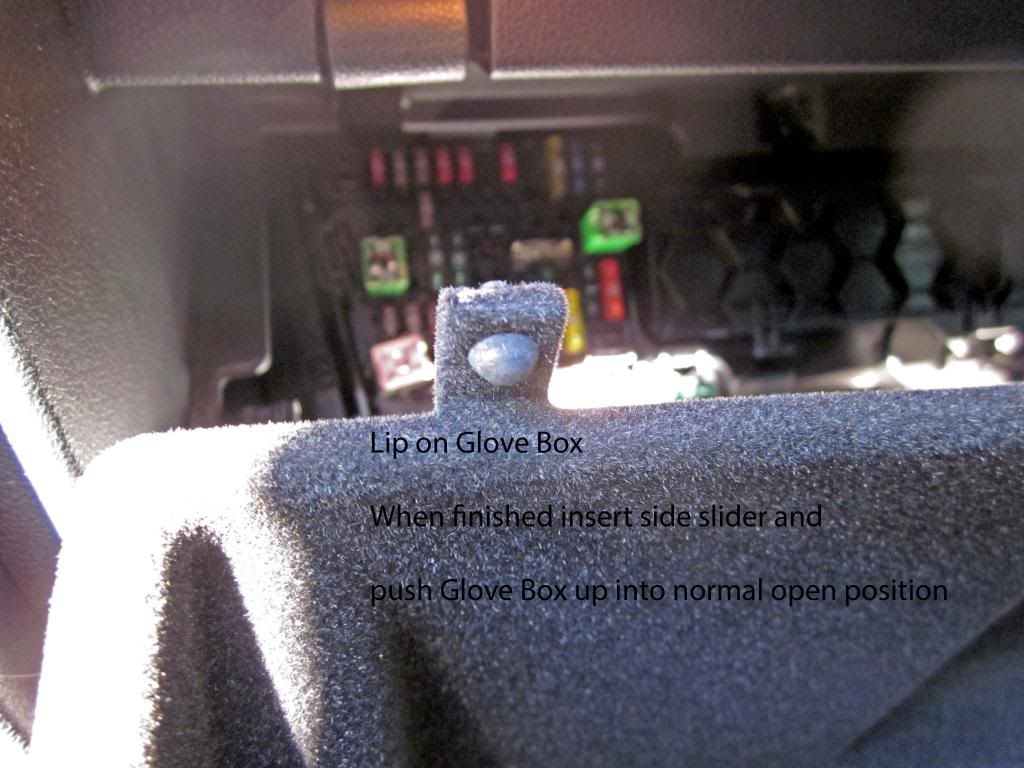
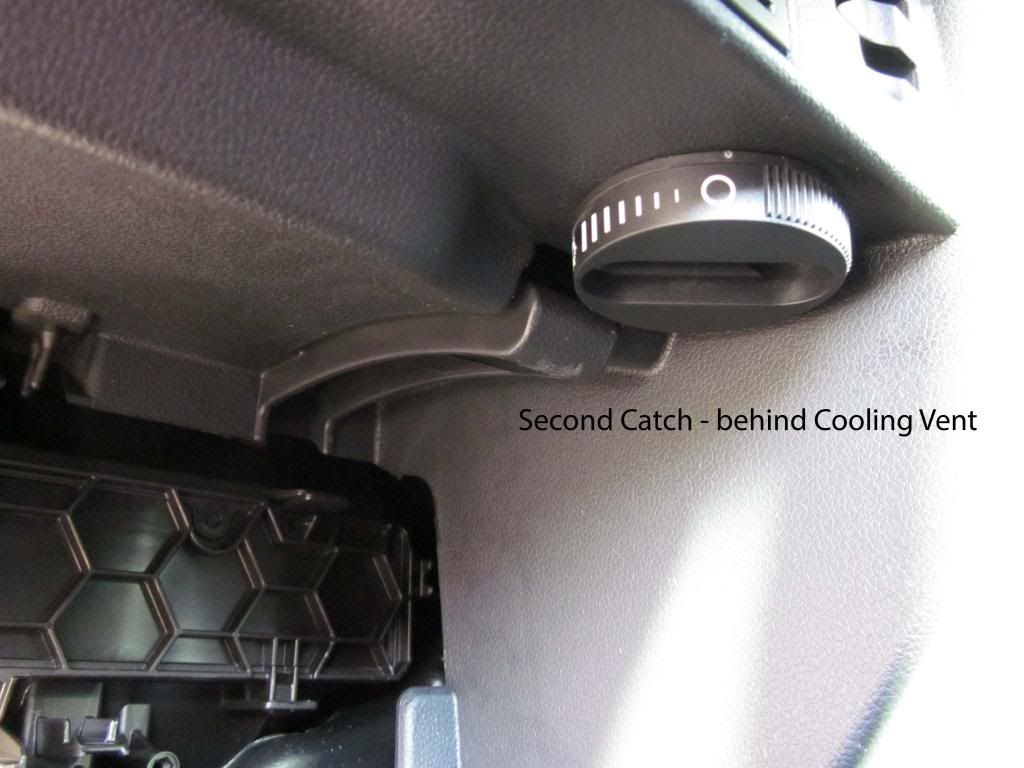
Step 1. Drop Glove Box - the instructions are in the cars user manual - be aware that the release clips have to be pulled forward and up and can be very stiff to release the first few times it is done.

There is a plastic guide clipped to the left side of the Glove Box and this is likely to drop off as the Glove Box drops to reveal the fuse box behind it.
When re-inserting the Glove Box this plastic guide must be clipped back to the side of the box and guided into the Glove Box Light Switch assembly above it.

Step 2. Identify the Fuse position to be used - I used Fuse slot 48 which is a switched live but has no designation in the User manual.
Step 3. Crouching in the drivers foot well feed the Mouse through then gap shown until it comes out in the passenger foot well
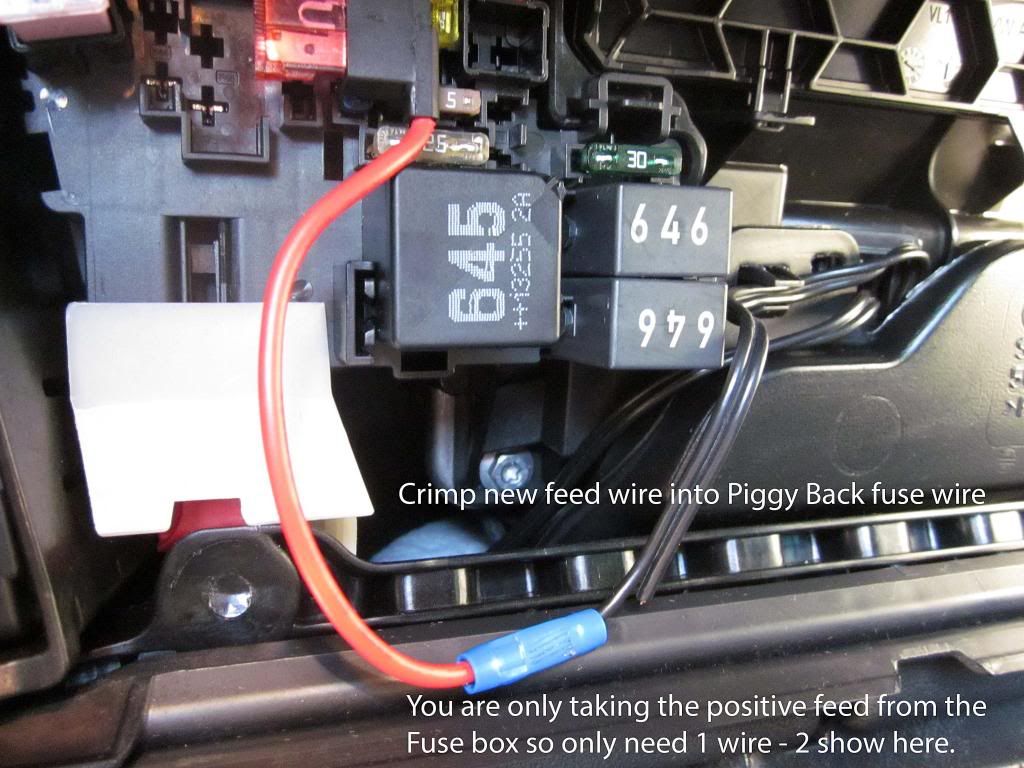
Step 4. Tape the end of the cable you are using to the mouse - you only need a single wire as you are only taking the live feed from the fuse box. I used a twin wire before I realised that the negative, earth, would be connected behind the drives cubby hole/drawer.
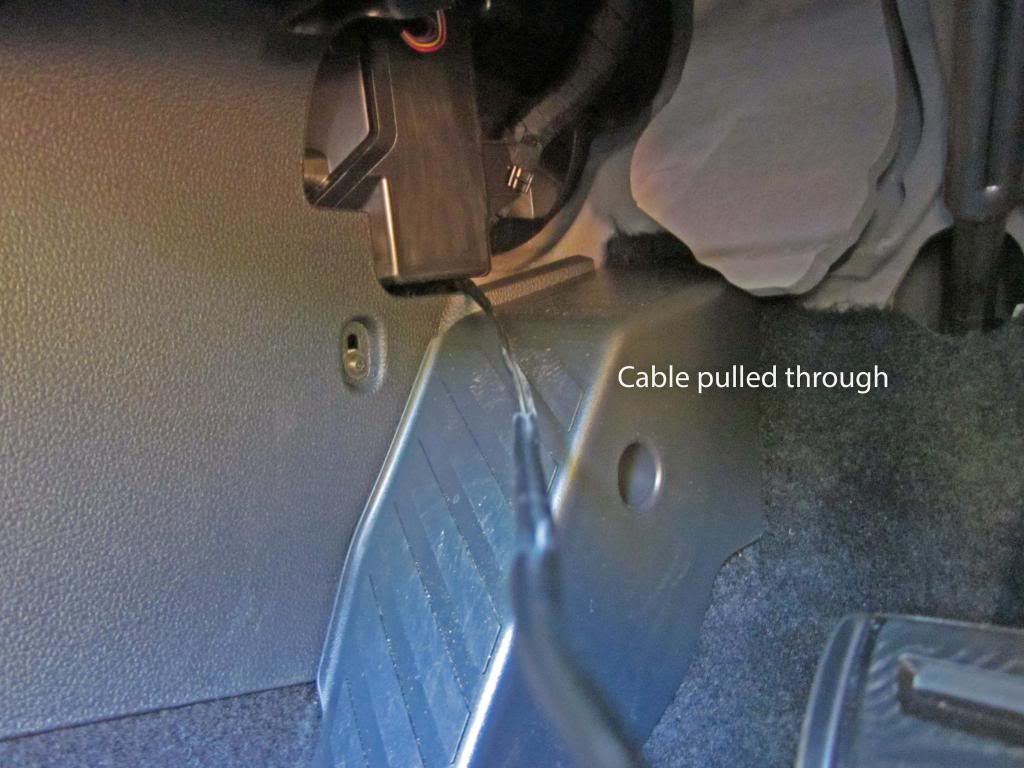
Step 5. Reuse the Mouse to pull the cable up from the foot well to the back of the Cubby Hole. Insert the mouse through the Dash end plate behind the bunch of wires as pictured and behind the steering column - to ensure the cable will not snag or wear on anything.
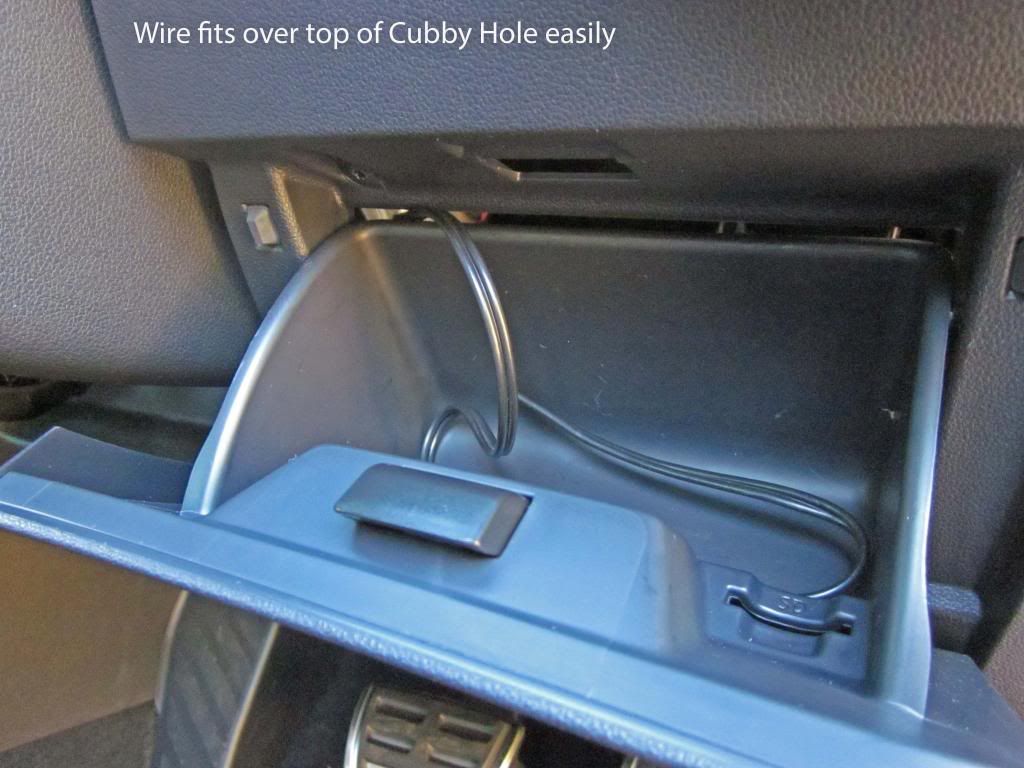
Step 6. Pull wire though and lead over the back of the drawer ready to connect to the centre connection of the 3 way adapter
Step 7. On the passenger side feed the wire under the flexible foam 'under dash' liner and up into the bottom of the fuse box.
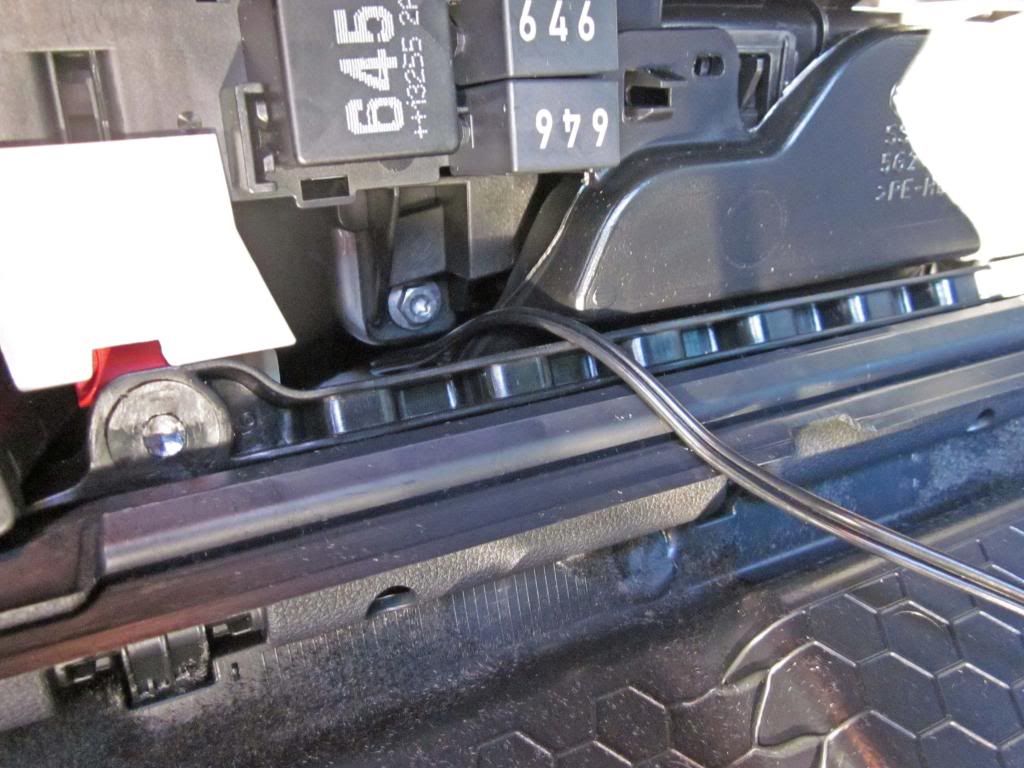
Step 8. Insert the required fuse into the top position of the PiggyBack fuse holder - I used a 10amp fuse - and the insert the fuse holder into the Fuse 48 position. Crimp the supply wire into the PiggyBack crimp connector.
Step 9. Route the cables to and from the 3 way adapter into the space behind the cubby hole drawer and ensure they are not going to catch or drag on anything.
Solder the live feed wire to the centre connector of the adapter - insulate the connection well.
Route the earth/negative cable from the adapter to one of the holes in the metal chassis member behind the cubby hole and use a suitable nut, bolt and washers to bolt the wire to the chassis.
IMPORTANT - using a digital multimeter check for continuity between the side connector of the adaptor and the chassis - check there is not continuity to the centre connector on the adapter. Switch on the ignition and using the meter check that the centre connector of the adapter is now live. If not check that you have inserted the piggyback fuse holder correctly, that the fuse you inserted is OK, that the crimp connection is solid and that the soldering to the adapter is OK.
Step 10. Insert a device into the adapter and check it works as normal then route the device cable along the windscreen/dash to the passenger side and run it along the side of the windscreen and down into the side of the dash over the back of the cubby hole drawer and plug it into the adapter. Repeat for all devices and ensure that any excess cable is coiled and tied into a safe place either inside or behind the cubby hole.
If using USB cables then insert a USB power supply into 1 of the Adapter sockets
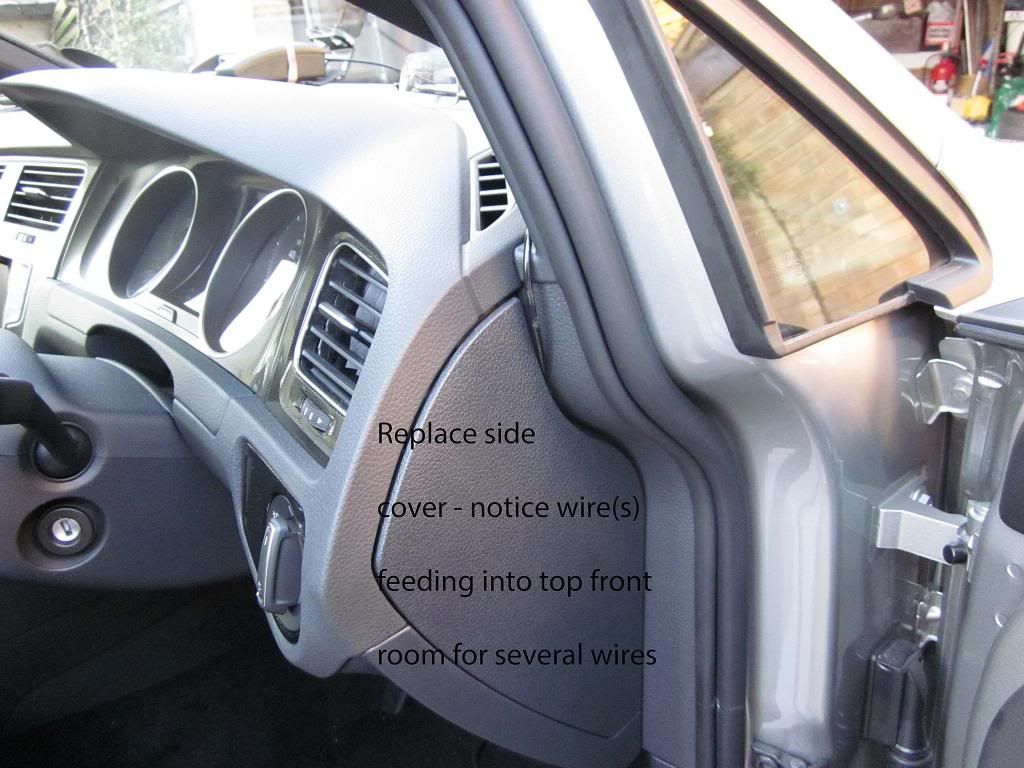
Step 11. Replace the dash side cover - just clips into place if aligned correctly
Step 12. Enjoy the lack of loose cables connected to the centre console.
