Author Topic: jeremybarker - 8v GTI restoration  (Read 12828 times)

Offline jv

  • Administrator
  • Serious forum addict
  • *****
  • Posts: 7,216
jeremybarker - 8v GTI restoration
« on: 24 August 2010, 20:50 »
:)
Buy site stuff!
GolfGTI.co.uk - merchandise

Support the forum charity!
Forum Charity

Offline jeremybarker

  • Here all the time
  • ****
  • Posts: 361
Re: jeremybarker - 8v GTI restoration
« Reply #1 on: 25 August 2010, 01:56 »
I've re-posted this from the Dub rides but thought i'd add it here as it'll be an ongoing project of fun, scuffed knuckles and generally swearing at the car as i take it all apart. I've had the car for a little over a week now so starting with some of the easy bits first.

Thought i'd post some pictures of my latest toy, always wanted a big bumper GTI but never got round to owning one. Not had a chance to clean it yet so this was how i picked it up taken at Goodwood last week. Whislt i'm still forking out the national debt in nursery fees i needed a cheap bit of fun that i can tick off my "cars to own" list, typically for us i briefly mentioned it to the wife on friday night and by saturday evening i had a 91 J plate Golf GTI sitting on the drive that we paid the tidy sum of £800 for, although it's definately a keeper and i'll restore it in it's original spec/condition. For a 20 year old car it's pretty cool, few usual bits of corrosion in the usual places but i'm looking forward to tinkering in the best way i know and love.  I'll look to keep this post as a rolling diary of the stuff done. Couldn't believe how tight it drives for not only a 20 year old car but one that's done 143k. So far i've already had the air box and afm out, spent 10 hours sanding the afm so it's now nice and shiney and ready to go back in, i've begun cleaning the left side of the engine bay and i'll repaint it as there's a little rust that needs brightening up, so far i've stripped sanded and treated the left hand side which is now ready for paint. The plastic cowlings are all out and soaking in autoglym so the plastics are coming back nicely and the washer bottle that was black with crud inside has also had a couple of hours cleaning and back like new, i'm really enjoying this little project. The long term plans will be to to source a rebuilt 8v engine with some subtle power increasesas as i don'twant to change the originality and in a couple of years i'll strip the car down and have it re-painted in Alpine white, good times ahead.

If anyone knows a MK2 guru in the Chichester area in would be great as i'm sure i'll need some advice along the way as i take it all apart.

Hope you like the pictures and i'll keep you all updated as i go along.


Making up for lost time

Offline jeremybarker

  • Here all the time
  • ****
  • Posts: 361
Re: jeremybarker - 8v GTI restoration
« Reply #2 on: 25 August 2010, 01:59 »
Chuffed with the results so far, shame you won't see most of it underneath the airbox :)

Sarted off like this,


Prepping almost done


White primer done, Just need to paint it Alpine white and i can put the restored airbox and afm back in

Making up for lost time

Offline jeremybarker

  • Here all the time
  • ****
  • Posts: 361
Re: jeremybarker - 8v GTI restoration
« Reply #3 on: 07 September 2010, 07:02 »
Well just a quick update,the airbox is all back in and now looks alot nicer with the corrosion now removed. As i don't have a garage i've been doing a few little bits to the car like cleaning all the door shuts and boot opening with a toothbrush and some white spirits.

The other bits done to date included removing the air deflector on the sunroof as it had some nasty rust,

Before


After


I also took the plastic grille off from under the bonnet as it had gone rather milky and gave it a nice clean,light sanding and a few coats of satin black.

Before


After


The washer bottle looks a whole heap better since giving it a thorough clean out with washing powder and scapring the crud off with a sponge on the end of a coat hanger.


Lastly i've decided to bite the bullet and pull the rear wheel arch trim off as i want to treat the "visible" bit of rust at the bottom of the arch, unfortunately this has pailed into insignificance as the rest of the arch is pretty bad. The arch will have to be replaced in the future along with the offside outer sill but for now i'll get off what i can, treat it with k rust, fill and paint it. I know it's only a short term fix but the plan in a couple of years once we have moved is to to a full body restoration.


Looks like this is going to  be fun !!!!

Making up for lost time

Offline jeremybarker

  • Here all the time
  • ****
  • Posts: 361
Re: jeremybarker - 8v GTI restoration
« Reply #4 on: 07 September 2010, 21:17 »
I've given the wheel arch my best shot, i'll never make a career from body repairs but it should do the job until i can do a full body resto. Due to the corrosion on the wheel arch and also the rust in the behind the filler flap the only to get rid properly will be to replace the whole rear quarter along with an outer sill. The result can only be better than what was there before and hopefully it'll hold off the tin worm for a little while.

Plenty of rust treatment painted on, bit like shuting the door after the horse has bolted but hey ho :)


First skim of filler on and i dont think it'll be the only one


Primer now on and another quick skim of filler to finish off the low spots


Top coat now on though i havn't paid too much attention the the under edge as it's too far gone (hidden by the arch cover though :) ) Just needs to be wet sanded back and the blended with the rest of the arch though with most of it hidden i can practise my lack of skill.


It's a bit frustraing that i have to get these sort of jobs done too quickly due to the "no garage". I had to resort to umbrellas to keep the rain off thanks to the unpredictable British weather  :)
« Last Edit: 07 September 2010, 21:21 by jeremybarker »

Making up for lost time

Offline jeremybarker

  • Here all the time
  • ****
  • Posts: 361
Re: jeremybarker - 8v GTI restoration
« Reply #5 on: 02 October 2010, 23:07 »
Thought i'd post some pics of the start of my wheel refurbing. I bought 4 BBS RA's to replace the "Vauxhall misfits" currently on the MK2. Rather annoyingly i missed the bent lips on two of the riims and after being quoted £75 to straigthen each one (if it could be done) i decided i had nothing to lose and rather than being anoyed with myself i gave it a go and set to the rim with a careful selections of hammers and applied some brute force.

The rim was a little worse than the picture below when i started but i couldn't put it on as it was so anthing i could do with it would be better. It was a little like seeing what happened as i went along but after initially knocking seven bells with the hammer to get the lip back into shape i could begin to re-shape the metal on the face and edges and eventually got it to being somewhere half decent. I'll try and find another rim at some point but the inside of the wheel and lip was straight and it had recently been fited with a new tyre so it must have balanced up.

Let me know what you think and if you can spot where the damage was (or still is :) )

Kinda looked a bit worse than this before


Lip repaired as best i can and the face has been cleaned and sanded back


Started like this


Now looks like this


Noow the rim is kind of done i'll get the tre removed and take off the external weights finish prepping it and decide how to paint it.

Was thinking of a silver lip and dark anthracite centres.  Then i just need to do the other three :)

Making up for lost time

Offline jeremybarker

  • Here all the time
  • ****
  • Posts: 361
Re: jeremybarker - 8v GTI restoration
« Reply #6 on: 12 October 2010, 02:43 »
Another update on the RA's, the wheels have been acid etch primed,primed again and then wet sanded with 800 followed by 1200 and are now ready for the silver to go on. Decided to stick to silver all over as it's OEM plus i didn't want to wreck the hours of prep by making a hash of masking two colours. Each wheel has had about 15 hours of prep to get them to the paint stage. I had a real job knocking the bent rims back into shape plus i also had to resurface by hand the lips that had seen more than a few kurbs in their time whilst also removing some nicks on the surface of the wheels.

The etch primer went on so well and it does prove that it's 90% prep and 10% finish.

It's been a long time getting to this stage


Still had to go back and re filler,sand and prime to get the last of the imperfections out


Primed and ready for the wet and dry


Sanding done on all four wheels done now and ready for the final finish


All in all i knew i wouldn't get a perfect finish as the edges would really have been better being re-surfaced on a lathe but with the cost of £75 per wheel to refurb plus another £150 to remove and repair the bent rims i'm pretty chuffed that it's just the price of the paint (£65 all in).
« Last Edit: 12 October 2010, 02:46 by jeremybarker »

Making up for lost time

Offline jeremybarker

  • Here all the time
  • ****
  • Posts: 361
Re: jeremybarker - 8v GTI restoration
« Reply #7 on: 13 October 2010, 16:52 »
Well here's the wheels after 2 coats of silver, thought the second coat may have lightened the colour a smidge but it's stayed the same, not sure whether they're too dark or not?

Any comments greatly appreciated before i put the clear coat on.

How much lighter will they go with the lacquer, still in two minds about finding a lighter silver.


They're not perfect but i'm still pleased with the results and they'll look alot better than the old rims.

Wheels have been given three coats of clear now, beeing a noob at this i didn't realise clear is alot thinner than paint so i might have to rub down a couple of bits and re-do them.

I stood the rim on a box to see what it'll look like against the car, let me know what you think, too dark or fine as they are?


Making up for lost time

Offline jeremybarker

  • Here all the time
  • ****
  • Posts: 361
Re: jeremybarker - 8v GTI restoration
« Reply #8 on: 20 October 2010, 11:19 »
Just a quick update, the wheels are now all finished and are booked in to have the tyres put on Friday, rather than put the old BBS centre caps back on i've treated the wheels to a nice new shiney set which turned up yesterday.

In the end i wasn't happy with the colour so all the wheels were flatted back again and repainted in Mercedes brilliant silver which has come out much better, bit of a pain having to re-lacquer them but at it would have bugged me leaving them too dark. My 2 year old decided to bang a plastic key on one of them and damaged the lacquer in three places so this one needed the rim flatting, repainting and re-lacquering and now it's back as it was. All in all i'm glad i did the refurb myself, saved myself over £300 by doing the job DIY and the finish has come out pretty damn good, with a bit more polishing they'll only get shinier too.


I've also managed to do a diy fix on the grill, one of the spot lights had broken it's fixings and pushed itself in, helped by my big hands whilst cleaning it. A quick trip to the local hardware store and i managed to find a bolt that fits the whole and a rubber grommet in the plumbing section, stuck a washer and two nuts on the back and it's gone back on perfectly, it's now better than the other side all for the price of 75p.

I've also removed the VW badge as it's starting to look a bit worn so i'll flat it all back, little dab of filler to remove a couple of nicks and paint it black.
« Last Edit: 22 October 2010, 20:37 by jeremybarker »

Making up for lost time

Offline jeremybarker

  • Here all the time
  • ****
  • Posts: 361
Re: jeremybarker - 8v GTI restoration
« Reply #9 on: 22 October 2010, 19:39 »
Some photo's of the most recent stuff,

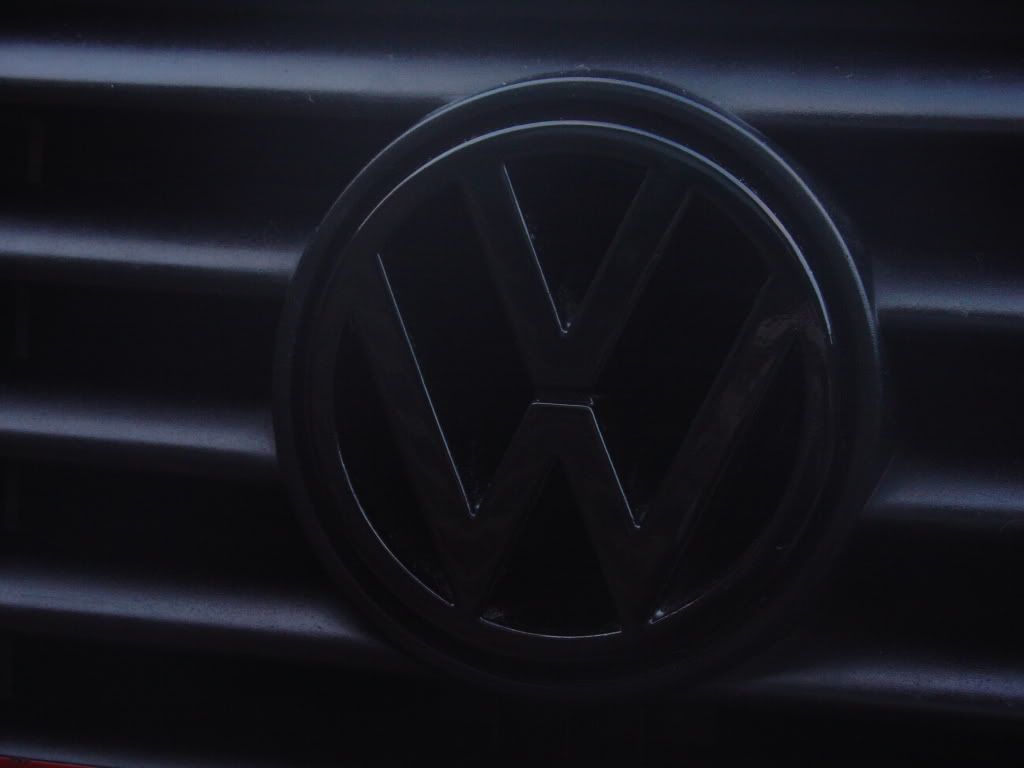
Badge was beginning to look at bit pitted and not particularly clean so thought i'd have a change of colour.


Much better, definatley looks better in black.


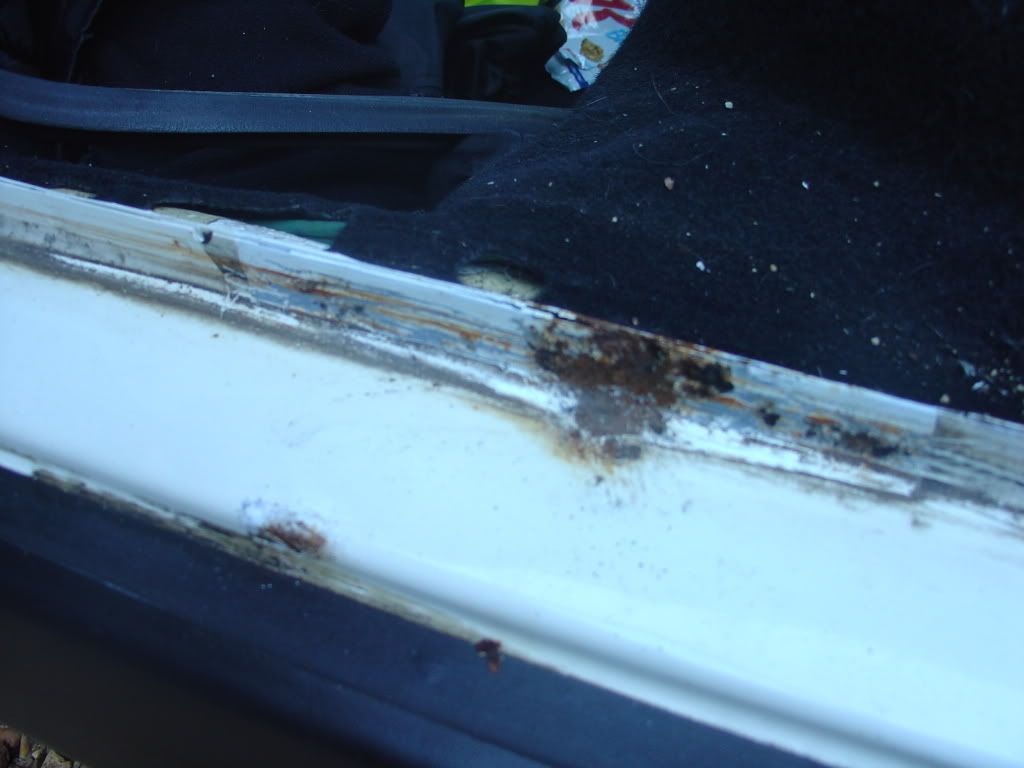
Thought i'd also have a crack at blending the paint from a rattle can as there's a few spots of rust on the car so i've started with the inner rear door shut. Again most of this is preventative, i want to get the car repainted in a couple of years so removing these little rust patches should help me out in the long run.

Here's how it started out


Sanded back a bit and K-rust applied


Used some filler to cover any differences in the paint level and then did a primer coat.


The primer was then flatted back with 800 and 1200 wet and dry (very wet) to remove some over spray and give a nice flat finish for the paint to sit on and the first of three coats of top colour went on


Three coats of lacquer


And here's the finished job, i'm really chuffed with the finish from a rattle can, the finish is so flat i barely need to cut it back at all even my masking was spot on over the black scuff panel. I'm starting to get the hang of painting from tins and am feeling brave enough a couple of the spots on the bootlid and bottom panel.

Making up for lost time