I had my car booked in at JKM on Wednesday for an S3 intercooler install. Thing is, I feel quite frustrated at not knowing anything about my GTI under the bonnet and enviously read about people doing mods or repairs to their vehicles themselves... but the only thing that stopped me before is that I'm mechanically retarded

and couldn't even find the jacking point on my Ed30 2 weeks ago :embarassed: However, I am a bit crazy so I decided after reading MatEd30's S3 install post and the APR Intercooler install guide and seeing that JoeGTI had also installed the intercooler himself, that I would have a go. Point being not to save money - as thats gone on purchasing a proper socket set from Halfrauds and a boost gauge on order from JKM

- but instead giving me the confidence to do future upgrades and changes to my vehicle without feeling intimidated. A lack of confidence and tools is the main reason why people like myself might contemplate doing something like this, but then freeze and give up at the first sign of trouble - like when I started this job and couldn't find the bottom screws holding the top part of the GTI front grill - took me 30 minutes just to find them

Anyway, MatEd30 said this install takes about 4 hours so I thought it couldn't be that bad - it took me 16 hours over 2 days


Mark from VWR was quite amused when I told him what I had done and how

I've given some details as to how to do the job below - from a complete amateur's perspective, although I haven't covered every little screw that was taken off as it would get even longer and more tedious..
Whats needed:
Torx T20, T25 and T30 heads
Hex 10mm, 16mm and 30mm sockets
No. 1 Phillips Screwdriver
Flathead Screwdriver
APR I/C Install Guide – it contained a few differences as I discovered along the way, but still an invaluable guide.
Optional (but it sure helps): Hydraulic Jack
I was very anal when it came to keeping track of screws and where they went. I put the screws associated with each step in a separate bag with a label. Still didn’t prevent having 3-4 screws left over after the job was done and I haven’t a clue where they should go
 Step 1
 - Get someone to help as this is not a one-man job if you've never done anything like this before. Plus it gives you a bit of confidence to crack on with the job. I enlisted my brother-in-law and his cousin who were bribed with tickets to Santa Pod on Sunday.
Unsuspecting Mugs - I told them it was only a 4 hour job

Step 2 - This part was very tricky as the front lower spoiler wouldn't allow the lowered Ed30 to mount the ramps. We had jack the car very high, slide the ramps underneath and then drive it the rest of the way.
Looking for the jacking point - oh sh1t, whats that cracking noise


Step 3 - Remove the negative terminal lead on the car battery

Step 4 - Remove the belly pan using a Torx T25

Step 5 - Remove the air intake. My car has an EVOMS intake so I was a bit confused at first as this did not need removal – although the cone heatshield was removed for access.
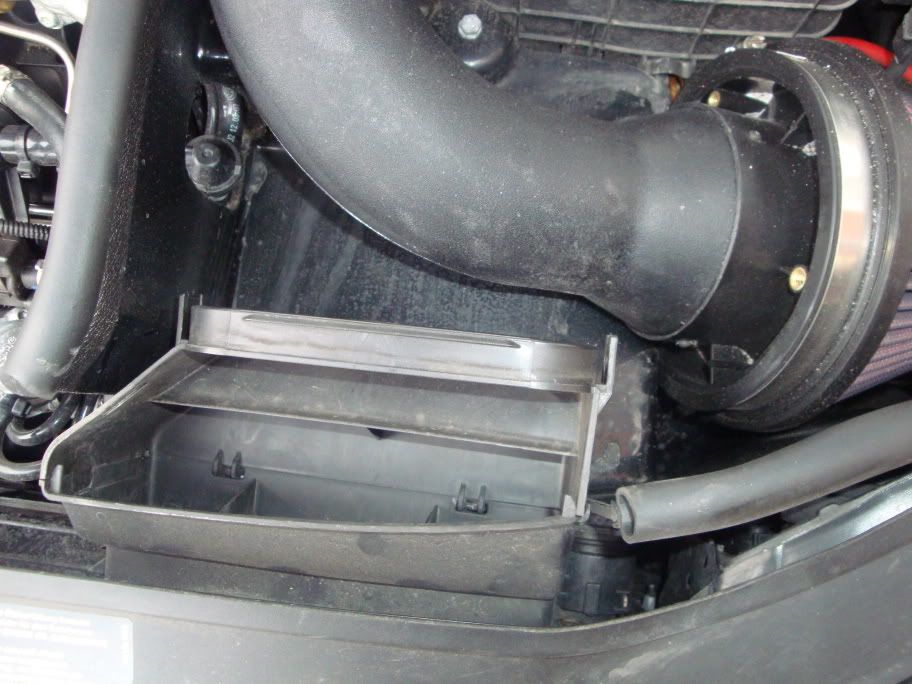
The oem intake removed

EVOMS Heatshield

Step 6 – Remove the front grill. There are 4 T25 screws at the top and 2 screws at the bottom. My bottom screws took a while for me to locate and then it took me a while to find the right screw to undo them as the APR guide is a bit off here – they were just below the plate holder.

Step 7 – Remove the T25 screws connecting the front wheel arch to the bumper – 3 on each side.
Access is awkward if you can be arsed to take the wheels off.

Step 8 – Remove the front bumper by:
1. Removing the 6 T25 screws under the front spoiler.
2. Removing assorted T25 and T30 screws holding the lower grill.
3. Disconnecting the washer pipes to the washer jets.
4. Disconnecting the foglight connections.
One front bumper removed…


Step 9 – Unclip the bonnet-release coupling as described in the APR guide.
Step 10 – Support the radiator assembly with a jack or bricks and remove the 8 16mm hex bolts as described in step 15 of the APR guide.
