Author Topic: JonL's 8v budget track toy - now going to be a race car! ;-)  (Read 54944 times)

Offline JonLeeper

  • GTI forum regular
  • ***
  • Posts: 232
Re: JonL's 8v budget track toy - now going to be a race car! ;-)
« Reply #200 on: 14 November 2011, 10:24 »
For heavens sake, just go to the MSA Blue Book and check through the specs on cages.  If you're using CDS whatever's being built really *should* be compliant.

DH did you have a look at the link?  The cage I'll be using as a template IS fully compliant and given that he builds it step by step with photographs it shoudl allow my German to follow and copy.  I will also have a good guide to follow for me, to make any amendments or additions.  It's my head that will be bouncing along close to the bars so i want to know I've got the best protection going.  :cool:


Offline JonLeeper

  • GTI forum regular
  • ***
  • Posts: 232
Re: JonL's 8v budget track toy - now going to be a race car! ;-)
« Reply #201 on: 14 November 2011, 10:52 »
So I've started to make a mental list of jobs that need doing and so thought I'd put them on here so i don't forget!  list of things to buy in red!  :undecided:
  • 1.  Move expansion tank, (it currently fouls the front strut brace) and washer bottle (to large and heavy).
  • 2.  Move Battery to boot and run new cable to wing mounted cut-out switch and dash mounted cut-out switch.  2 x cut-off switch
  • 3.  Strip out dash to allow roll cage fitting.
  • 4.  Fix plexiglass windows and rear screen. (finding the parts in the garage after the movers have finished and I was away will be interesting!)
  • 5.  Fix bonnet pins to front of bonnet.  I was thinking of stripping the bonnet down of all the clutter and fixing a couple of thin ali right angle strengtheners and then using 4 x bonnet pins to attach it.  This would save some weight and make access a little easier and i have seen it done before.  Any thought on the potential advantages / disadvantages here? 2 (or 4) x bonnet pins
  • 6.  Actually finish prepping the wide-track conversion I stripped off a Passat over a year ago and fit.

It's not as long as I thought, there are lots more that I want to do but I am trying to prioritize the ones that must be done!

Offline Diamond Hell

  • Serious forum addict
  • *
  • Posts: 7,997
  • Opinions я Us
Re: JonL's 8v budget track toy - now going to be a race car! ;-)
« Reply #202 on: 14 November 2011, 16:50 »
Are you using aero-catches rather than pin with a clip jobbies?  If you *do* go to the Eifel you may get turned away with the pin-and-clip type ones.

Washer bottle to boot as well as the battery?
Just because you're offended doesn't make you right.

Holiday cottages on the Isle of Wight for 2-10 people? PM me.

Offline stow1985

  • I live here
  • *****
  • Posts: 1,122
  • 'when im cleaning winders'
Re: JonL's 8v budget track toy - now going to be a race car! ;-)
« Reply #203 on: 14 November 2011, 23:38 »
Interesting Read...
GOLF GTI MK3 2LTR 8V-MATT BLACK-WORKHORSE

Window cleaning: www.marcstow.vpweb.co.uk

Offline JonLeeper

  • GTI forum regular
  • ***
  • Posts: 232
Re: JonL's 8v budget track toy - now going to be a race car! ;-)
« Reply #204 on: 26 January 2012, 09:02 »
So thread resurrection, once again!   :laugh:

A quick update:

The car is in Surrey, I am in Germany and the family is in Kent!  I have access to a full garage with a two pillar lift and compressor and have brought most of my tools and some of my spare parts over to enable me to fill my evenings and weekends with car fun rather than sitting alone in a room in the Mess.  So I splashed out on a spare PB head and a few other bits and pieces over Xmas and am planning to build a strong PB engine to fit to the car, when it joins me over here, hopefully in late Feb.  I also brought over the wide-track parts and will be cleaning these up and fitting the polybushes I have so that they can also be fitted once I am reunited with the car.

I started looking at the head and decided that I should have a little look at the casting and see if it needed any cleaning up before reassembly.  I have taken some pictures and will post the results as soon as i can fire up my laptop and get them uploaded.  I am also planning on acquiring a spare bottom end and will be, hopefully, getting all of the rotating parts lightened and balanced before re-building the engine.  The aim is a good strong PB kicking out a reliable 117-120 bhp that will survive my ham-fisted attempts to get it round a track as quickly as possible!

Still at least I am doing something positive and have actually achieved some work on the car, even if I am a few hundred miles away from it!

Offline Horney

  • 10k hero
  • *
  • Posts: 10,782
  • Racing, Trackdays, Starwars.
Re: JonL's 8v budget track toy - now going to be a race car! ;-)
« Reply #205 on: 26 January 2012, 09:09 »
Good stuff Jon!

Offline JonLeeper

  • GTI forum regular
  • ***
  • Posts: 232
Re: JonL's 8v budget track toy - now going to be a race car! ;-)
« Reply #206 on: 26 January 2012, 10:31 »
So as promised I took some photos to show what I have done / am attempting to do.  All work was done with a Dremel Pro and a variety of bits I already had.

First a look at the head before work commenced:

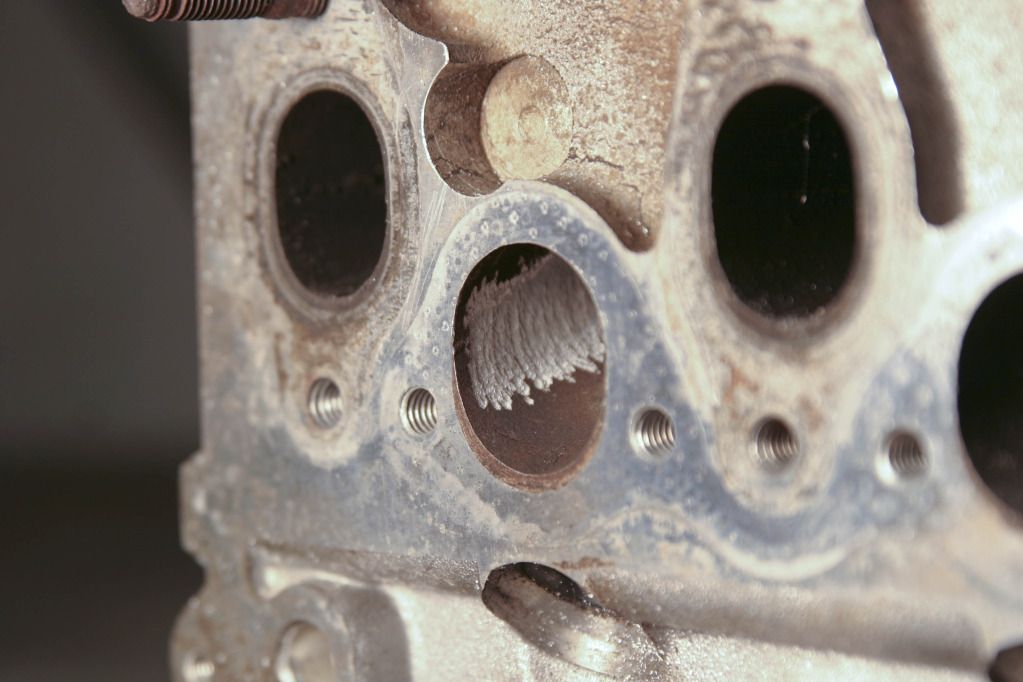
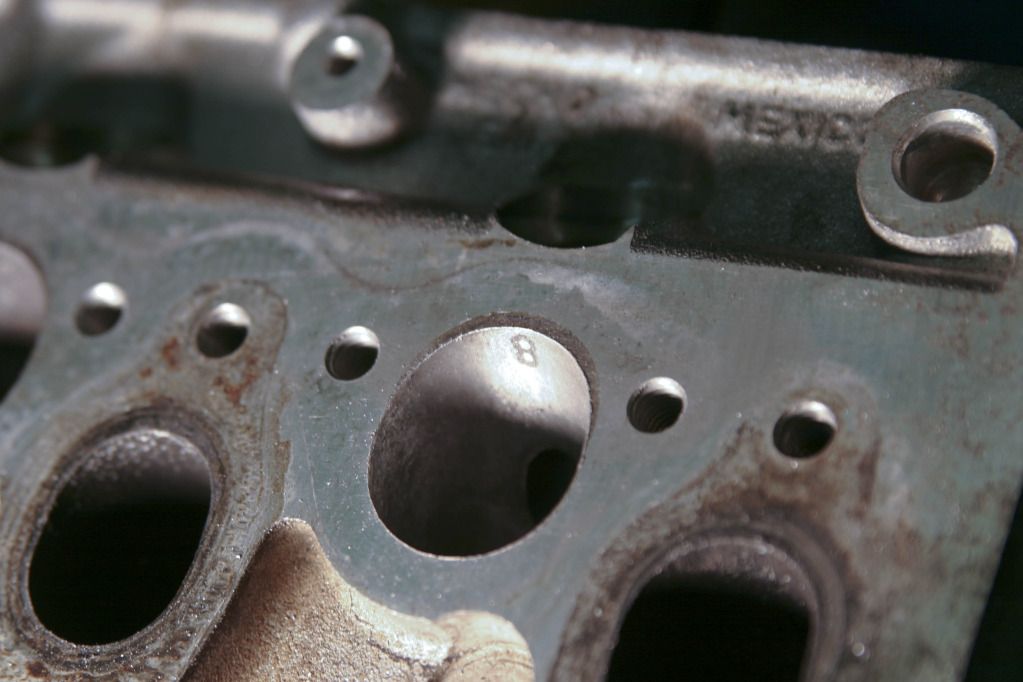
In this first shot you can see the overall condition of the head.  I have specifically checked, visually, for any cracks between the valve seats and generally for any evidence of cracking elsewhere.


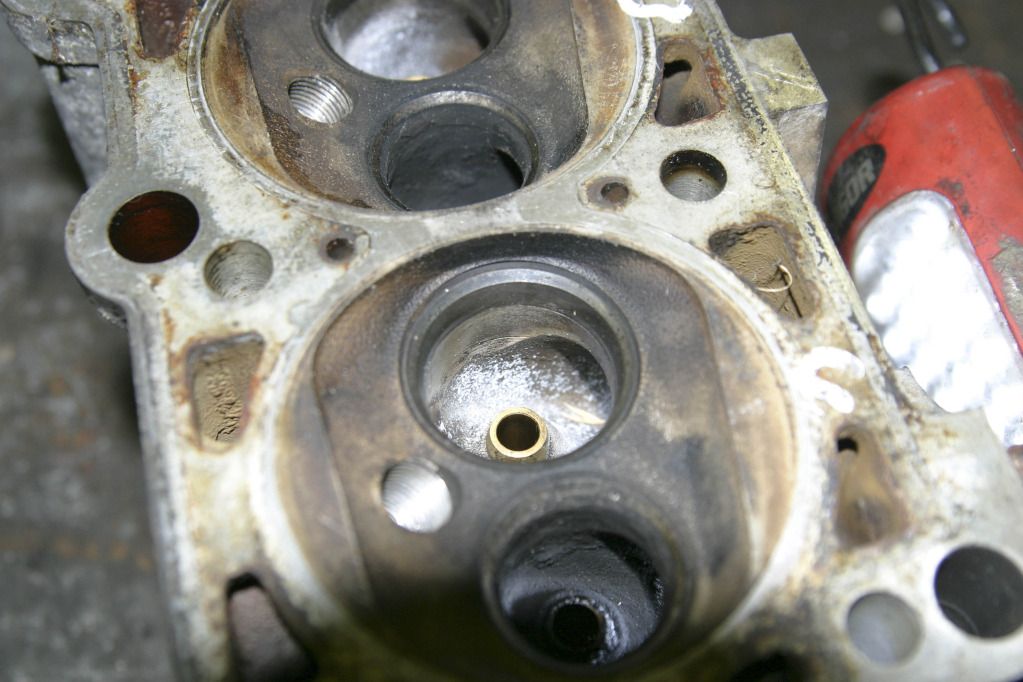
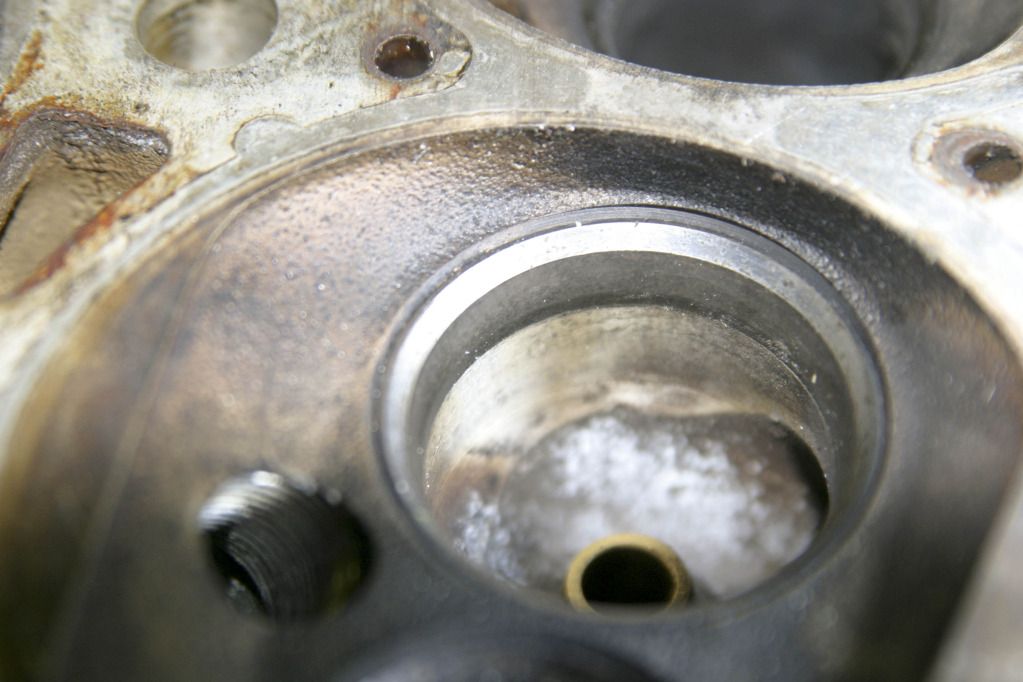
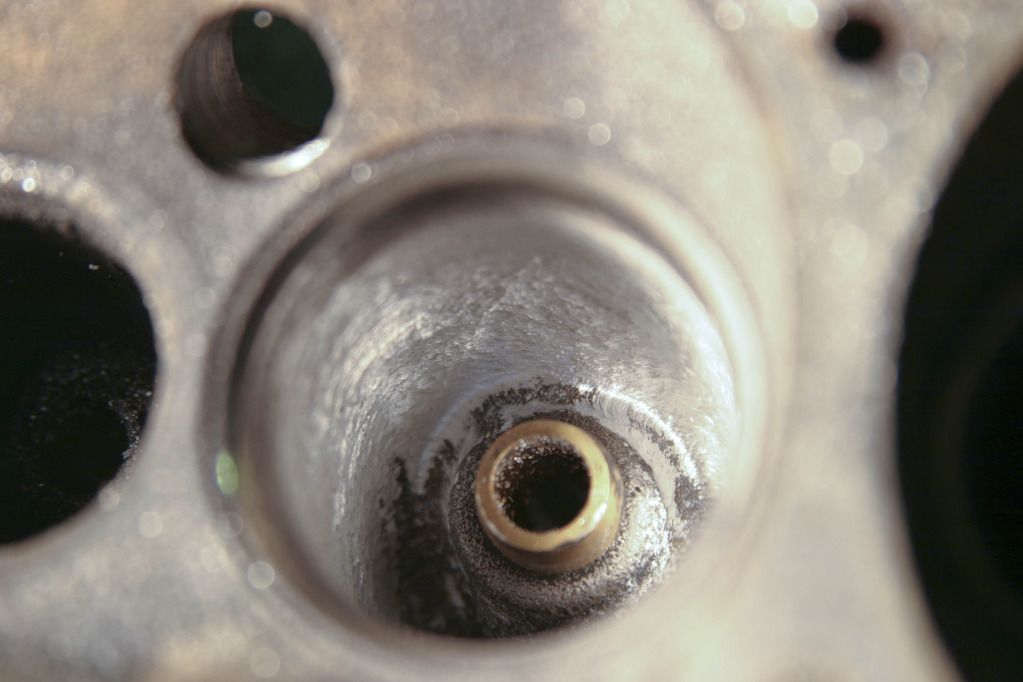
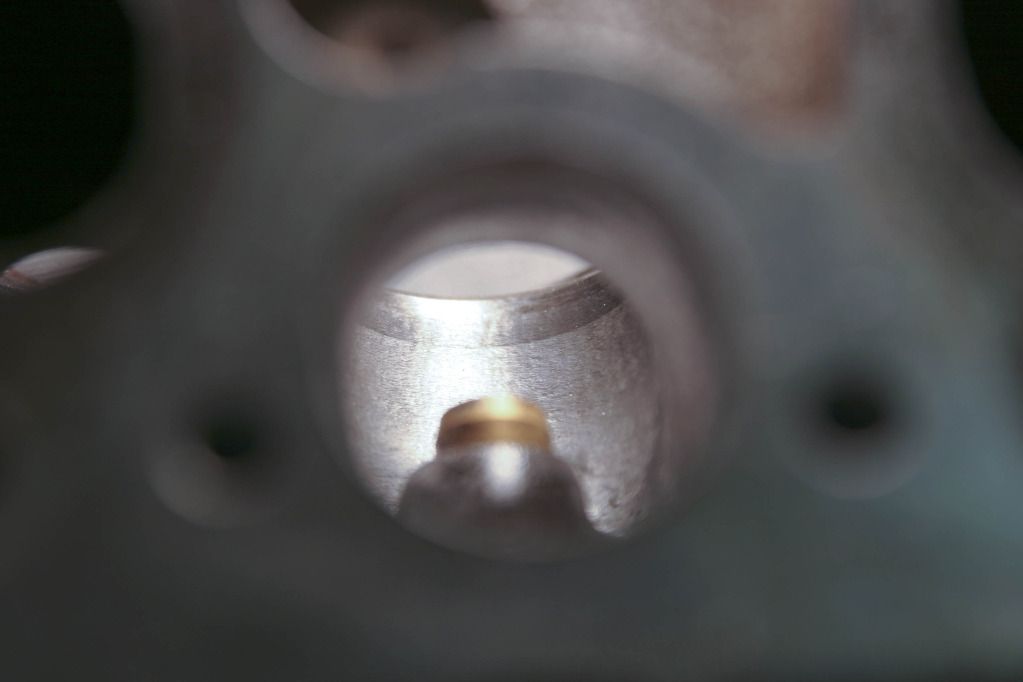
This is a closer look at the valve seat and you can see that there is a ridge between the base of the seat and the throat.


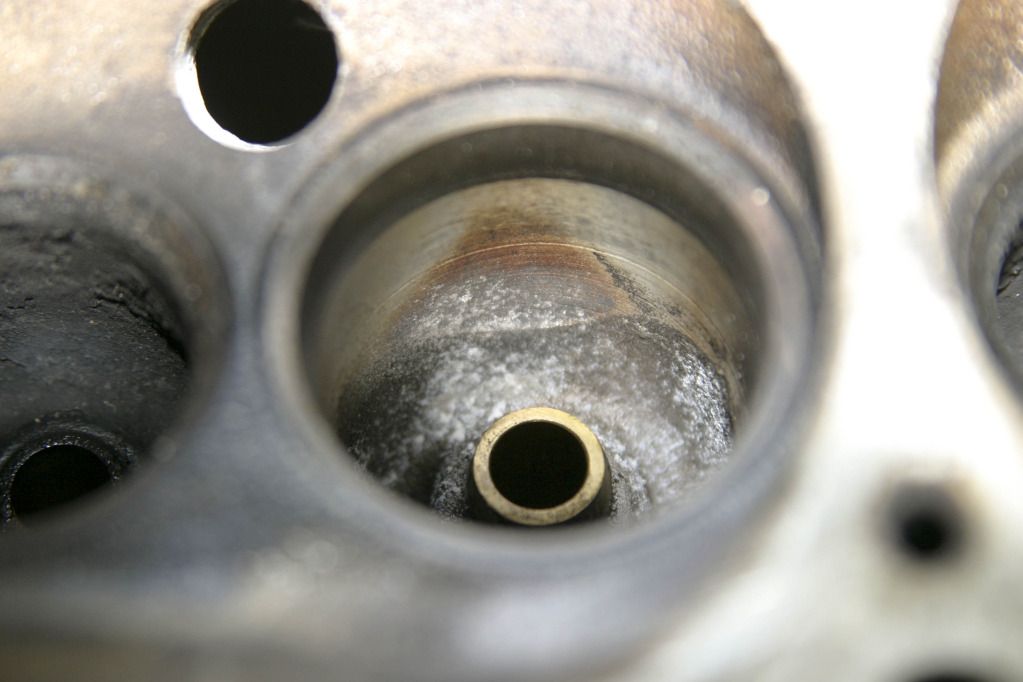
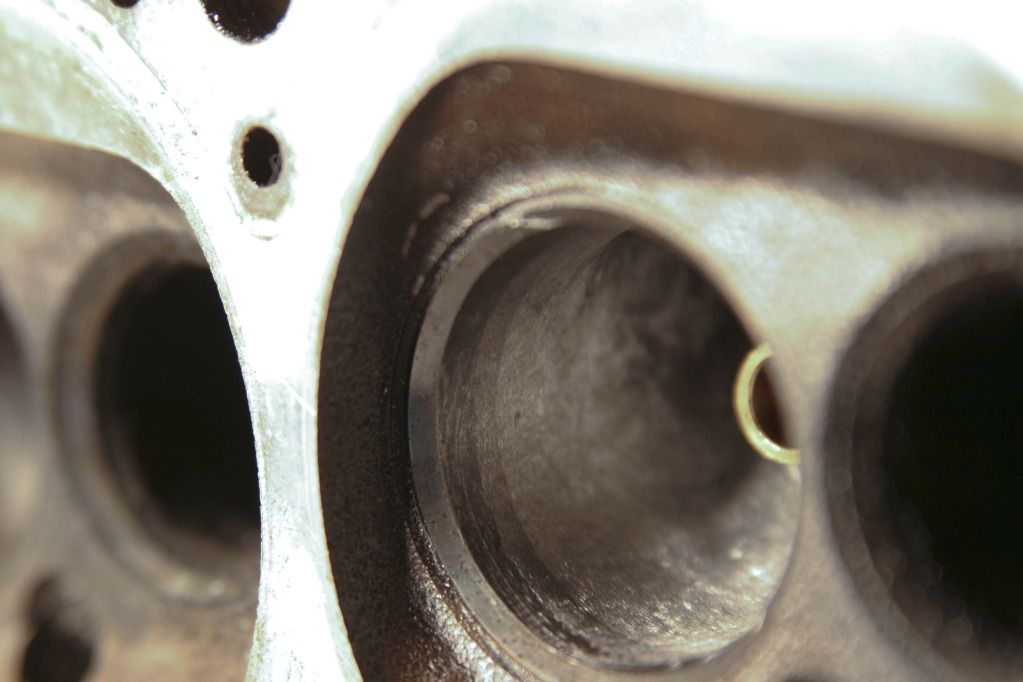
Here I have tried to show that there is a prominent ridge on the wall of the bowl behind the valve guide boss.  There are also casting marks / burrs across the port that can be felt with my finger.


For my first attempt all I have tried to do is smooth out the obvious casting marks and blend the ridge into the wall of the port.  I used some small carbide tips i had and a speed of 22000 rpm.  This seemed fine with gentle pressure and a bit of patience.

The initial results are as follows:

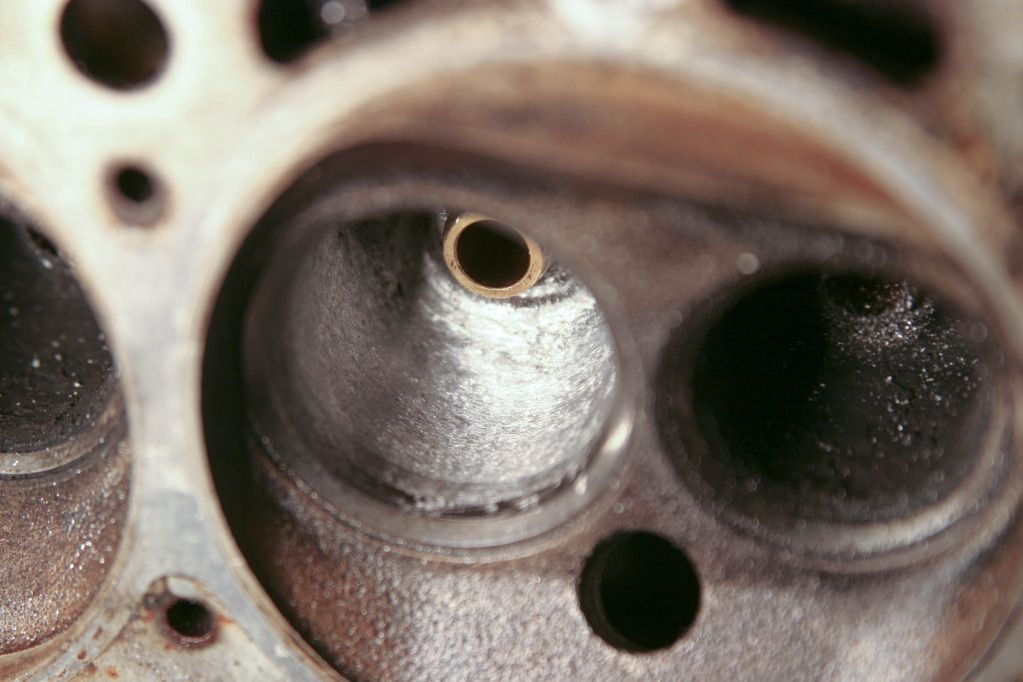
I first tried to blend the valve seat into the throat to get a continuous surface.  This was achieved by gently grinding the join until there was a continuous colour change across the whole of the area.  When I started there was an obvious line where the two surfaces did not match and I slowly worked until it felt smooth and looked continuous.


Next I delved deeper into the bowl and smoothed out the prominent ridge at the back of the valve guide boss.  This took a bit of time, cutting then feeling then cutting then feeling etc, but eventually i got a result that i am happy with.  It is not perfectly smooth and the ridge can still, just, be felt but it is much smoother than it was.


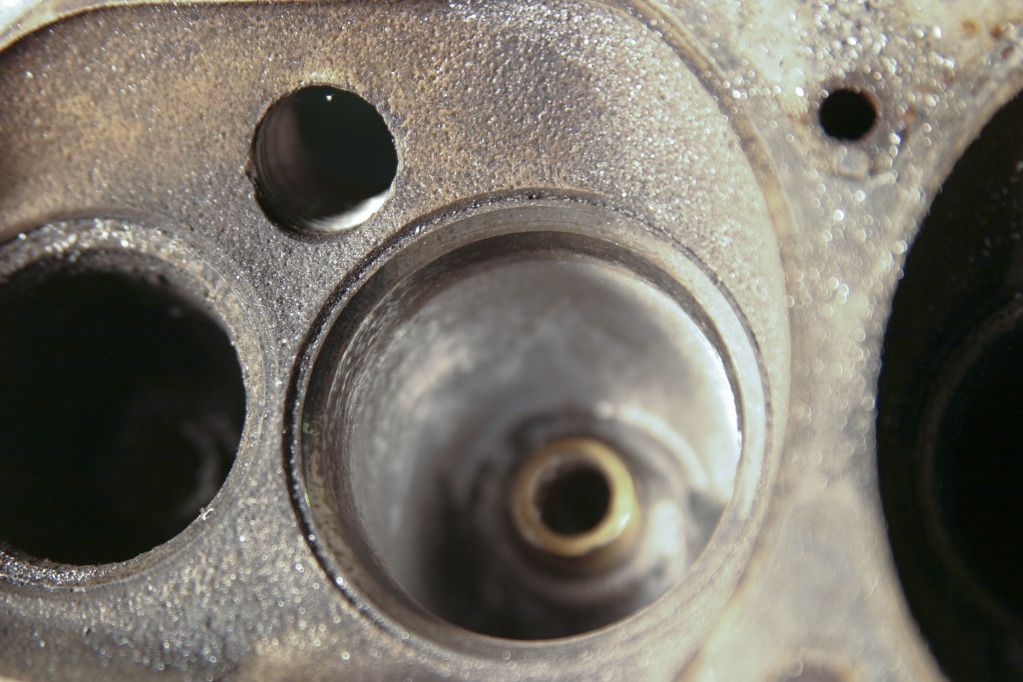
I then turned my attention to the inlet.  Here there was a very prominent casting burr running down each side into the port.  I smoothed these out on both sides.


I then slowed down the speed and fitted a stone to try and further smooth out the walls of the port.  The results are as follows:


I am sure that there is much more that could be achieved, i am just trying to go slowly and learn as I go.

Over to you all for comment / critique!

Jon

Offline JonLeeper

  • GTI forum regular
  • ***
  • Posts: 232
Well she is finally in the same location as me, not just in the same hemisphere, on the same continent, actually in the same physical location!  The battery was flat, as were the tyres, and she was covered in dirt but I could touch her.  So I've knocked off work early (about 1730 hrs!) gave her a quick wash, put the battery on charge and pushed her into the garage.

There are lots of jobs that need doing but the first one is getting the roll-cage made and fitted.  So off came the bonnet, out came the seats and everything else inside and out came the dash.  I then looked at the sunroof and roof lining and so that came out as well.  I started to grind out the sunroof case and realised that it was 2100 hrs and I needed to get something to eat and then some sleep before work today. 

still buzzing that I can actually work on her again.  The first race of the season is this weekend but I am not going to make that.  I will not bodge things just to save a little time, I want to keep her and thus I am doing it once and properly!  So tonight I am going to try to finish stripping the interior and then she will go off to get caged.

I will take a few pictures later and post.

Offline stow1985

  • I live here
  • *****
  • Posts: 1,122
  • 'when im cleaning winders'
Re: JonL's 8v budget track toy - now going to be a race car! ;-)
« Reply #208 on: 20 March 2012, 21:36 »
Glad to hear your back on it...

look forward to some updated pics  :smiley:
GOLF GTI MK3 2LTR 8V-MATT BLACK-WORKHORSE

Window cleaning: www.marcstow.vpweb.co.uk

Offline JonLeeper

  • GTI forum regular
  • ***
  • Posts: 232
Re: JonL's 8v budget track toy - now going to be a race car! ;-)
« Reply #209 on: 21 March 2012, 06:46 »
So, as promised, pics.  Not very good ones, as I only had my mobile with me and I'm not as talented as Horney!  :kiss:

I have stripped out the interior, what there was of it, and it is all now on the floor in the workshop.


I have also removed the dash and everything I could think of so that the cage can be properly fitted tight to the A-pillars.  I have kept the dash and will, probably, trim it down, to just the bits I want, and then refit around the cage.


I removed the sunroof and stripped out the headlining.  I then decided that i should do the job properly and set about chopping out the sunroof housing.  I still have to tidy up the edges and grind down a few small pieces but here is the roof now.


That just left the sunroof itself to be stripped back so I can weld it back into place and have a complete roof again.


So I will continue to tidy up the work already done then it's out with the glass windows and in with plexi ones, except the windscreen.