Author Topic: Dan_GTi8v, 20vt project  (Read 75256 times)

Offline Mr_Orange

  • I live here
  • *****
  • Posts: 2,205
  • MK4 GTi Turbo Exclusive 150 AUM
Re: Dan_GTi8v, 20vt project
« Reply #160 on: 03 October 2011, 19:41 »
Cracking read.  Keep up the good work!


Build thread clicky

Offline Dan_GTi8v

  • I live here
  • *****
  • Posts: 1,904
Re: Dan_GTi8v, 20vt project
« Reply #161 on: 08 October 2011, 14:33 »
Cracking read.  Keep up the good work!

cheers :)

Update coming today, been taking a few days to upload all the pics photobucket is taking an age to upload  :angry:
20vt conversion, sig pic coming soon!

Build thread http://www.golfgtiforum.co.uk/index.php?topic=167291.0

Offline Dan_GTi8v

  • I live here
  • *****
  • Posts: 1,904
Re: Dan_GTi8v, 20vt project
« Reply #162 on: 08 October 2011, 15:05 »
Guess I'll do the battery relocation first. I did this and the catch can at the same time over 2 or 3 days, but some of the pics are still uploading.

I didn't get a pic of all the bits and pieces I used, but basically its just 5 meters of welding cable, around 0-1 gauge (32mm squared) a positive and a negative battery clamp, a junction box, and various sized 8mm ring terminals

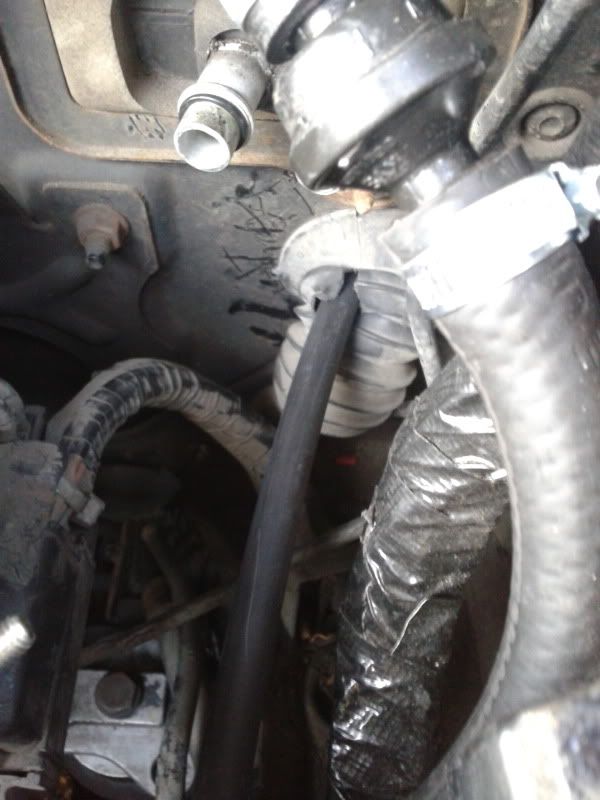
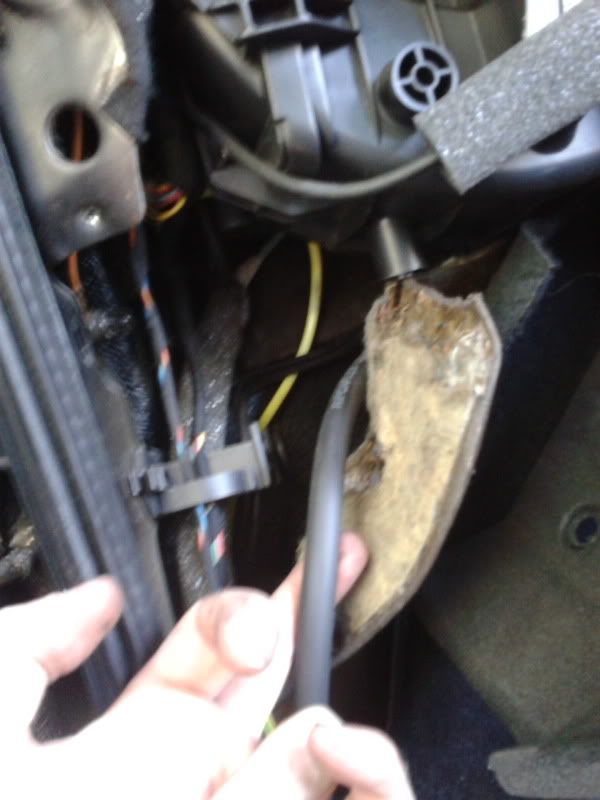
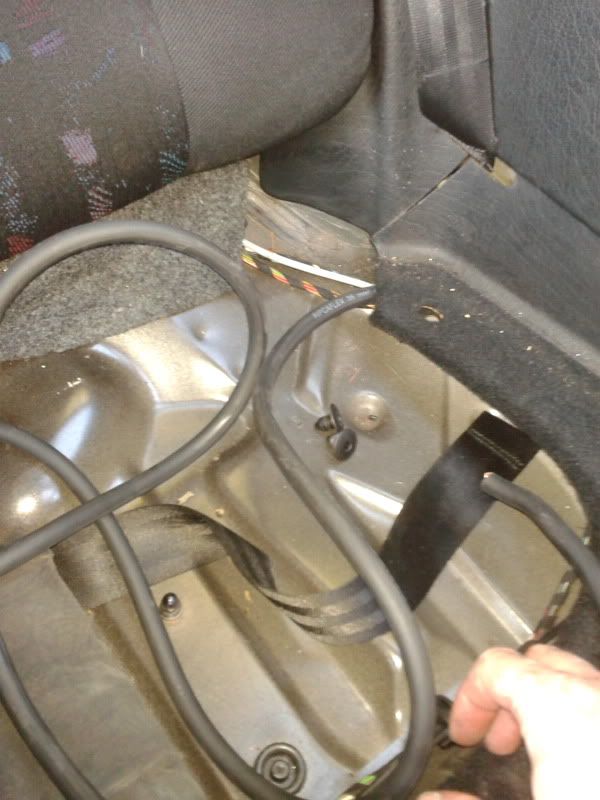
So, first off I routed the cable from the engine bay through the car and into the boot. Access to the grommet in the engine bay isn't great and I did try for a while to get it off but in the en I just cut through it and fed the wire through, needs tidying up later


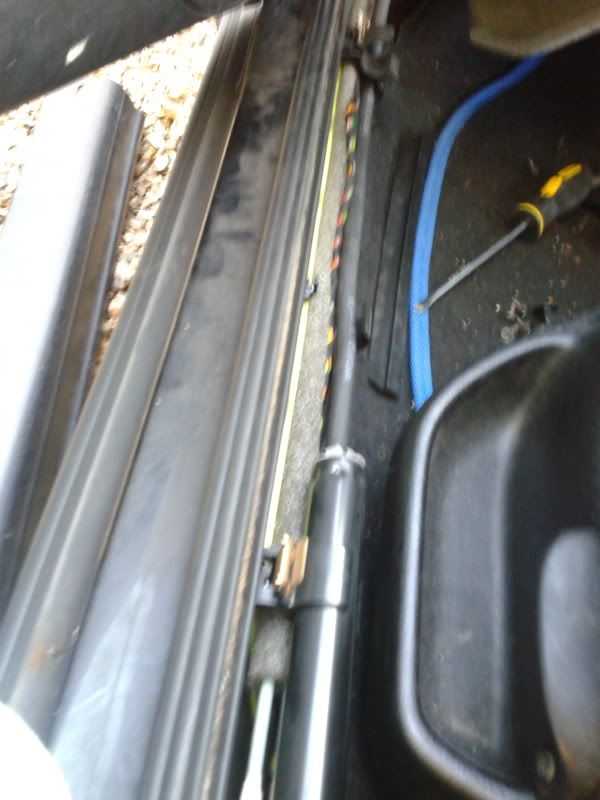
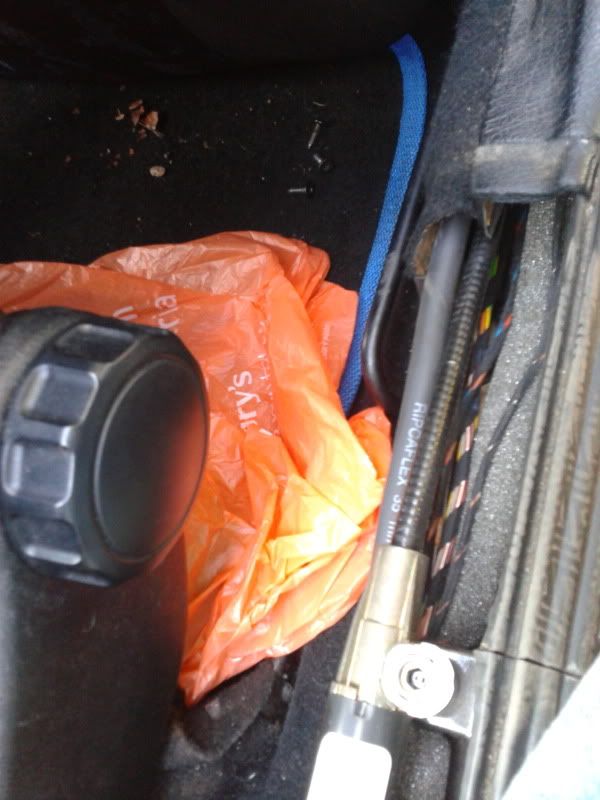
I took all the interior trim off that needed to be removed, pulled back the carpet and fed it through up to the rear seats, following the wires that were already there through a tunnel thing under the seats and into the boot, then ran it around the edge of the boot under the carpet and up to the box. I put the terminal on later but no pic of that


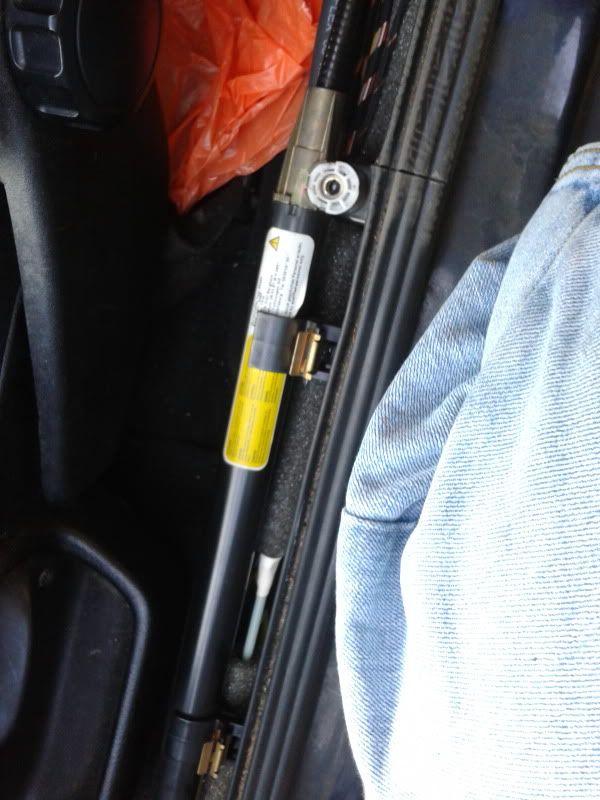
Also uncovered this thing, anyone know what is it? :P


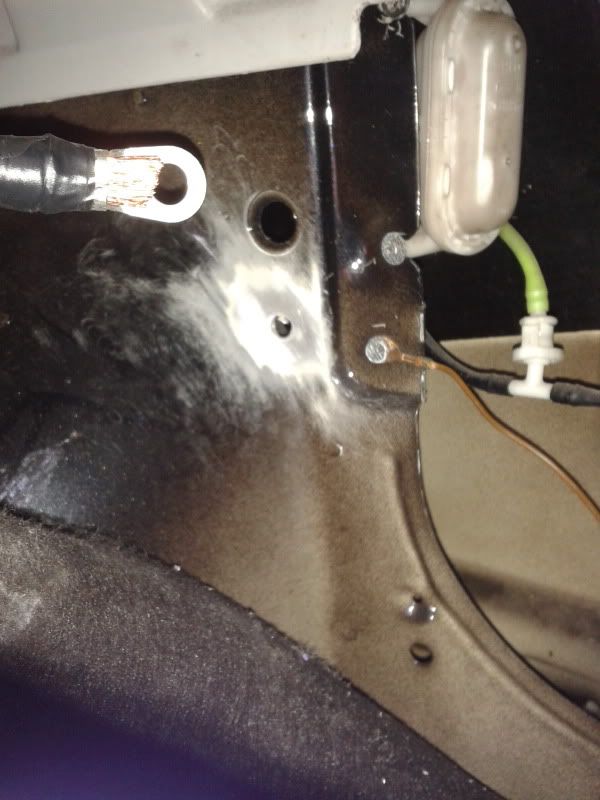
Next up was the negative wire. I pulled back the carpet around the box and wheel arch looking for a good spot. not really many options tbh, basically either through the arch which would mean having to bolt through the exterior of the arch which I didn't want to do, or just behind the arch as shown in the pic where I could get behind and so have both nut and bolt on the interior


and here it is in the box with the terminal attached


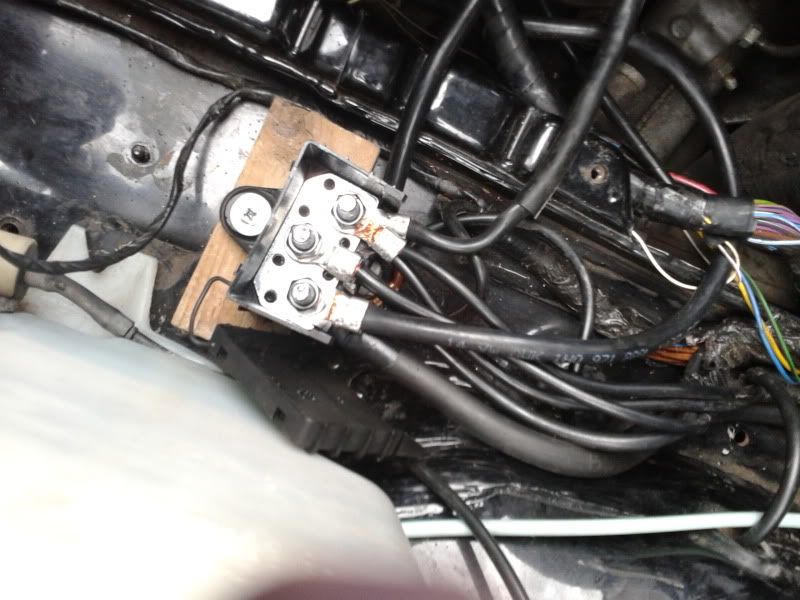
so that's all the new wiring routed and ready. Next up was fitting the junction box and fitting the new 8mm terminals onto the old wiring. original trminals are something like 6 or 7mm, just to small for the junction box which was a bit annoying  :angry: So I set to cutting the ends off and fitting the new terminals. I didnt get any pics as almost as soon as I cut the first wire it started to lightly rain and I started panicing as I now had a car that couldn't be moved  :laugh:

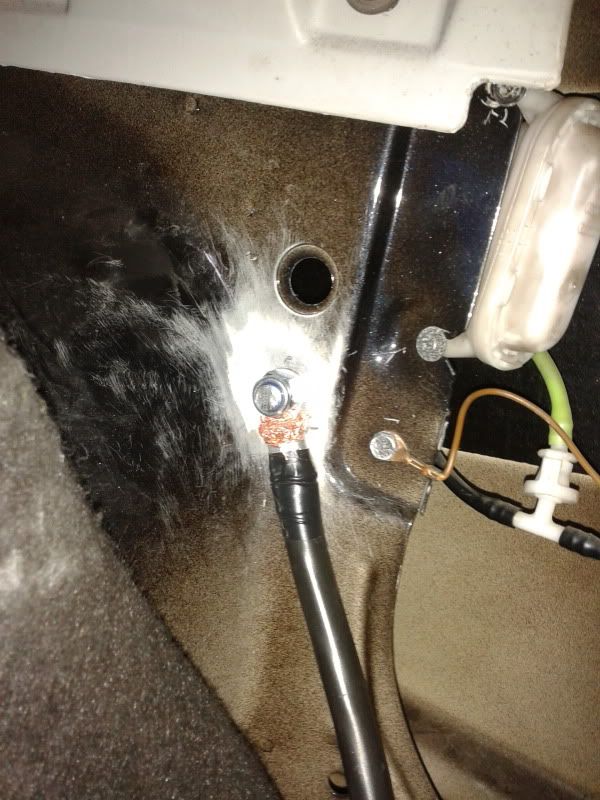
Pretty straight forward, cut the old terminals off, crimp on the new ones. Also as the old battery terminal was grounding the engine block to the bodywork, I had to cut the negative terminal off and ground the engine directly to the body. I used the original grounding points under the battery tray, there are 2 under there but I only used 1 and used to other one to bolt the junction box to. I mounted it onto a block of wood so I could angle it the right way without the other wiring getting in the way


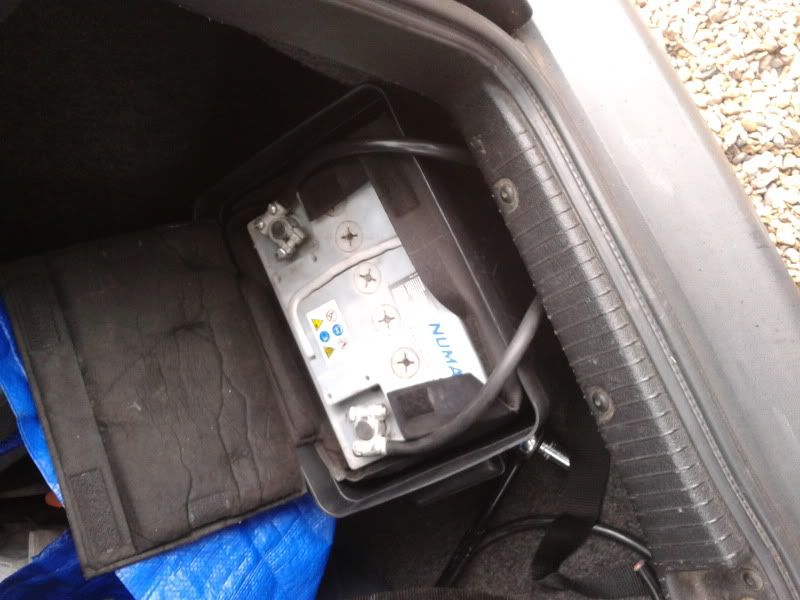
and thats pretty much it for the battery, tidied a few things up but thats all the work done. here it is sitting it ins nice new cosy home in the boot away from the cold  :grin:


next up catch can install
20vt conversion, sig pic coming soon!

Build thread http://www.golfgtiforum.co.uk/index.php?topic=167291.0

Offline Dan_GTi8v

  • I live here
  • *****
  • Posts: 1,904
Re: Dan_GTi8v, 20vt project
« Reply #163 on: 08 October 2011, 15:28 »
OK, catch can install!

in addition to the bits already posted before I purchased some 15mm id hose, a plastic 19mm T piece, and a box of jubilee clips, so I now have this lot


First job pull out the old pcv pipework.

It runs from this outlet in the oil filter housing held in with a clip that you just pull out towards you (don't lose the O ring),


up to the notorious for breaking Y pipe pictured here (mines broken as you can see)


then that leads to the 'hockey puck'


There is also a small outlet just behind and to the right of the dipstick held on with a pain in the arse one time use clip. Pull this off and cap it as its just a vacum source for the pcv system. If you have no caps just cut the hose and cable tie a bolt into the end of it.


Undo all these connections and pull it all out. you need to keep the 2  pieces in the following picture, forget the T piece and the copper pipe, that plan backfired  :grin: just keep the filter housing L shaped pipe and the hockey puck


keep these bits


Pictures for the rest of the install are not great as this is the same time like in the above post that it started to rain, so I was moving fast.
Its a pretty simple install, You want to use the the original L pipe from the filter housing and fit a length of 19mm pipe onto it, this then runs to the T piece. From here the pipe splits, one way goes to the can and the other goes to where the original Y pipe was fitted. that's one side of the can install done. the other end is even easier, just run the pipe from the can to the hockey puck, and fit the puck back into its original location

The reason for the 15mm id pipe and reducers is that my can only has 15mm inlets so I had to reduce the 19mm down to 15mm (I actually used 16mm reducers and pipe as I couldnt find 15mm, but meh it has the same affect)

Hopefully you can make sense of that from the final install pics


All I did after this when the rain stopped was push the last few pipes on properly and stick some clamps on them. I'll probably lengthen some of the pipes at a later date so they can be run under some of the other stuff and not look such a mess, but until after the mot im not gonn throw any more money at it  :grin:

cheers :)

20vt conversion, sig pic coming soon!

Build thread http://www.golfgtiforum.co.uk/index.php?topic=167291.0

Offline Seanl

  • I live here
  • *****
  • Posts: 2,561
Re: Dan_GTi8v, 20vt project
« Reply #164 on: 08 October 2011, 18:11 »
That thing you were asking about is the seat belt pre-tensioner. Its attached to the buckle and on impact, fires a clip through the hole in the buckle to stop it ripping out. Good work so far, be good to see the finished article!
Classic Green Corrado VR6 Storm | Jetex Cat back | BMC CDA | VT mounts | Bilstein B12 | 288mm front brakes | Mk4 rear brakes | Goodridge braided hoses | BBS RX228s | Shortshifter | Lupo wipers | Uprated headlight loom | All red rears | Refreshed leather | Fresh paint |

Offline Dan_GTi8v

  • I live here
  • *****
  • Posts: 1,904
Re: Dan_GTi8v, 20vt project
« Reply #165 on: 13 October 2011, 14:52 »
Passed MOT yesterday woohoo, had to buy another lambda as the wires were rubbing on the driveshaft which caused a fail on the lambda reading :( all good now though

I've decided to remove the cold side dv kit as its gains are next to nothing go gonna flog it for some cash  :grin:

Just gonna be tinkering now probably untill the new year, cant really afford to throw any more money at it for a while :(
I've been getting a pressure drop code pop up every now and then so gonna be looking for a boost leak, may take this opportunity to redo some of the pipework especially the passenger side now the battery is gone, make it more conventional routing. Also read the T bolt clamps are a bit sh!t and can cause leaks so will replace them with jubilee clips (there cheap enough  :laugh:)

Writing all this is making me wanna spend money lol so I'm gonna stop
20vt conversion, sig pic coming soon!

Build thread http://www.golfgtiforum.co.uk/index.php?topic=167291.0

Offline tech1889

  • Serious forum addict
  • *
  • Posts: 8,039
  • Mk2 GTI FTW !!
Re: Dan_GTi8v, 20vt project
« Reply #166 on: 13 October 2011, 17:12 »
Great progress now will look sweet once all tidied up  :cool:
Mk4 Golf GTI anniversary and mk6 golf tdi :)

Offline Dan_GTi8v

  • I live here
  • *****
  • Posts: 1,904
Re: Dan_GTi8v, 20vt project
« Reply #167 on: 06 November 2011, 17:22 »
Started fitting the new TIP today from creation motorsport, didnt go so well though as it gets dark so goddam early now. managed to get it on while nearly crushing my hand in the process, dunno how most mk4 people do it but I'm guessing there's a lot more space than there is in the mk3! Hoping to finish it off tomorrow along with some other bits and pieces so should be a pic update tomorrow with a relatively tidy engine bay and also how the exterior looks atm as I haven't had any outside pics for a while

also going to fit some boot struts to the bonnet and get rid of the awful rusty lifters I have fitted now, and fit some new rear bump stops. Exhaust needs looking at as well as it hangs real low and wonky at the back
« Last Edit: 06 November 2011, 17:25 by Dan_GTi8v »
20vt conversion, sig pic coming soon!

Build thread http://www.golfgtiforum.co.uk/index.php?topic=167291.0

Offline tshirt2k

  • I live here
  • *****
  • Posts: 1,323
  • Been there...Done that...
Re: Dan_GTi8v, 20vt project
« Reply #168 on: 07 November 2011, 14:54 »
You could have at least chose a better way of getting the cable from the bay to the cabin. There are better access point to choose from without cutting into the side of that bellows.  :undecided: You could also do with soldering those crimped connectors for extra strength and conductivity. :wink:
« Last Edit: 07 November 2011, 14:58 by tshirt2k »


Mk3 ABF 16VT Megasquirt V3

Tshirt knows........ How to diagnose

Offline Wayne

  • Sir Postalot
  • *
  • Posts: 32,051
Re: Dan_GTi8v, 20vt project
« Reply #169 on: 08 November 2011, 10:48 »
You might be better to get a vented battery at a later date.