Author Topic: Project colour code is COMPLETE!!  (Read 7774 times)

Offline mowlamb

  • I live here
  • *****
  • Posts: 1,532
  • MK4 GT TDI 130 - DERV POWER!!
Project colour code is COMPLETE!!
« on: 04 January 2011, 12:27 »
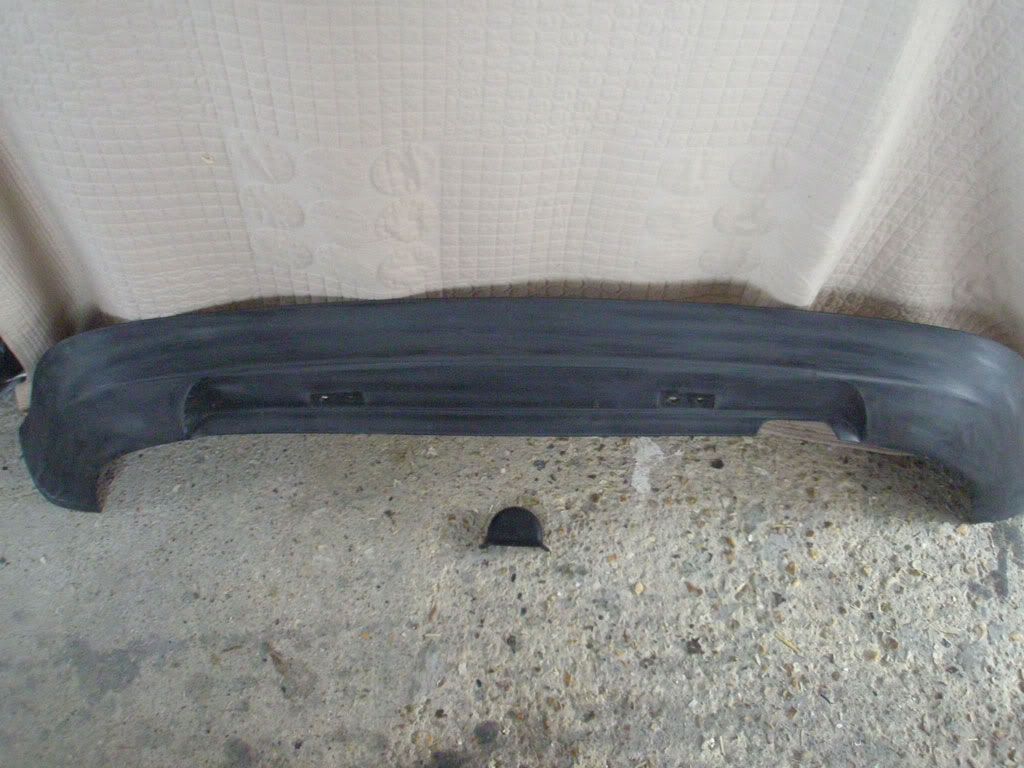
So, whilst bored last night I was looking around ukmkiv's and found a few threads on people that have colour coded their standard valances. I have a votex front valance on the way which I'm also going to spray myself but as money is tight I'm going to have a go at doing my rear valance. It's only a short term mod as once I have some money I will be getting an anni one but hopefully it will look good until I can get one.

I'm hopefully going to do a little DIY guide with pics to help others with no money but who are also fed up of the rubbish black valances.

The first stage which I started today is just sanding it down to smooth out any scuffs/scratches. As you can see in the first picture I also have the towing hook cover off. I'm going to colour code this too as it will stick out like a sore thumb once the valance is done.


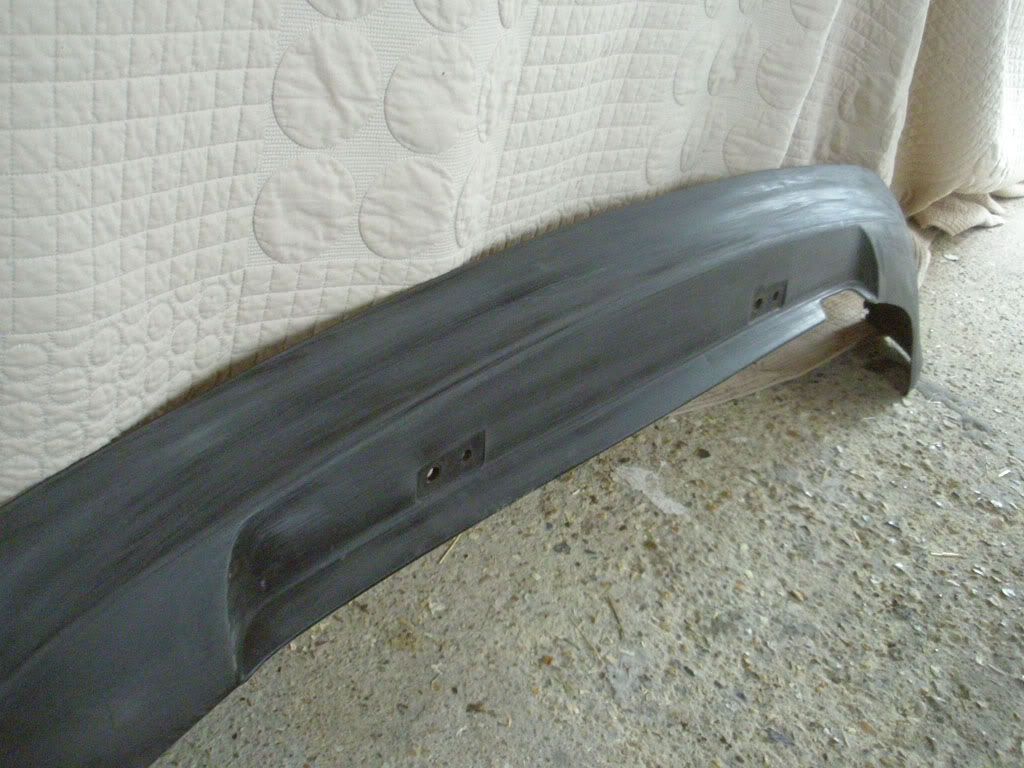
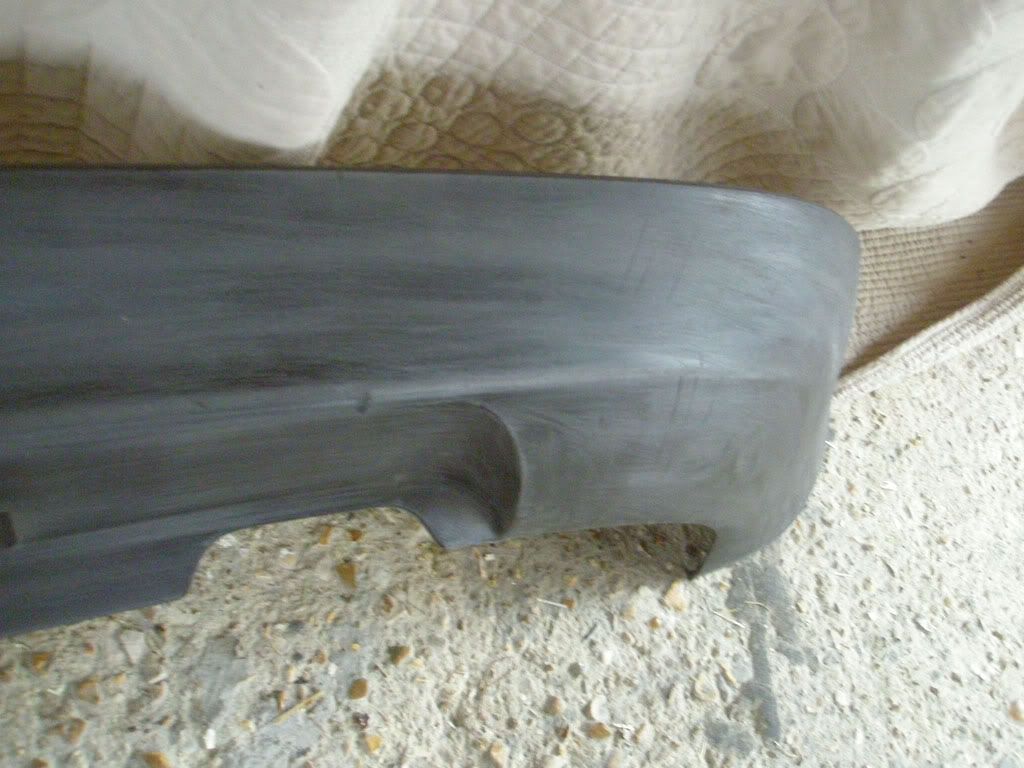
I used some 80 grade sandpaper to get the scuffs/scratches out. I'm going to get some filler primer later on today to hopefully fill any little bits that I've missed. Then I can begin smoothing it even more with 600, 800 and 1200 wet and dry.

I have also decided to colour code the chrome part of the VW sharan badge Reflex Silver. That is in primer and should be finished in a day or so.

More to come soon......
« Last Edit: 19 January 2011, 17:03 by mowlamb »

Offline mowlamb

  • I live here
  • *****
  • Posts: 1,532
  • MK4 GT TDI 130 - DERV POWER!!
Re: Project colour code has begun.....
« Reply #1 on: 04 January 2011, 15:17 »
Right after sanding the rear valance with some 80 grade sandpaper I have now sprayed it with some filler primer. As far as I'm aware this stuff fills scuffs and scratches better than normal primer. I've done three coats of filler primer and now have to wait for it to harden, so I'm going to leave it overnight, before using 600, 800 and 1200 grade wet and dry to get the smooth finish I need before primer and then paint.


Offline richw911

  • 10k hero
  • *
  • Posts: 18,673
  • The Linkmeister and an OEM Freak.
Re: Project colour code has begun.....
« Reply #2 on: 04 January 2011, 20:30 »
Good stuff  :cool: :cool:

MKIV Mod Squadâ„¢ a part of the headlight police.

Offline old_n07

  • I live here
  • *****
  • Posts: 728
Re: Project colour code has begun.....
« Reply #3 on: 04 January 2011, 20:43 »
Thats basically how I did my front valance, the only difference is I used a plastic primer before the 2K high build but I'm not sure if it is needed as the sanding should key the surface enough for the primer to adhere
Quote from: mikemk4golf
Hey you're a moderator, I want a serious answer not someone who takes the piss!

Grammar is the difference between Helping your Uncle jack off a horse and Helping your Uncle Jack off a horse.

Not so standard Gt TDi
Cluster Mods FAQ | Miles to Empty Guide

Offline Wazzzer

  • Moderator
  • 10k hero
  • *****
  • Posts: 11,175
  • Golf GTI 1.8T AGU
Re: Project colour code has begun.....
« Reply #4 on: 04 January 2011, 20:51 »
yeah I think the plastic primer just allows you to skip the keying process

good work so far mate, just don't expect all those deep scratches to go away with just the filler primer, it doesn't build up that much


1999 1.8T: R-Tech remap - 225bhp/256lb/ft : K03s : THS FMIC : THS PCR pipe : 2.5" stainless exhaust : THS FR3 Engine mounts : G60/VR6 clutch : Calibra Yellow injectors : VR6 MAF : Devils Own WMI : Forge 007p : Carbonio CAI : Leon Cupra R Brembos : FK AK Street coilovers : Votex skirts : Anniversary front : click ---> http://www.golfgtiforum.co.uk/index.php?topic=92175

Offline mowlamb

  • I live here
  • *****
  • Posts: 1,532
  • MK4 GT TDI 130 - DERV POWER!!
Re: Project colour code has begun.....
« Reply #5 on: 04 January 2011, 20:55 »
Don't worry Wazzer I wasn't expecting it to work miracles lol. Plan of attack 2moro is to sand the living daylights out of it to get it nice and smooth. Then once I return the grey primer to Halfords and get the one I actually need, grey plastic primer (I picked the wrong one up :embarassed:) I will maybe get some coats of primer on before 2moro night.

I got 600, 800 and 1200 grade paper that should be ok shouldn't it? To use the sandpaper wet do I use warm soapy water?

Offline Wazzzer

  • Moderator
  • 10k hero
  • *****
  • Posts: 11,175
  • Golf GTI 1.8T AGU
Re: Project colour code has begun.....
« Reply #6 on: 04 January 2011, 21:18 »
any water will do mate, it's just to keep the dust down as it's very fine and doesn't do you any favours when it gets airborne :undecided:


1999 1.8T: R-Tech remap - 225bhp/256lb/ft : K03s : THS FMIC : THS PCR pipe : 2.5" stainless exhaust : THS FR3 Engine mounts : G60/VR6 clutch : Calibra Yellow injectors : VR6 MAF : Devils Own WMI : Forge 007p : Carbonio CAI : Leon Cupra R Brembos : FK AK Street coilovers : Votex skirts : Anniversary front : click ---> http://www.golfgtiforum.co.uk/index.php?topic=92175

Offline mowlamb

  • I live here
  • *****
  • Posts: 1,532
  • MK4 GT TDI 130 - DERV POWER!!
Re: Project colour code has begun.....
« Reply #7 on: 04 January 2011, 21:19 »
That's ok then, will hopefully get a chance to attack it after work 2moro.

Offline tech1889

  • Serious forum addict
  • *
  • Posts: 8,045
  • Mk2 GTI FTW !!
Re: Project colour code has begun.....
« Reply #8 on: 04 January 2011, 21:44 »
looks good mate.. theres a lot of wet sanding there to get rid of them deep scratches.. outcome should look nice tho..
Mk4 Golf GTI anniversary and mk6 golf tdi :)

Offline mowlamb

  • I live here
  • *****
  • Posts: 1,532
  • MK4 GT TDI 130 - DERV POWER!!
Re: Project colour code has begun.....
« Reply #9 on: 05 January 2011, 16:03 »
Todays update.....

Well today I decided to start sanding it all again to get it much smoother. I started with some 600 grade wet and dry which seemed to be smoothing it ok. I cleaned it with a cloth and dried it and run my hands along it to see how smooth I had got it. It was ok but not smooth enough so I dug out my various sheets of sandpaper and found some 240 grade and set about the smoothing process once more.

The 240 grade seemed to be doing a much better job so I took my time and worked every inch with it. I never went all the way back to the plastic all over the valance but it now feels quite smooth. I think I might be ready for the plastic primer now. The only problem is my local halfords have run out so I will have to go to another one 2moro after work.

Here are a couple of pics of how it is:


Any comments or advice welcome  :grin: