End result:
http://www.flickr.com/photos/mark_croston/3326304695/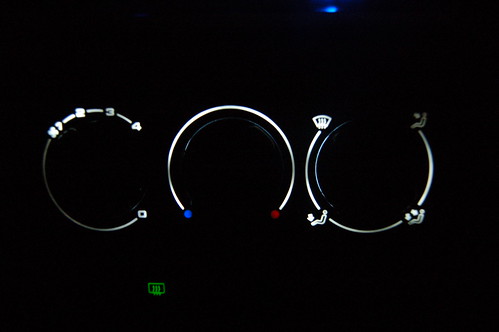
The heater controls are lit by 1 bulb, with a green filter. It illuminates the centre dial properly, and trys to do the oute controls by a horrible bit of plastic. The dials themselves are clear so will light up in any color you like. I have not yet done the dials - these use green plastic so your options are green, purplish blue with blue LEDS or extra work to put LEDS of your choice in the actual knob. The way I did it the dimmer still works.
I used 20kmcd white 5mm LEDS. I added 1K resistors to reduce the brightness (I had these from a previous project, pre-wired). Other tools: dremel, soldering iron, wire, small bit of PCB, 5mm drill, superglue, hot melt glue, white paint (with small brush). Buy your LEDS from
http://www.phenoptix.co.uk/.
First, get those controls out. Remove the ashtray and prise off the heater control panel. There are 2 screws at the bottom of the ashtray area and 4 in the heater controls. Get the ashtray / switch panel out of the way. Now the fun bit: remove the multiplug from the fan controls. Remove the plug from the illumination. The 4 control cables are clipped to the heater contols with around the force of 10 tigers. Prise the clips off one by one, taking care not to snap the plastic of the heater controls. Then remove the steel wire from the control arms - label the 2 for air direction (my temp one was blue, and therefore easy. Now you can come back inside. Didnt take any piccys here

.
You should end up with:

Take the white hood off - this has the bulb / green filter in it. Remove the clear plastic.
Basically, we are going to add a number of LEDS to light the dials directly. I added them to these locations:

Red X for LED. Green is where I dremeled a bit to allow the light to spread.
The 4 leds which line up with where the acrylic light guide used to be (around the central control) are sanded flat and glued in. The others shine directly onto the faces, so I sand them flat and add several coats of white paint (or tip ex) to the front of them. This reduces the effect of hot spots - the normal led would leave a vey bright spot on the dial. To help the light spread, I painted areas around these LEDS white.
Once you have all the LEDS in, cut a small bit of PCB (prototype with the tracks and holes) and shove it into where the bulb used to be. Solder 1 wire to each track (use a meter in the car if you need which is +ve), and modify the white shroud to fit past the LEDS if needed. You could just wite it into the car, but this stops you cutting the loom. Join up all the wiring and secure to the back of the shroud.

Test

.

In the great haynes tradition, refiting is a reversal of removal. Only much more annoying. BTW, when you have the heater contols out, you have awesome access to the back of your headunit to tidy up the wiring and stuff.
I need to do another set to iron out some kinks and get enough phots to do a decent tutorial. Expect ths post to e edited over the next couple of days - a few diagrams would not go amiss.
