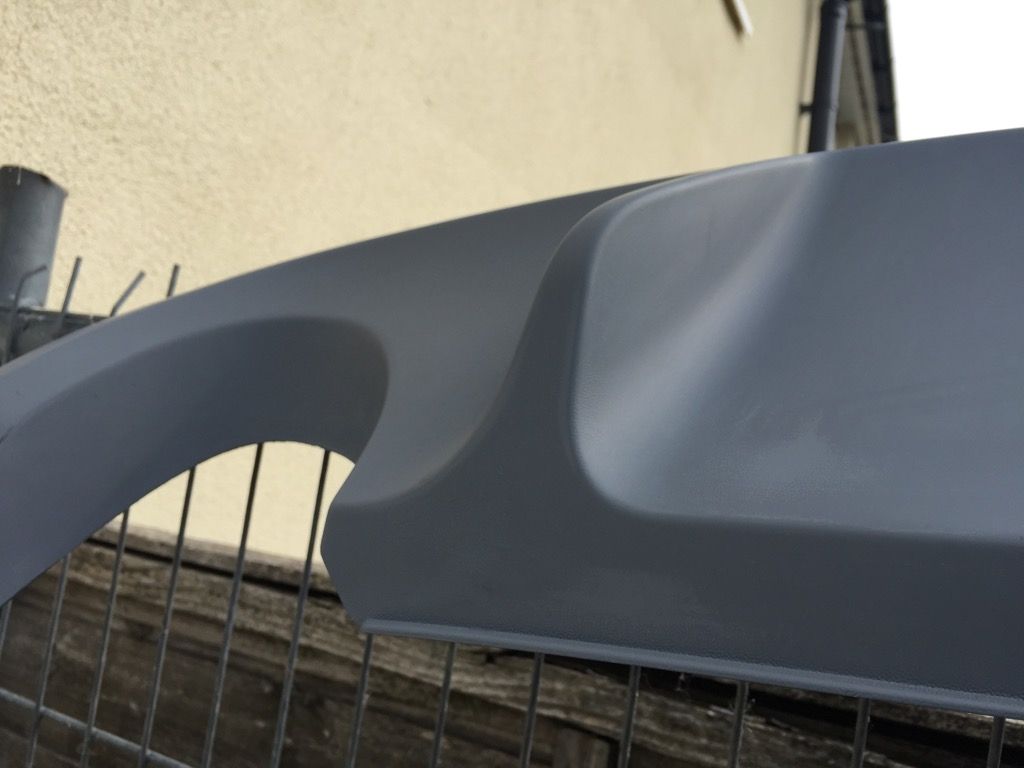
Golf Mk6 GTI - How to paint rear diffuser / valance and how to remove the rear diffuser / valance / spoiler / bumper
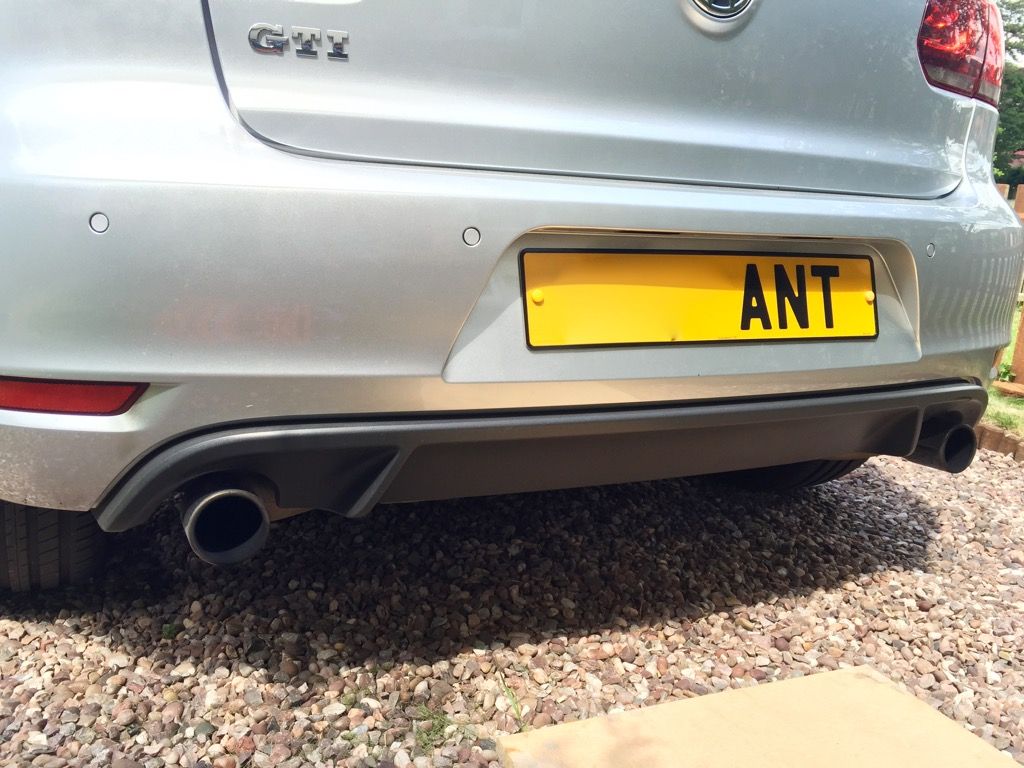
 Couldn't quite find a decent guide to painting a rear diffuser on my Golf GTI, as you know it's covered in dots. Firstly I would set aside two days to do this ideally on a nice hot day.
ALL PHOTOS HERE https://drive.google.com/folderview?id=0BwDEJoRquJlYfkg0ejhjRlo2MjFXOUpvY0MyU2Rhal9hY3BqdElSRE5lLTMwVExoMWhkYjg&usp=sharing
How to remove the diffuser
There are four torque bolts, two on the far end, two in the mid centres. Unscrew by hand. (There not tight, so remember the torque feel when replacing).
Grab the top lip of the diffuser, pull at the centre just enough to unclip (do not pull to remove the whole thing) the grab the top side and unclip, the diffuser will literally fall into your hands. (Remember to pull at ridged area's). Clean the area well prior to any replacement.
HOW TO PAINT
Step 1: Decide what colour. A) Base colours use a 2pac paint in aerosol - This tends to be easier, tougher and less prone to chips and lacquer run.
B) Metallic or such like colour + clear lacquer
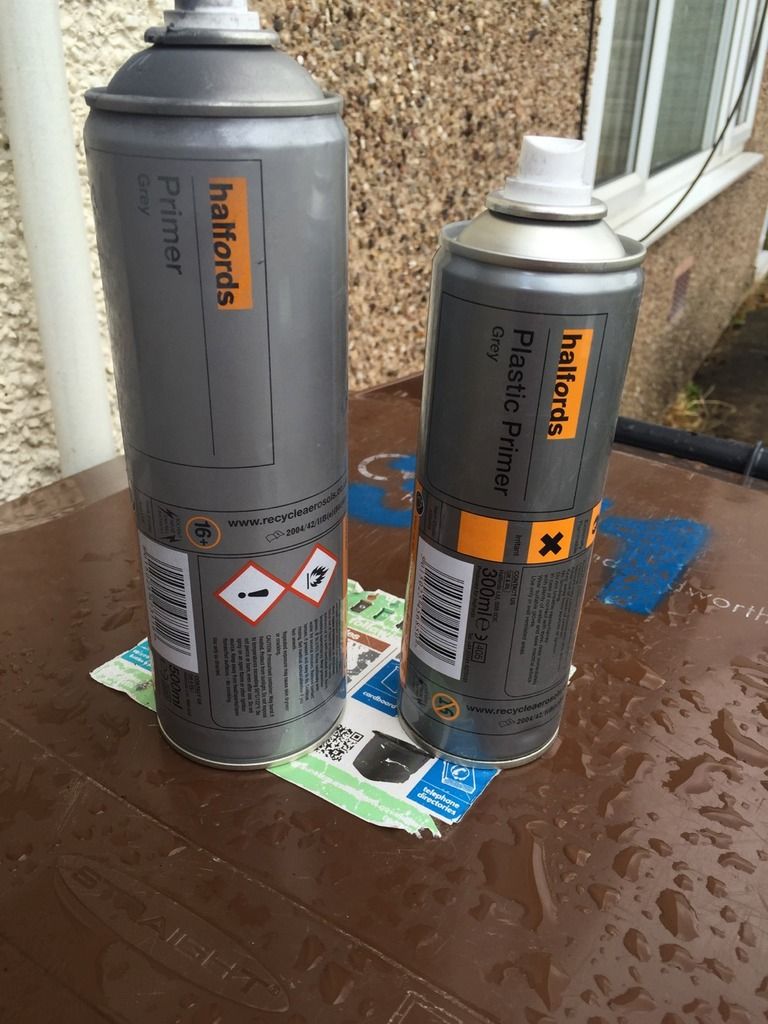 Step 2: Buy some decent plastic primer, I had brought some expensive plastic primer and it was useless, was too dry and flaked and dried when spray on a very hot day.
 2 off 300ml - Halfords plastic primer - quality was good, adhere'd well
1 off Colour [My case gloss black] (500 + 300ml would be plenty enough to really cover up thick ideally)
1 off 500ml - Halfords primer - filler
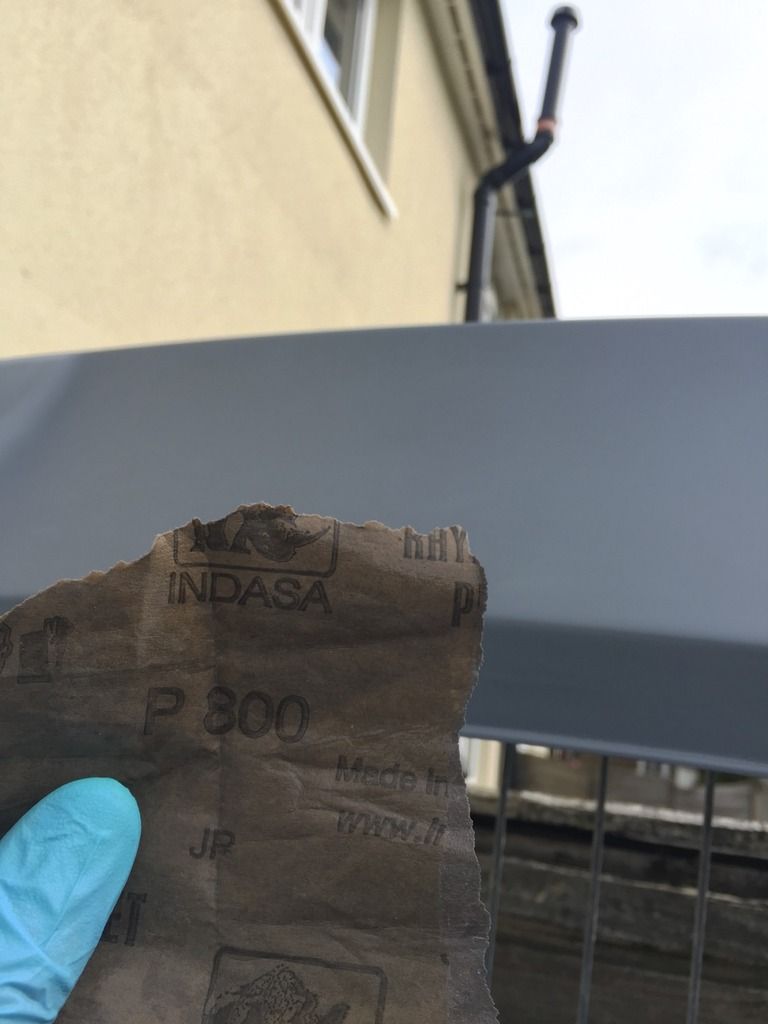
1 off Alsorted wet and dry sand paper ( 240, 400, 600, 800)
1 off Scotch pad
1 off hair dryer
1 off keyboard or beg, borrow or steal baby fence/gate or such like equipment
1 off white spirit
Step 3.0 WASH - Wash the surface with a strong cleaner i.e. wheel cleaner and use scotch bright, get that carbon of!

Step 3.1 PREPARATION - Worst bitFirstly from my experience, you need to smooth them dots out so they are nearly flush. Though there is a CHEAT, just scotch bright the whole surface - though this did not work with my high quality plastic primer, it did not stick!
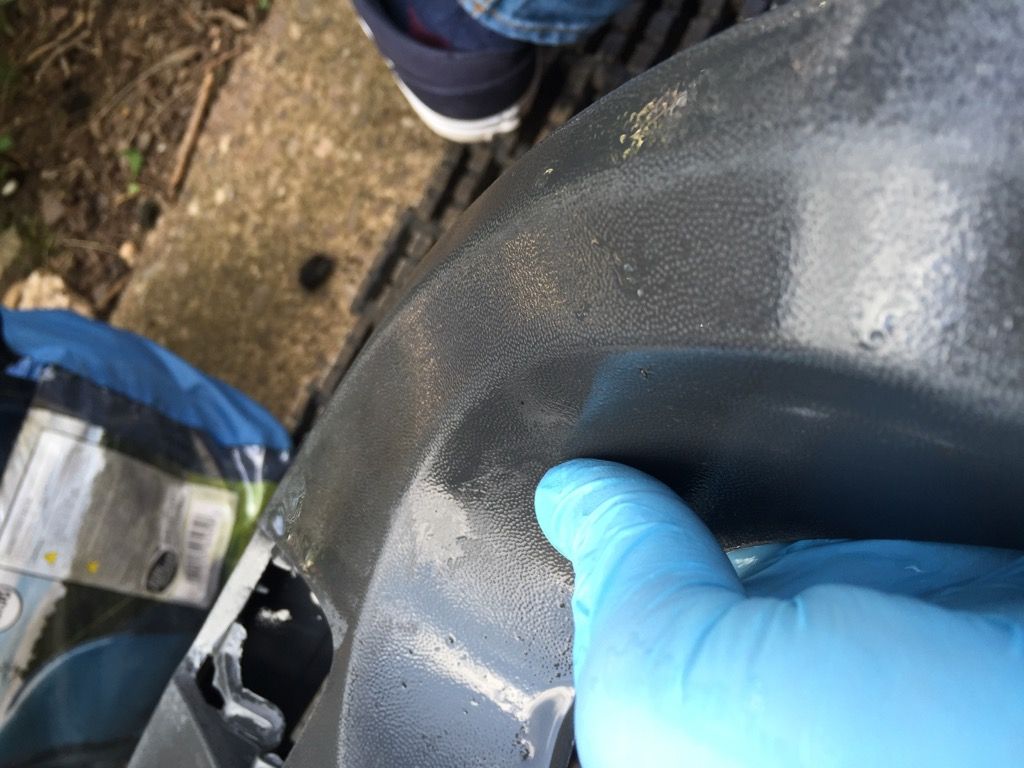
So I spent a couple of hours getting it smooth. Otherwise the primer doesn't really stick well.
A) 240 Wet all surface area evenly, not to hard to leave score marks, use plenty of water to cool the plastic. Test prior to make sure this isn't scoring area. Just enough to bring them spots down and touch the lower surface. You still should be able to see them.
B) 400 Wet another layer, just to smooth of the area some more, you only need a few stokes per area, I did mine in sections. Attack the curve area's some more to make sure there smooth and less spotted to allow the primer to rest.
C) Wet Scotch bright all over and alone all edges.
D) 600 Wet all over to finish.
E) Scotch (grey least rough?) with bucket of water with washing up liquid
F) Wash surface with a sponge and throw the sponge away (Don't want to wash the car with that one) Asda sell them 30p each.
G) Wipe surface with blue towel or clothe
H) White spirt all over with a cloth that's well soak and has no fibres and dust
I) Allow the surface to dry, use a fibre free material (I still wet it with white spirt) and a hair dryer and blow the surface dry and blow of all dust and fibres.
STEP 4 - PRIMER - SHAKE WELL FOR 2 MINS
Tip: Make sure the primer is thick, don't go to hard, but enough to look slightly wet so it hides any blemishes.
A) Primer the surface with PLASTIC primer. Make sure you 20 cm's away from the surface. Do your spraying in horizontal robot motions. Try to avoid holing the trigger on, I find tssstt tssstt ( on of on off) as you swipe back and forth allows a better layer and stops spitting of the can.
A) I did mine in sections, bottom end first, around the sides, along the top.
B) Allows the overspray to centre of part
C) Paint across the fins
D) Curve the can around the exhaust sections, not too close
E) Left side section in like a window wiper and other side
F) Now the final section, the centre, click the can spary in ////////\\\\\\\\\ lines. The trigger switch off as you go past, and switch back on as you return back over, but before the paint hits the paint. (Gets a better even spray).
ALL THIS NEEDS TO BE IS ENOUGH TO MAKE A BASE COAT. SO COVER ALL THE PLASTIC.
You can over run to the other side, just touching the edges is a good idea.
Hair dry the part immediately so its surface dry not to allow bugs to test
Go have your lunch, allow to drive for 30 mins in the sun.
STEP 5 - PRIMER TO FILL This is you most important part, repeat the above. ______}---------{ <> cc /\ /\ ///////||||\\\\\\
Get them corners and edges thick, as it likely the sandpaper will hit them most. Get a good thick coating all over. Any score lines, hit them thicker so you can sand out.
STEP 6 - Hair dry the part immediately so its surface dry not to allow bugs to test. Allow the part to dry for an hour in the heat. Come back, pick the diffuser up from the rear side in the slots. Got hang it in shed or cupboard. Somewhere warm. Allow to harden for atleast 12 hours or over night. Mine took 12 hours in the shed temps (26c till 11 ish, 16c in night, 26c in morning).
STEP 7 - NEXT DAY PREPI'm pretty tired of waiting and typing this.
Make sure you got a day of no wind, nice sunny weather and warmth.
Get the hair dryer back out. The spirits. Bucket of clean water.
A) 800 Wet the diffuser all over. Run you fingers over the surface, does it feel notchy, smooth it in sections. Do the main large surface areas first, avoid the curves, edges and corners as you'll end up hitting plastic quickly. Just get the surface smooth, don't go at it hard. Once it looks nice and shinny in water, you fingers run like butter your there. Run you fingers along the corners, are they smooth? If not rub them down a little. Remember to fold the paper in styles to match the surface. I.E those edges Curve fold the paper to only attack the part you want. (U Shape).
B) Wash the surface as previous
C) White spirt and repeat previous steps
D) Double check for any blemishes, if so just focal those points and wipe back of with a white spirit wet cloth.
STEP 7? THE BEST BIT
Make sure your surface it clean and ready. Shake you paint really well for 2 mins atleast.
A) Again like the primer, the same kind of paint motions. You need to get it on there thick, but remain 20 cms at least away, focal paint direction. Edges and ends first.
B) Don't go in too over exciting. Just do one layer, so its got a light shine. Then allow it to dry for 20-30 mins. It's worth to dry the surface quickly with the hair dryer.
(IF ANYTHING LANDS ON THE PAINT I.E. FLY - WAIT ALLOW IT TO DRY FOR A GOOD FEW HOURS, COME BACK AND WET 800 OVER THE AREA IF REALLY DRY ONLY WAY YOU CAN RECTIFY)
C) Now you've got a covering, the paint should start to lay better, again get it nice good thick coating so it shines, cover the corners well. Need to look shiney and wet, but not enough to run, so watch the vertical sides, as the paint will fall down. These bits are best done in lighter coats of when you can reposition the part in a horizontal position.
I did mine in 3 - 4 coats, but the final 2,3,4 I did in the space of 30 mins. Doing section by section, as the time I got round, the other side was slightly dried and sticky not to run.
2 Pac doesn't tend to run, so if you are lacquering, you need to build on layer and allow to dry, otherwise you'll have running and white area's everywhere.
 STEP 8?
DRY THE SURFACE WITH A HAIR DRYER IMMEDIATELYA) ALLOW THE SURFACE TO HARDEN AND DRY FOR A GOOD 5 HOURS (this was my min at 28c atleast) IN A REALLY WARM ROOM (TENT IN THE SUN) HALFORDS SELL TENTS FOR £12.
You need to come up with your times, based on the weather conditions.
B) Make sure the surface it dry, test by apply a finger pressure on a hidden surface, does it leave a finger print? if so, allow to dry. Need to get rid of a print, with Caution wet the area with cold water and wet sand on the back side of the sandpaper( text side) and just rub very lightly on that area. Has to be slightly hard though. Best to get the dryer out first.
C) Fit the diffuser, sit the bumper in guides first, the hands either side of corners and push in. Doesn't really click.
POLISH / T CUT TO GET IT SMOOTH AND SHINNY
ENJOY THE NEW LOOK!!!
Anthony
