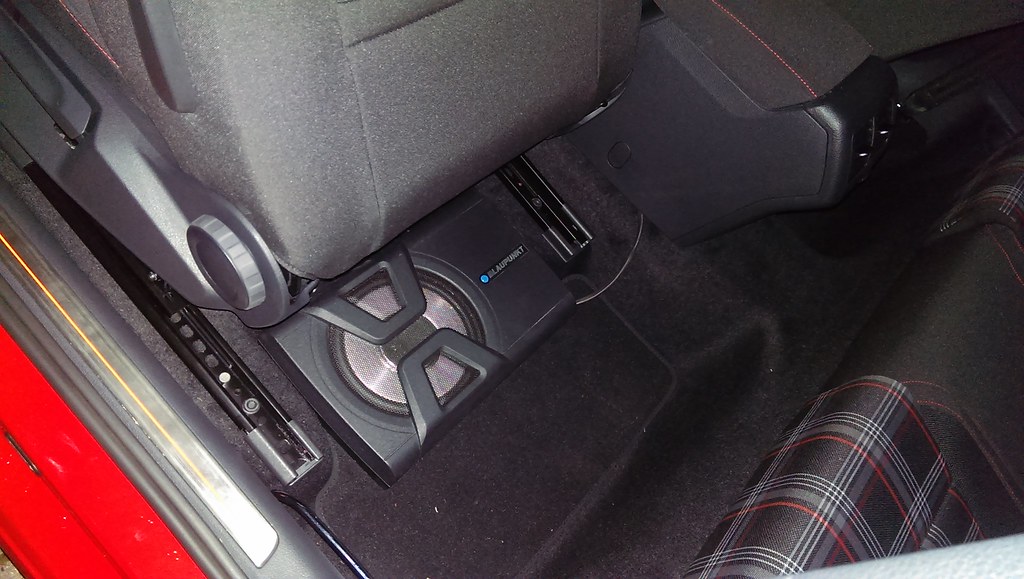
Well I spent a couple of hours this morning putting one of these under the passenger seat... not a bad upgrade for £150
 http://www.bluespot.co.uk/car-audio.aspx/xlf200a-speaker
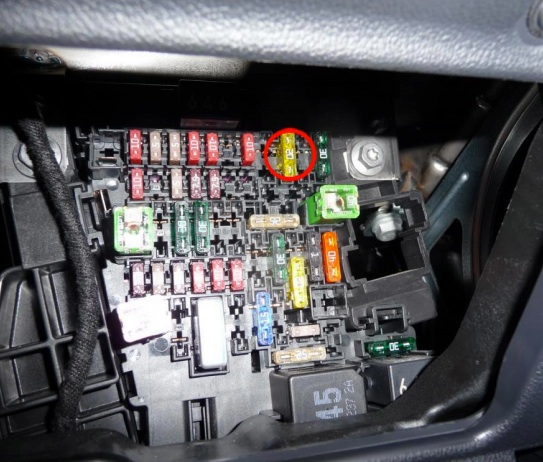
The speaker only needs four wires connected. First to an always on +ve feed which I found in the glovebox. Basically you can see a terminal sticking out on the top left of the fusebox to which you can attach a spade connector. This is a LHD fusebox but the RHD is exactly the same... It's immediately to the left and the bottom of the 10A red fuse on the top left of this picture (ignore the circled fuse).
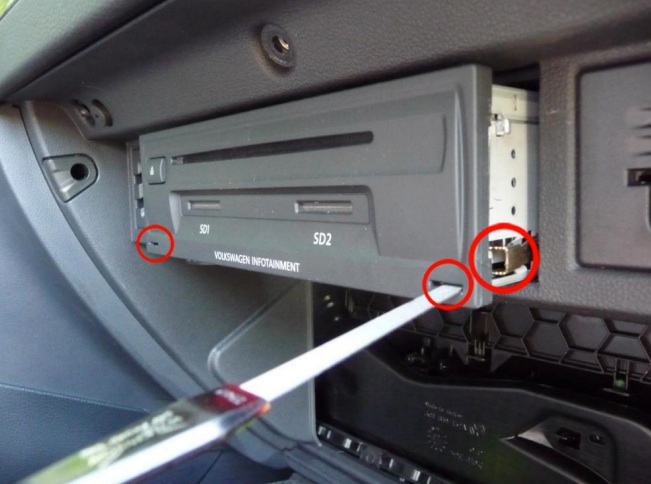
Secondly you need to remove the CD/SD card unit. This is fairly easy. I used a couple of jig saw blades...
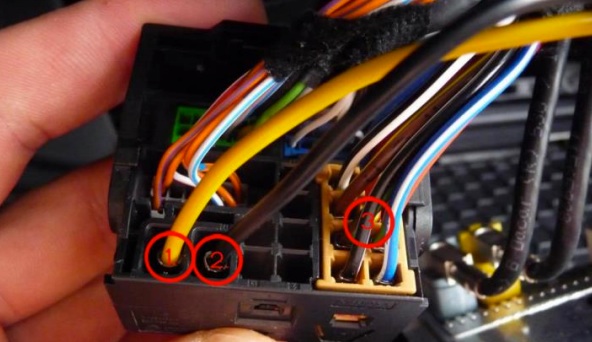
Once you've done that you need to find the brown connector on the back and splice one of the two pairs of the sub's speaker wires into two of the wires from the VW unit. You can use any pair and I used the top two, basically the black wire with white stripe and the blue wire with white stripe. It doesn't matter which way round you connect as you can adjust the phase on the sub once you're all connected. If you want to be ultra correct, connect the striped wire from the sub to the black wire with white stripe. (No 3) The blue wire is immediately to the right of this wire, connect the solid coloured speaker input wire from the sub to this. The sub comes with a pair of high level input speaker wires but it is really only necessary to connect one of the pair. If you really want to connect both of them then use the wires at the opposite end of the VW connector. For info the middle two pairs of wire on this connector are front speakers and the outer pairs of wires are rear speakers.
The last connection is the sub is easy. It's the -ve (ground) connection. Find a suitable earthing point (any screw or bolt attached to the chassis. I basically ran all of these cable out from beneath the glovebox/fusebox under the edge of the centre console to end under the passenger seat. If you look at the panel on the central console, you will see one torx screw to the right of the passenger's feet. If you remove this, this panel pulls down which makes access easier. You'll also find many points to attach the ground wire to, behind that panel.
The sub turns itself on automatically once it "hears" sound...
The results are amazing... who needs the accessory Helix system or Dynaudio?

If you need to carry a passenger, the sub can be lifted and tucked back or removed altogether as the supply simply unclips. That's the only downside - it removes a bit of footroom from the rear footwell. Just leave enough free lead so that you can move the sub around as necessary. This pic is my sub which is the previous incarnation of the link above. If I'm carrying a passenger, I simply lift the sub to a vertical position and put it leaning under the seat squab behind the rear seat passenger's knees.
Hope this gives some of you some ideas...