As promised
Step 1 Removing Headlights from Audi B6 (Bi-Xenon's)NOTE: The following is a detailed procedure on how I removed my Headlight assembly's from my Audi B6, so I could complete three jobs (complete O-ring fix stop condensation, remove amber inserts and stealth side indicator Blubs), I am sure others will find ways to do this or improve on it, but this is what worked well for me
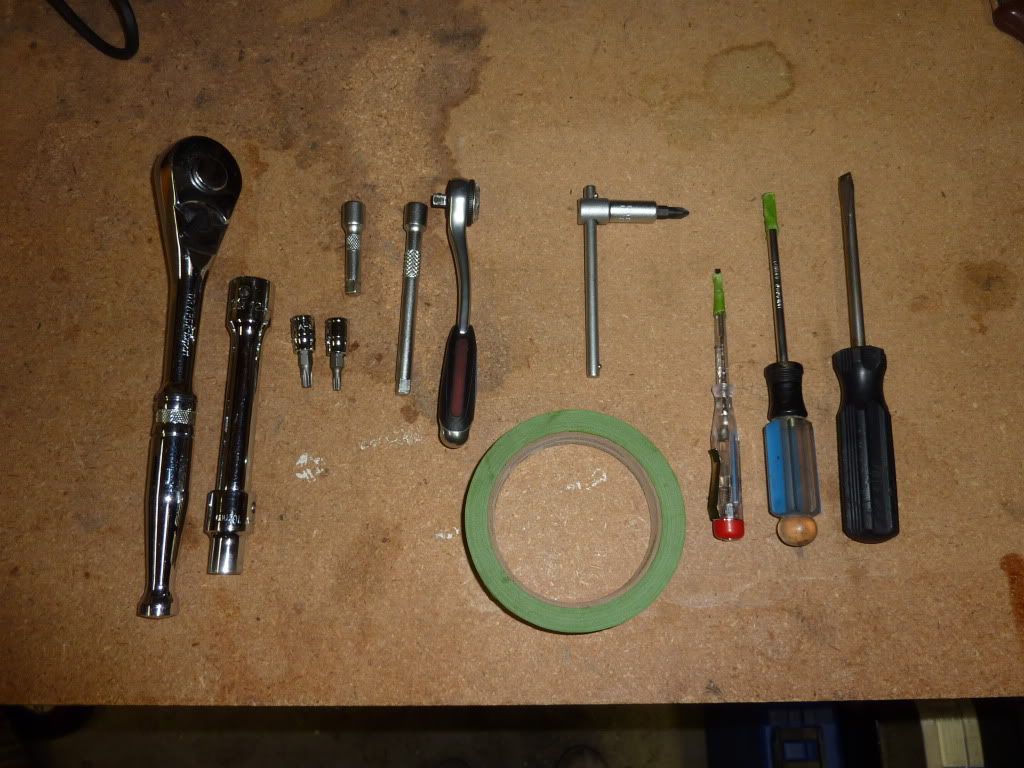
 Tools needed;
 - Torque wrench, extension bar and T30 1/4"Torx socket
- Torque wrench, extension bar and 10mm socket
- Phillips screwdriver
- Flat head screwdrivers
- Tape
Picture shows all the tools outlined above for this procedure, but also for completing O-ring fix, removing amber inserts)
 Preparing car, before starting work
I recommend starting by first parking the car on a level surface in front of a wall or garage door and noting the position of the beam pattern on the wall. This will make it easier to realign the lights later once everything is completed.
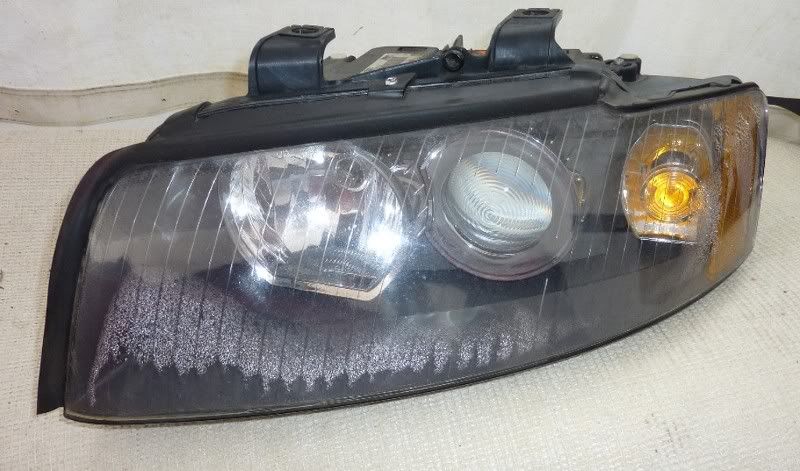
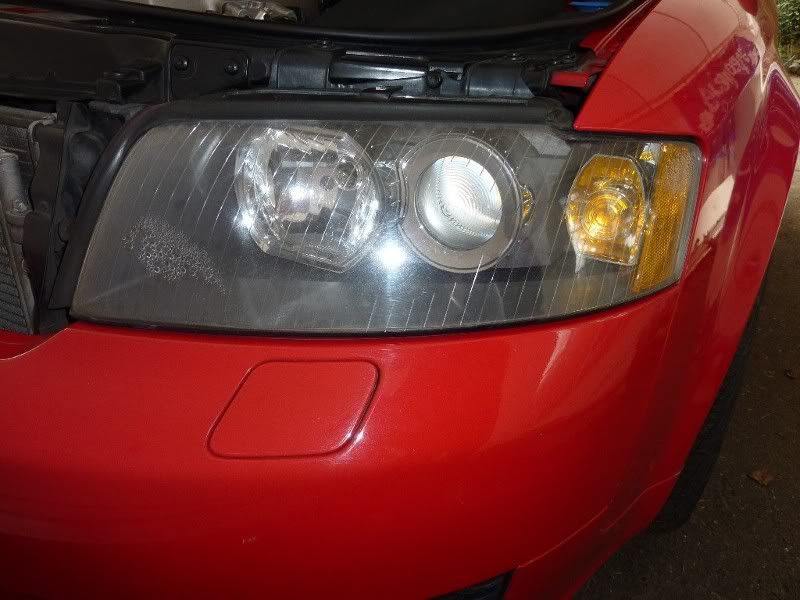
Removing head light left side Here is pictures of headlight before any work.
Step 1. First job is to remove the left engine cover as pictured below, this is held in place by two rubber screws, at the front and to the right, you just need to gently pull cover up and out towards the front of the vehicle.
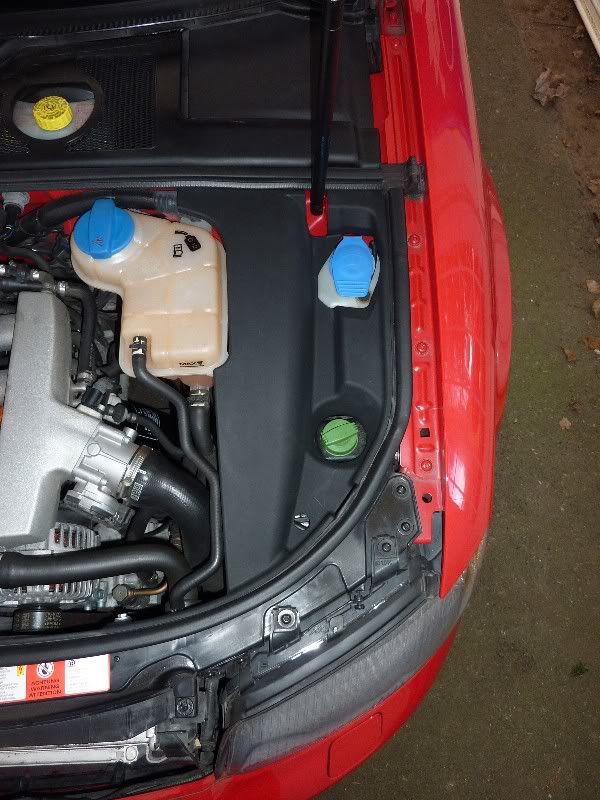
Below picture shows engine cover removed.
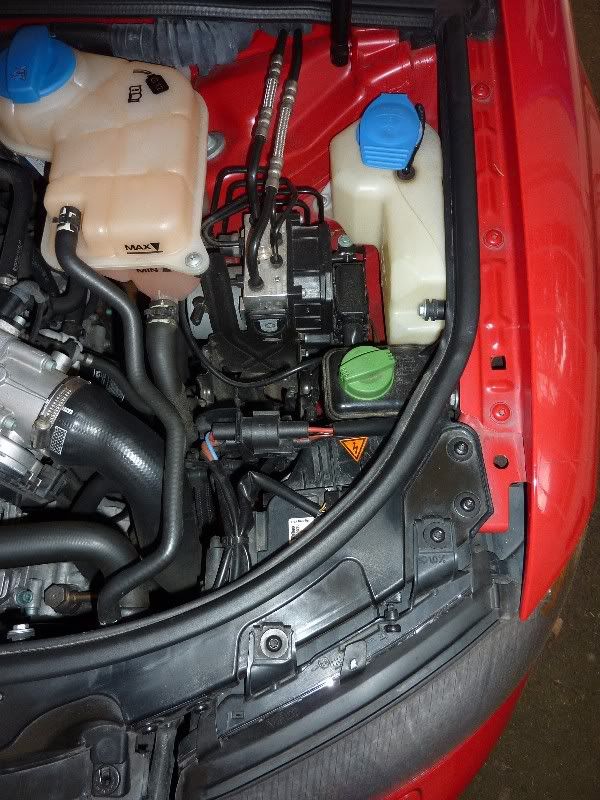
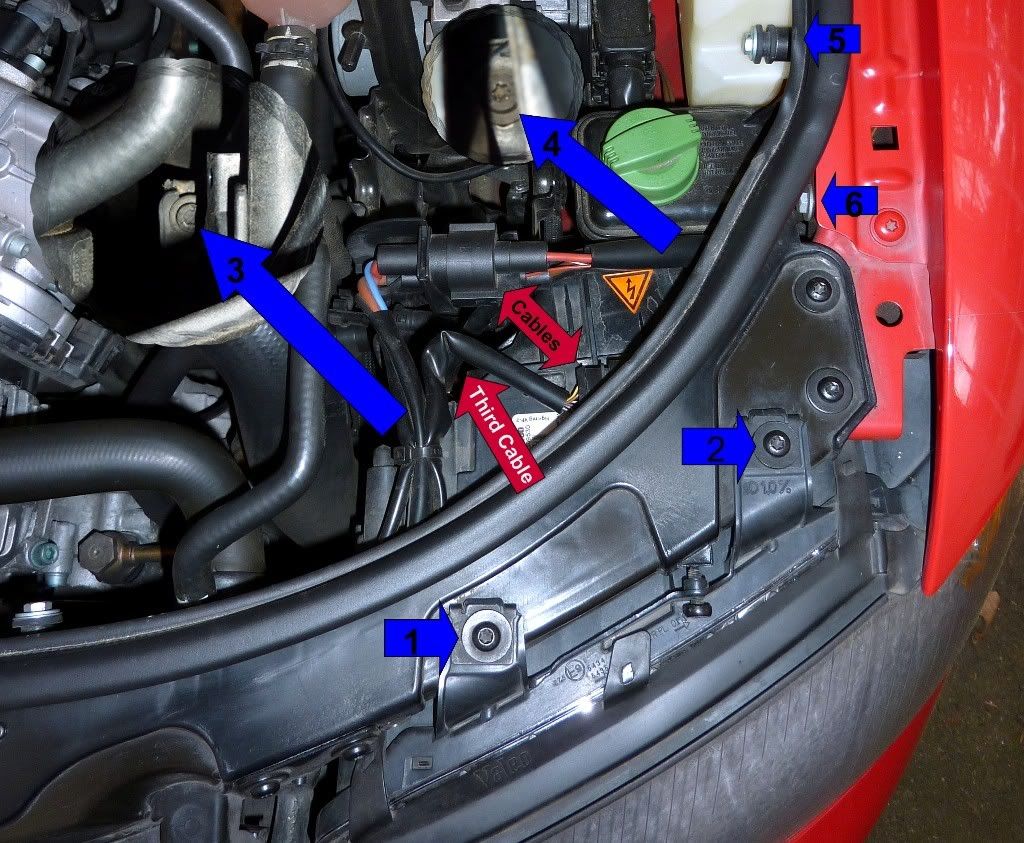
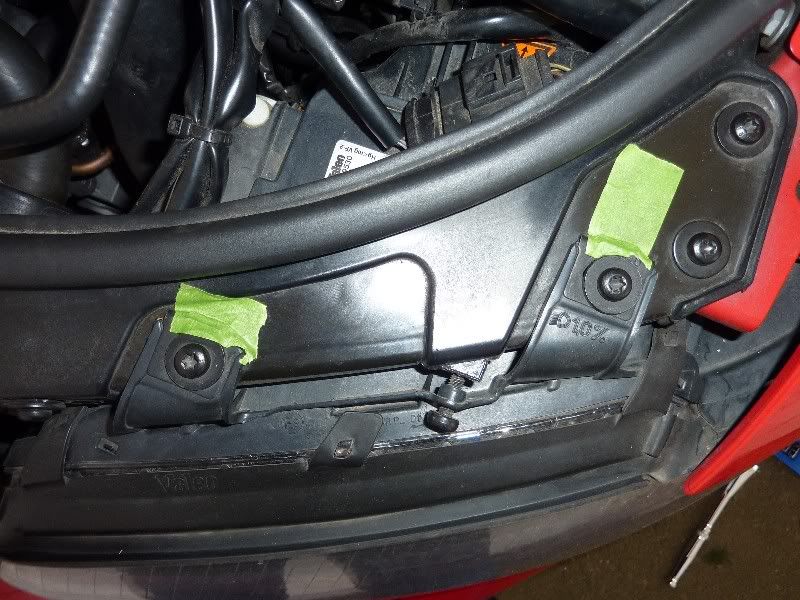
Step 2. Below picture is close up of all the bolts and cables, we need to work on over the next few steps. I have outlined each one, so you understand
No.1 & 2 Bolts = hex bolts (these will be completely removed)
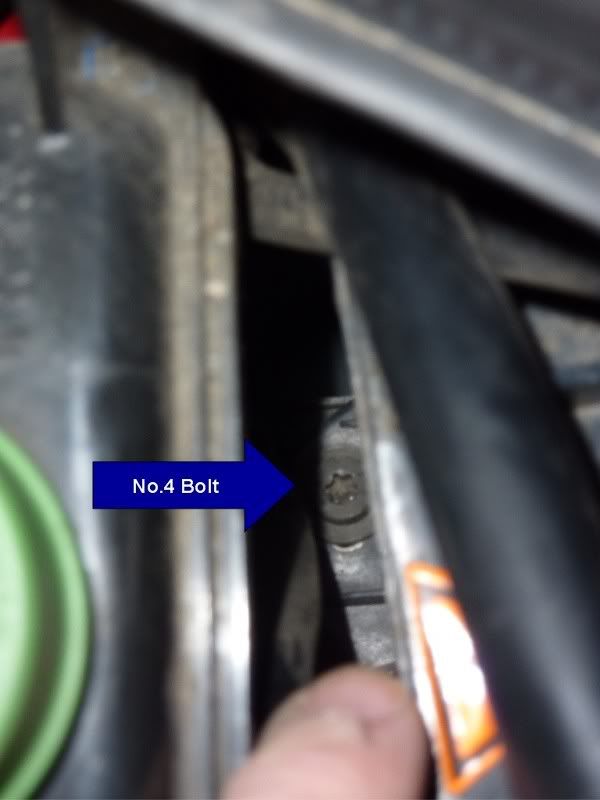
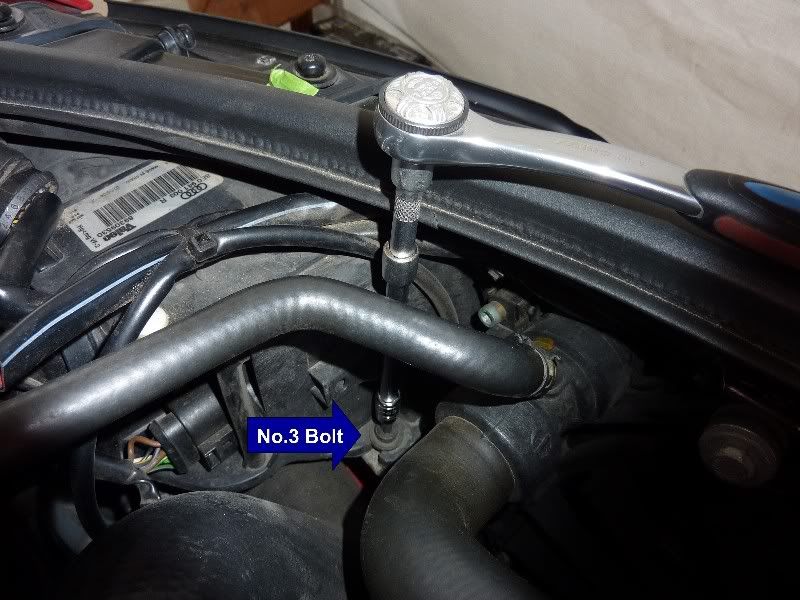
No.3 & 4 bolts = hex bolts (these only need to be loosen, 2-3 turns, not completely removed)
No.5 & 6 bolts = 10mm bolts (these will be completely removed) so that you can get to No. 4 bolt.
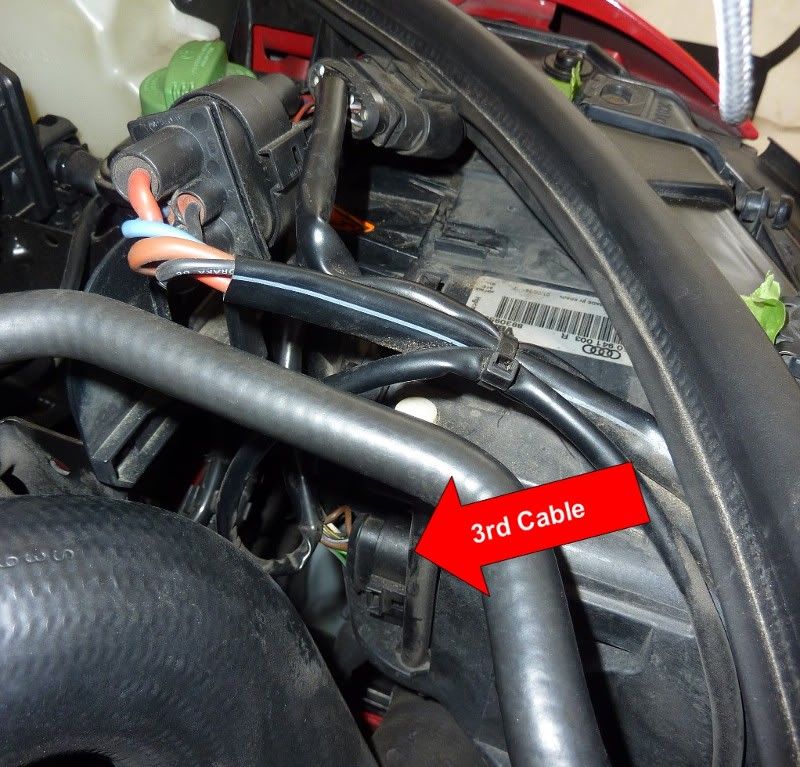
Three cables that require disconnecting/removing from clip holders
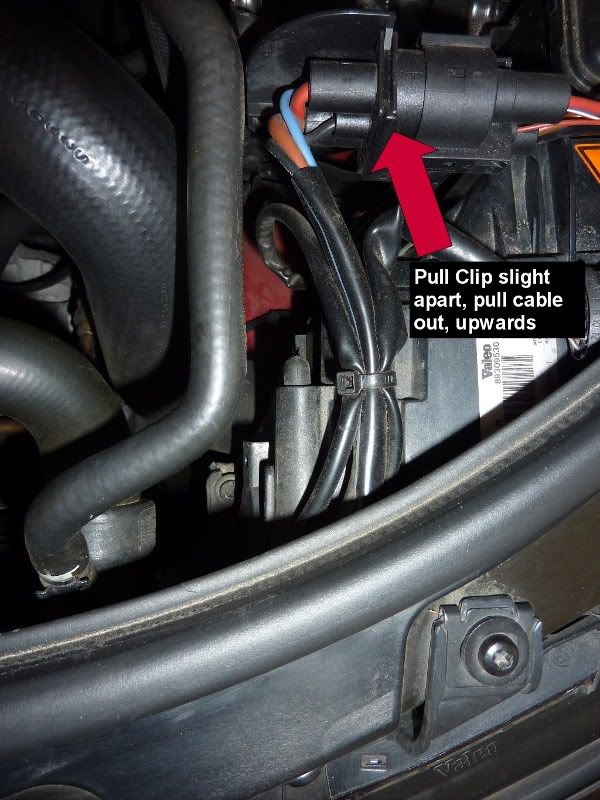
Step 3. Need to disconnect two cables that are connected to headlight and in way of getting to No.4 Bolt.
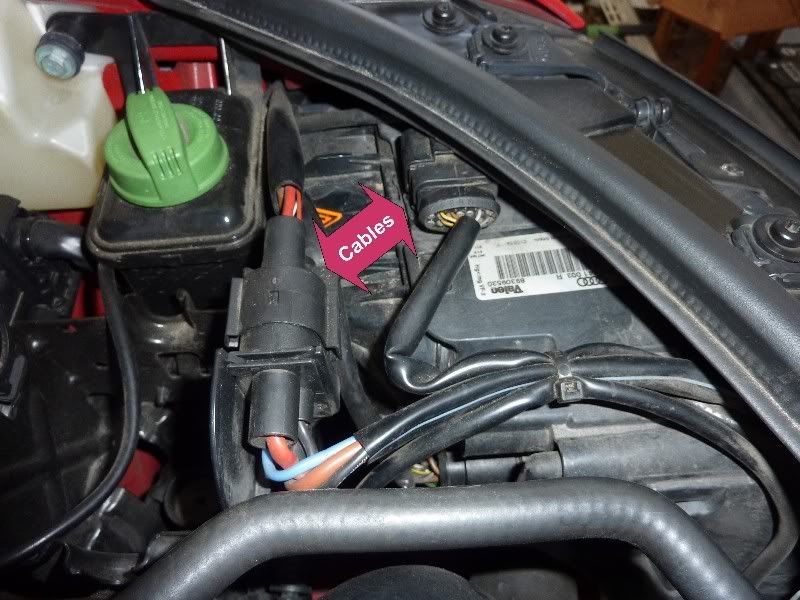
You can remove cable connected on top of the headlamp, by pushing down gently on the clip holding cable in place, as outlined in picture below. Then slide the cable out towards the engine .
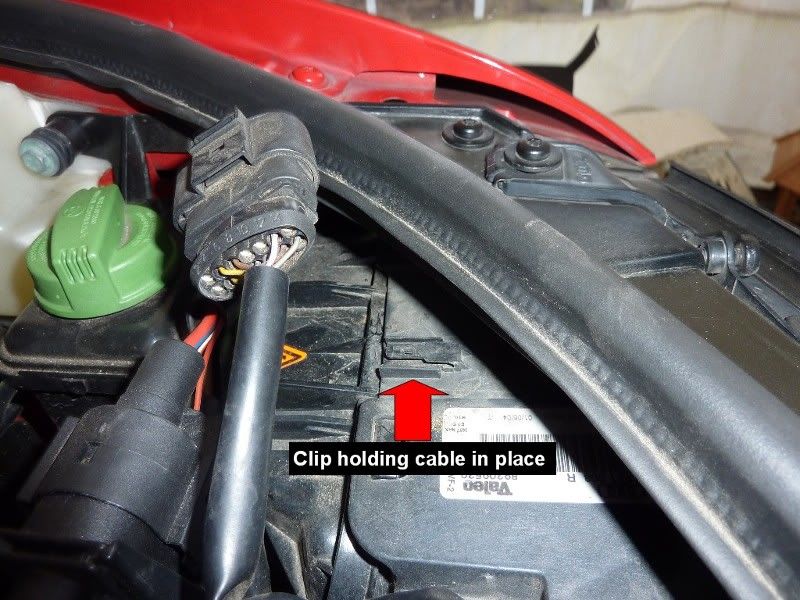
Second cable is held in place by plastic clip, you need to gently pill clip apart and pull cable out upwards, this cable doesn't require to be disconnected, but by removing from clip, can move cable out of the way to get to No.4 Bolt, which you will see in next few steps.
Step 4. Removing Bolts 5 & 6 using 10mm socket, with torque wrench, do can allow you to get to No.4 bolt. Outlined the bolts in the below picture.
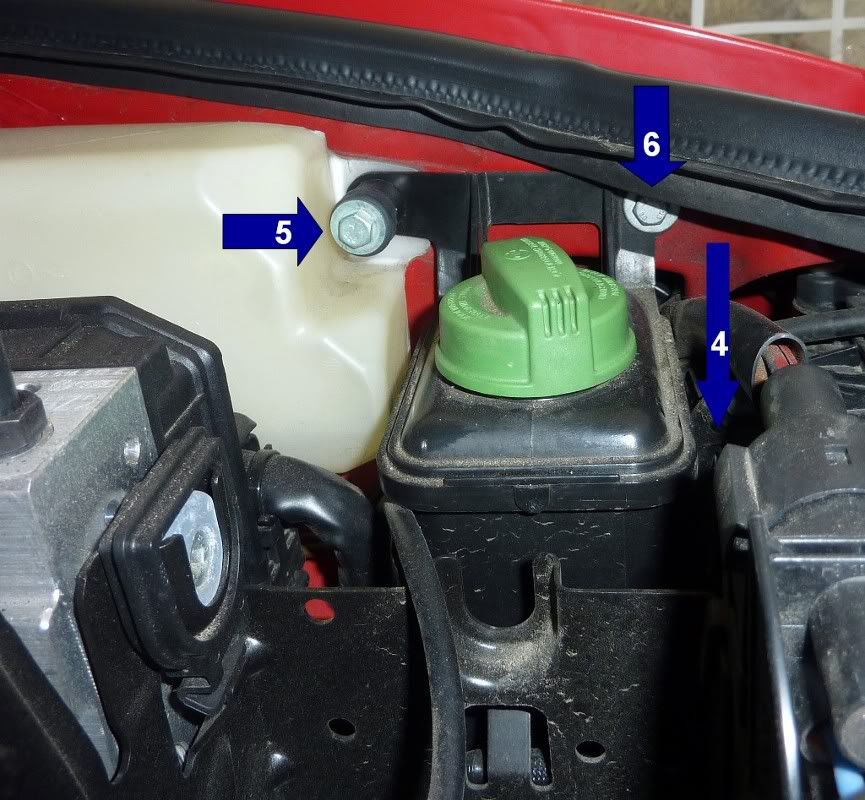
Undo the 10mm bolts. This bolt (No.5) on my car is used not only to hold this break fluid bottle, but also to hold the engine cover in place)

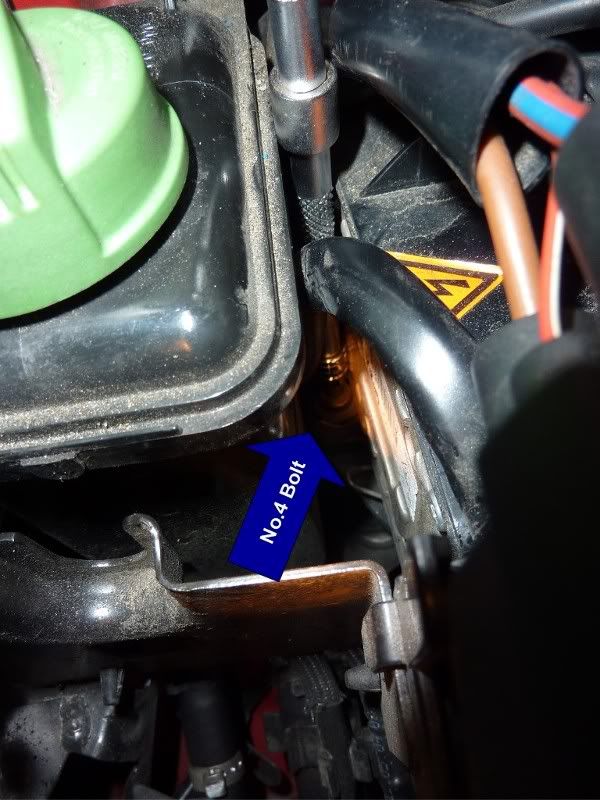
Both No.5 & No.6 10mm Bolts removed, which allows you to move the unit over a little, so you can see and access No.4
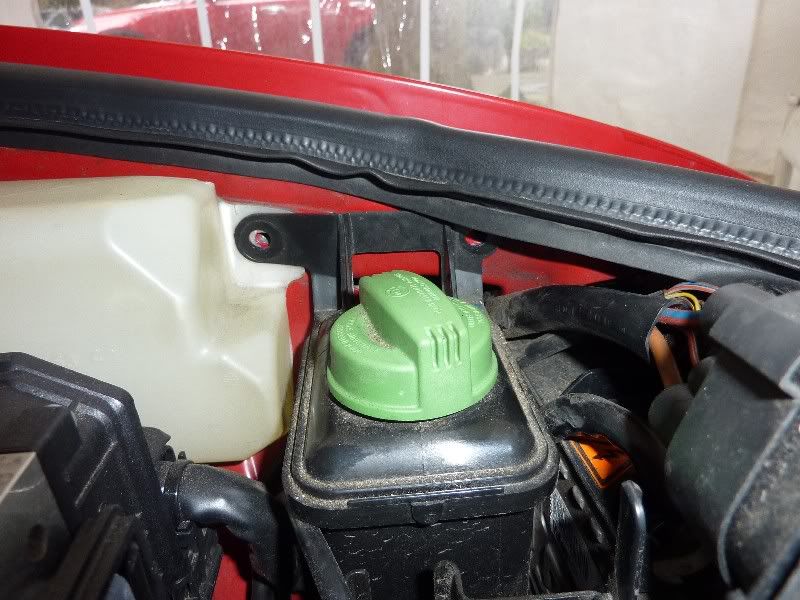
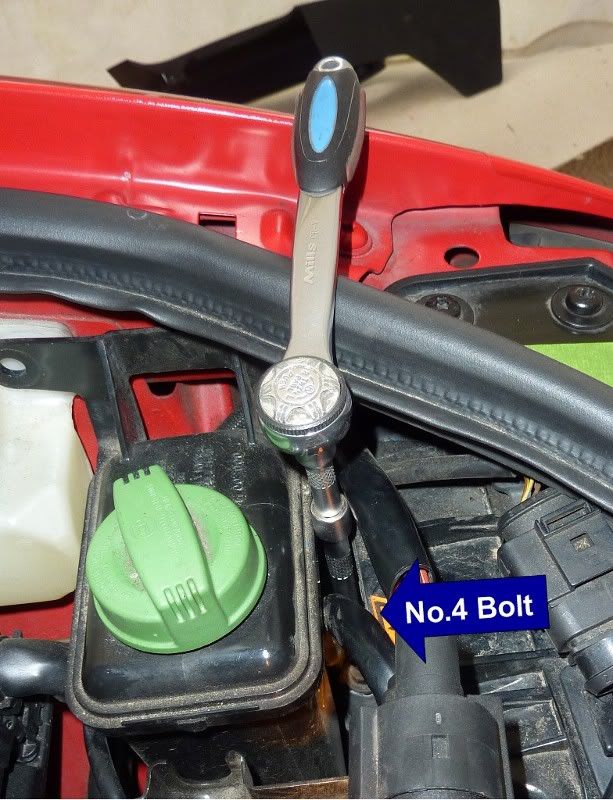
Now see and access No.4
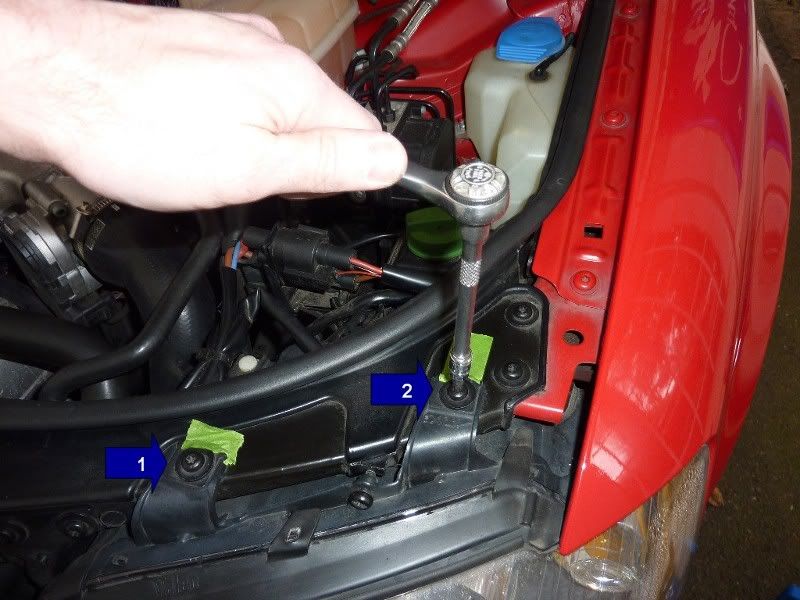
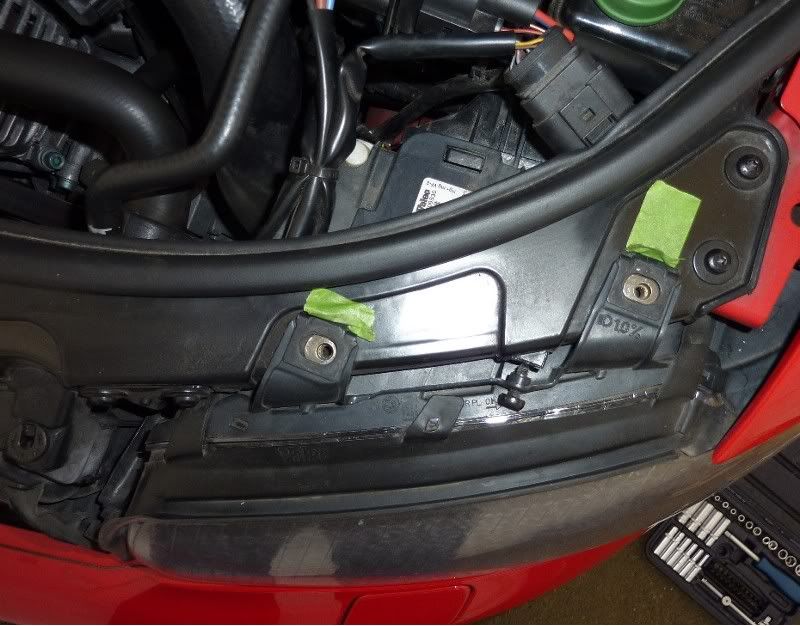
Step 5. Remove headlamp bolts. To make sure you can align the headlamp back in the same position, I used tape to make up where the top bolts are tightened up.
Now using torque wrench with T30 1/4 Torx socket), to unscrew No.1 & 2 Bolts = hex bolts (these will be completely removed)
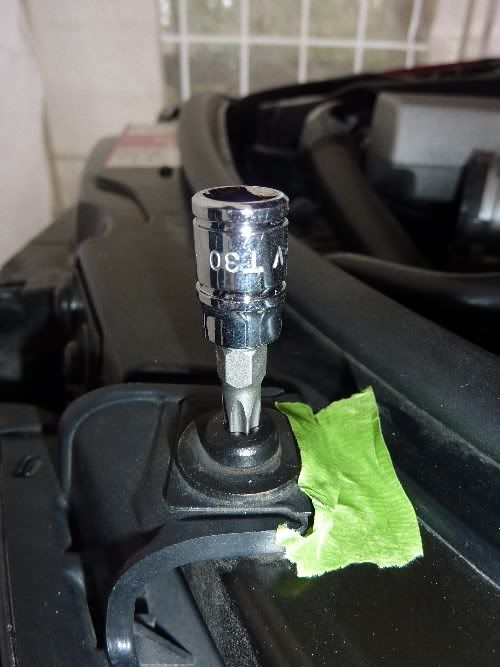
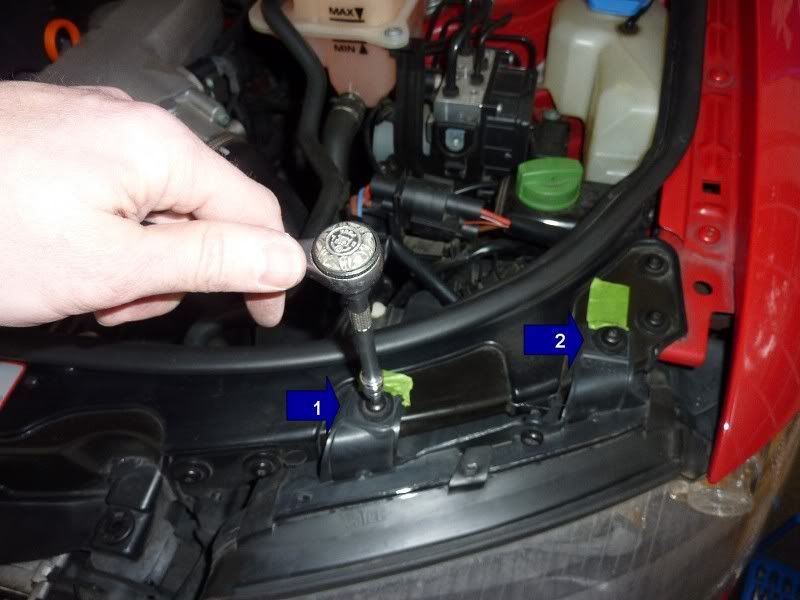
Now using torque wrench with T30 1/4Torx socket, to unscrew No.3 & 4 bolts = hex bolts (these only need to be loosen, 2-3 turns, not completely removed)
Now that you have removed No.1 & 2 bolts and loosened No.3 & 4 bolts, you can now pull headlamp slightly out, reason for not pulling headlamp out completely, is you need to disconnect last 3rd cable from headlamp.
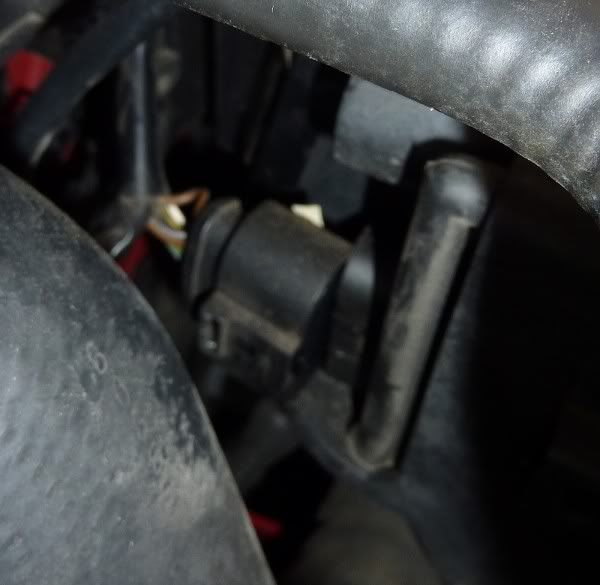
Step 6. remove final 3rd cable connected to the back of the headlamp as outlined in the below picture. Now you have headlamp slightly pulled out, you can now see the final cable (3rd Cable) to disconnect.
Using flat head screwdriver, gently, push down on clip on cable, so you can then pull cable off its clip.
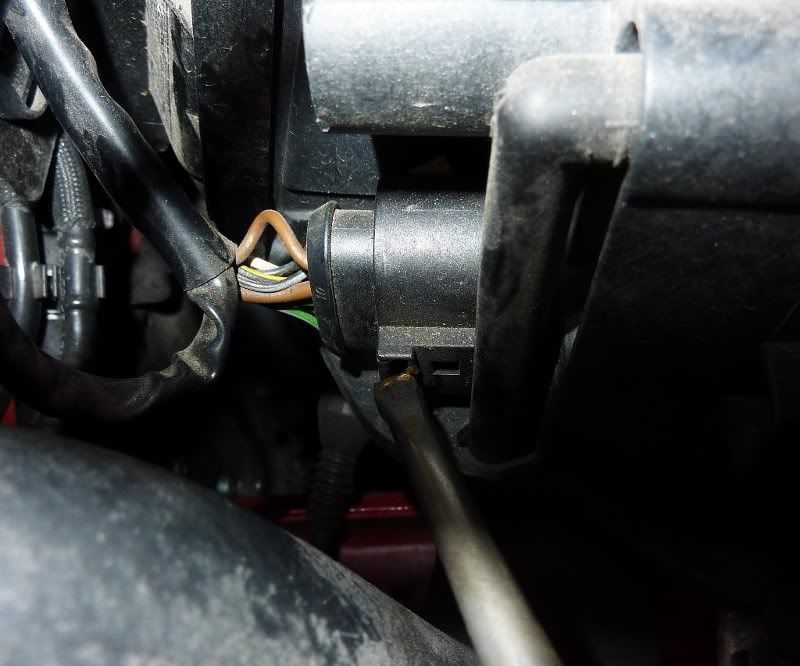
Cable now disconnected
, can now remove headlamp completely.
Step 7. Remove headlamp completely, by pulling headlight unit out. Take care not to scratch your bumper paintwork. To prevent any scratching you can either put cloth or tape on bumper before pulling head unit out.
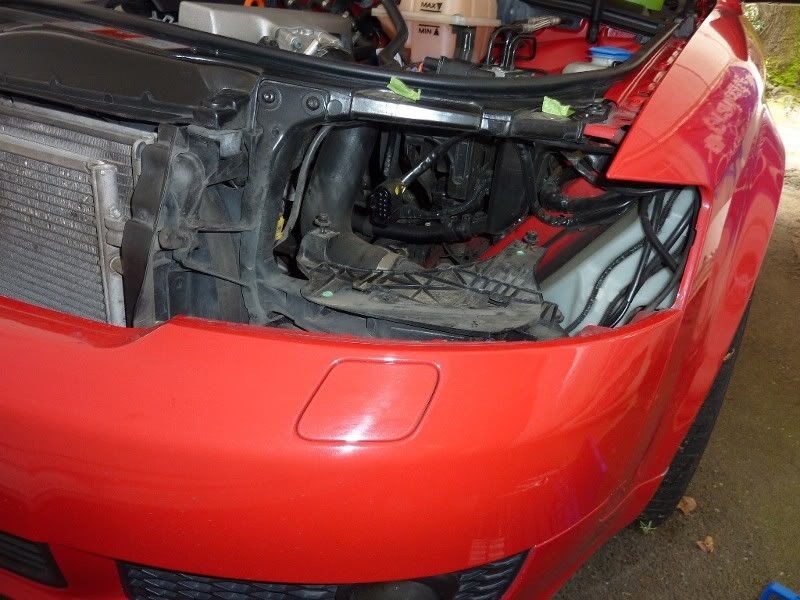
Now have Left head light unit successfully removed from Audi.