Author Topic: Kev's GTI PP DSG with OEM mods  (Read 167708 times)

Offline kevinm

  • GTI forum regular
  • ***
  • Posts: 229
Re: Kev's GTI PP DSG with OEM mods
« Reply #30 on: 09 September 2014, 15:44 »
Thanks Kevin, the schematic (when you have a chance) would be great.

Sorry to ask another question, but with regards to removing the door cards, are there bolts behind the door grab handle and if so, does the outer part of the trim lever off ?

I guess elsewhere there's bolts on the bottom edge (and there appears to be a "special" one in the bottom middle ?), and everything else is just those big white clip things (like on my Scirocco) ?

Ya the cover for the grab handle pops off to get access to the bolt (T27 IIRC). The bolt at the bottom edge is just rotated 90 degrees with a ring spanner. The door card clips are black: 7L6 868 243
Current: His: 2020 M340i   Hers: 2019 GTD

Previous:
2014 GTI PP DSG
GTI ED30 DSG

Offline kevinm

  • GTI forum regular
  • ***
  • Posts: 229
Re: Kev's GTI PP DSG with OEM mods
« Reply #31 on: 15 September 2014, 00:13 »
So here's a bit more detail on the door warning light mod. Again, I didn't intend on doing a how-to so I don't have pics for every step. Also note some pictures are of the drivers side and others are of the passanger side in case you notice that the 32 pin plug has extra wires in some pics. The driver's side has more wires in it.

This mod was easier to do on mk5 and mk6 as there were empty positions in the door controller to accept the wiring for the door warning lights. If your car has illuminated door sills, this is fed from the door warning light position on the door controller. This makes sense as the sills only illuminated when the door is open, and only the side with the open door illuminates. This makes the wiring more difficult as you have to somehow tap into this feed but on the other hand the door controller already has door warning lights activated (to power the sills), so no vcds coding is necessary.

The power for the sills and lights comes from pin 16 on the blue 32 pin plug in the door controller. I could not find an empty ground pin in the plug on the door controller so i decided to tap into the ground already at pin 5 in the 32 pin plug.

If you dont mind damaging the car's wiring then you can just get tap connectors and take your power and ground from the wires going to the pins mentioned above. I avoid doing this if possible. My solution is to build a loom that plugs in between the car's loom and the 32 pin plug. I then spilt the power and ground in my loom. The advantage of this is that the home-made loom can be removed and the wiring returned to factory spec without any signs of modification.

Parts needed:
Light:..............1K0 947 411 A......1 per door
Plug:...............1J0 971 972.........1 per door
Repair wire:.....000 979 019 E......1 per door
Repair wire:.....000 979 009 E......1 per door
Repair wire:.....000 979 012 E......1 per door
Door card clip:..7L6 868 243.........3 per door
0.5mm2 Thin Wall wire:...............3m per door
VW loom tape
Shrink tubing
Solder

* The A3 wiring diagram shows 0.35mm2 wire but I'm fairly sure the A3 uses leds for the door warning lights. As we are using a regular bulb, 0.5mm2 is safer.

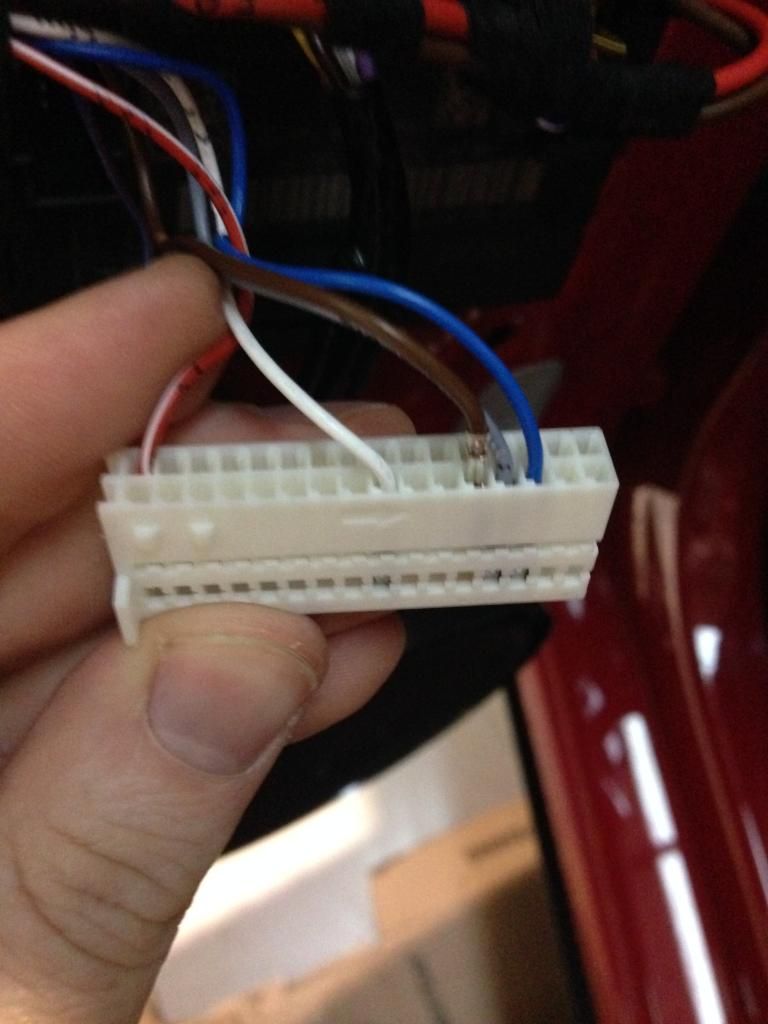
Here is a quick sketch of the wiring loom you need to make. The 019 repair wires go in the plug. The 009's go at the far right end of the loom and the 012's are used on the little spurs off. Note that the drivers (right side) needs a slightly longer loom. This is because the 32 pin plug is closer to the door hinge on the right door.


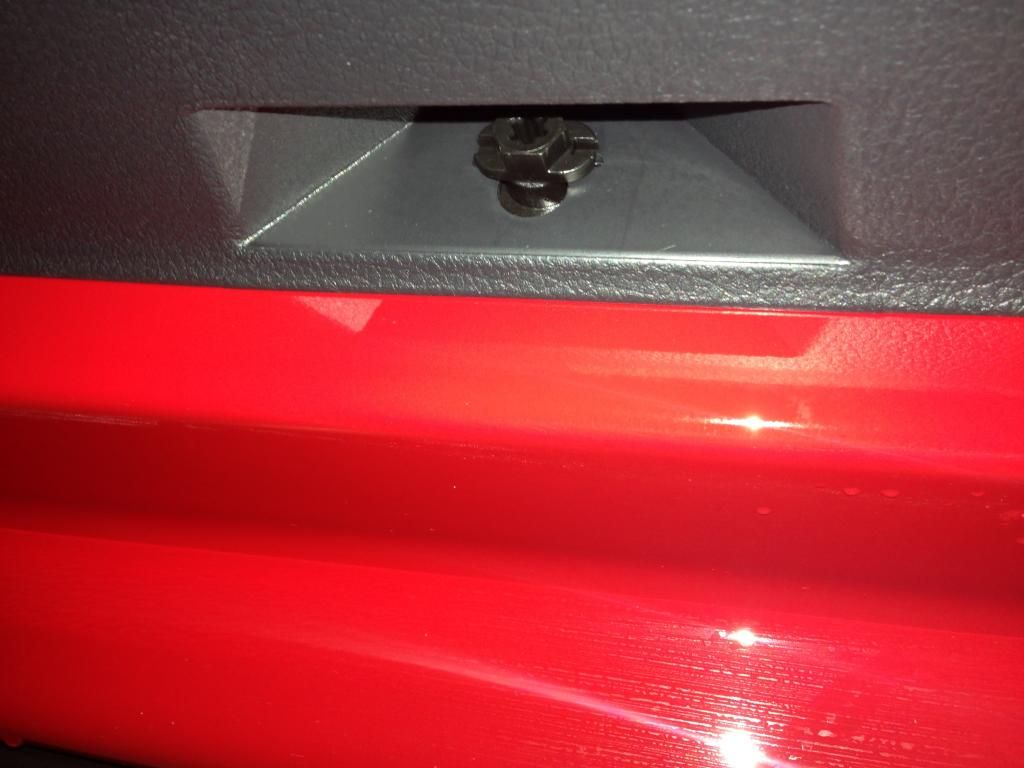
Use a ring spanner to turn the plastic clip at the bottom of the door card 90 degrees:


Pop off the cover to the grab handle:


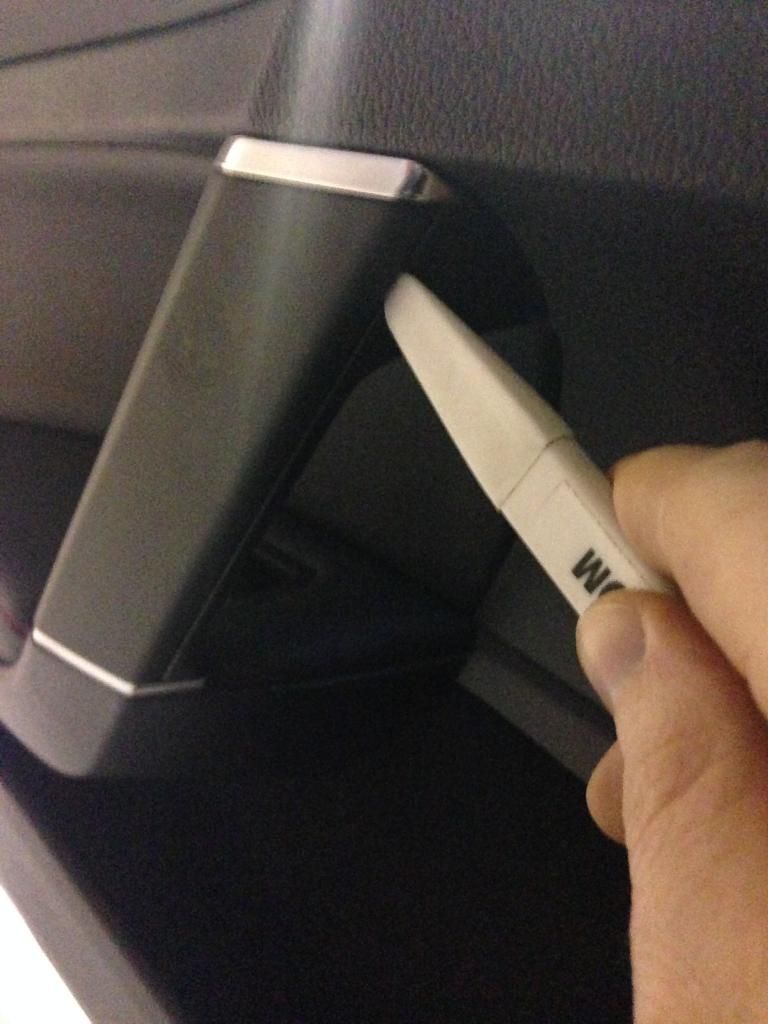
Remove the one bolt behind the cover an dthe other below the grab handle:


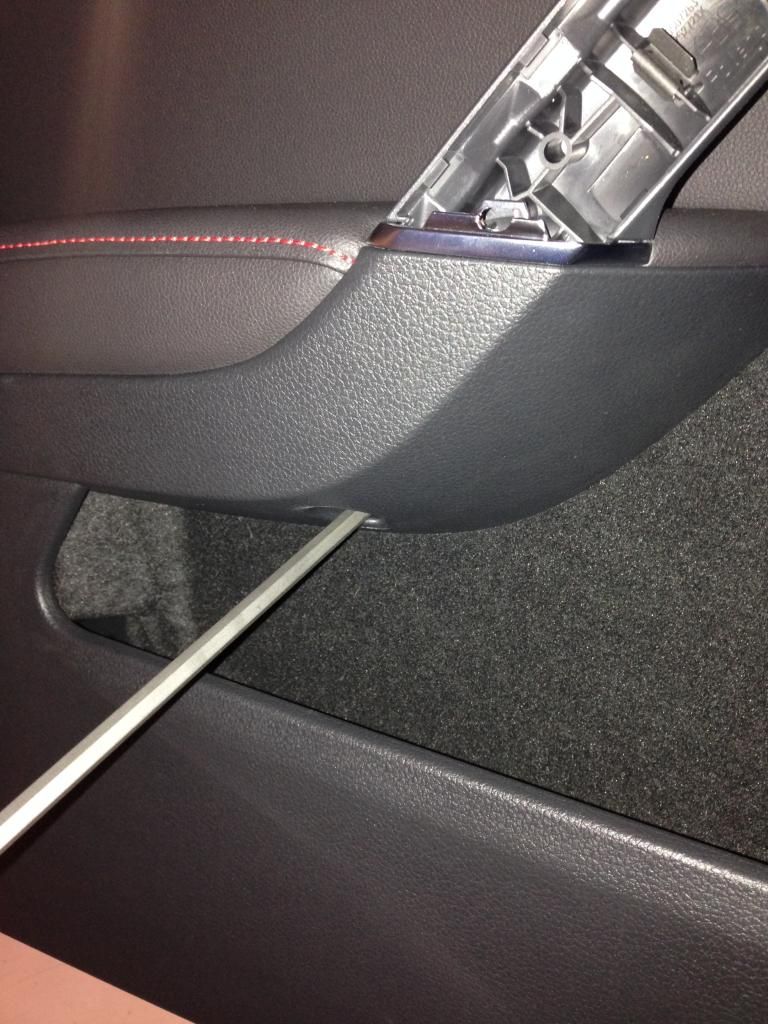
The next bit requires brute strength and care. Pop all of the clips holding the door card on. You are pretty much guaranteed to break some so do get spares.

Remove the door card and unplug the wires. Note 2 light fittings have the same plug so you could plug them back in the wrong way round. They are a black 2 pin plug. Mark which ones goes to each light. I didnt do this and it took trial and error to figure out which went where! I didnt remove the cable from the door handle to door lock as I was worried I would break it so I just let the door card lean up against the door while I worked.

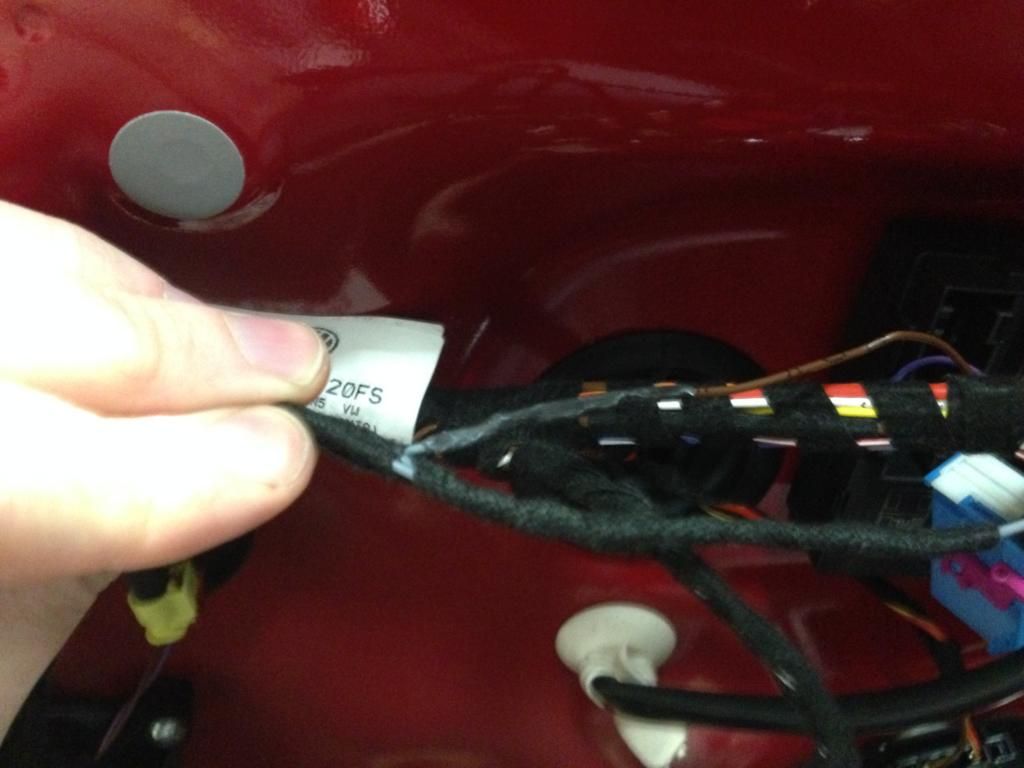
This is the right side door controller with blue 32 pin plug:


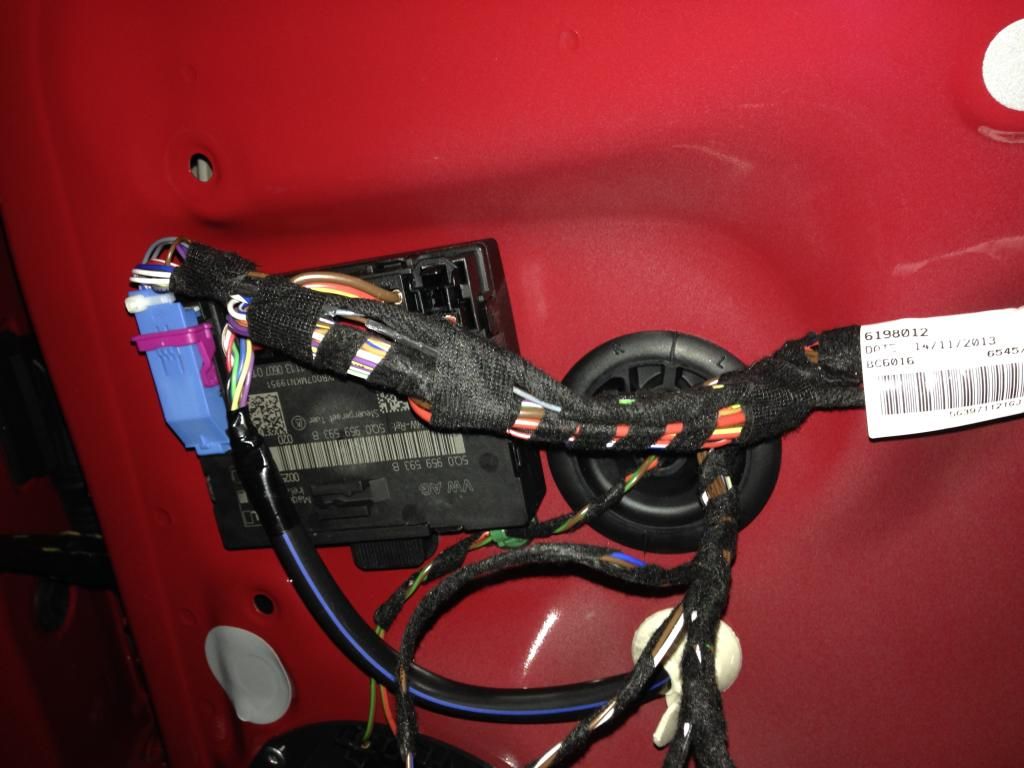
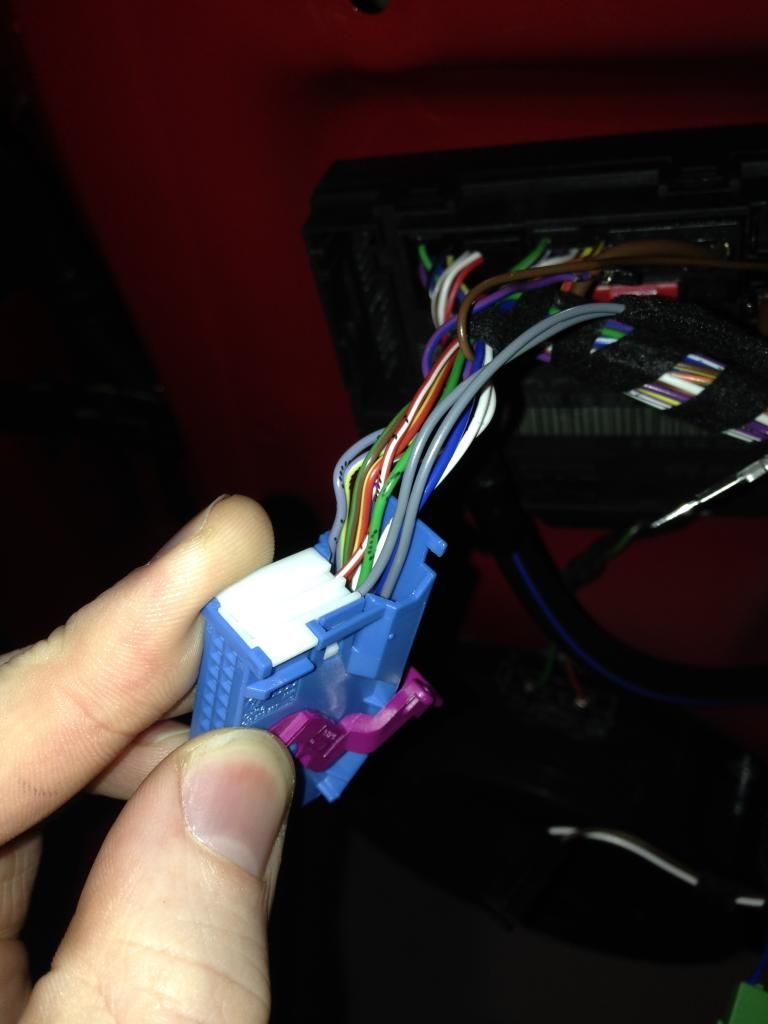
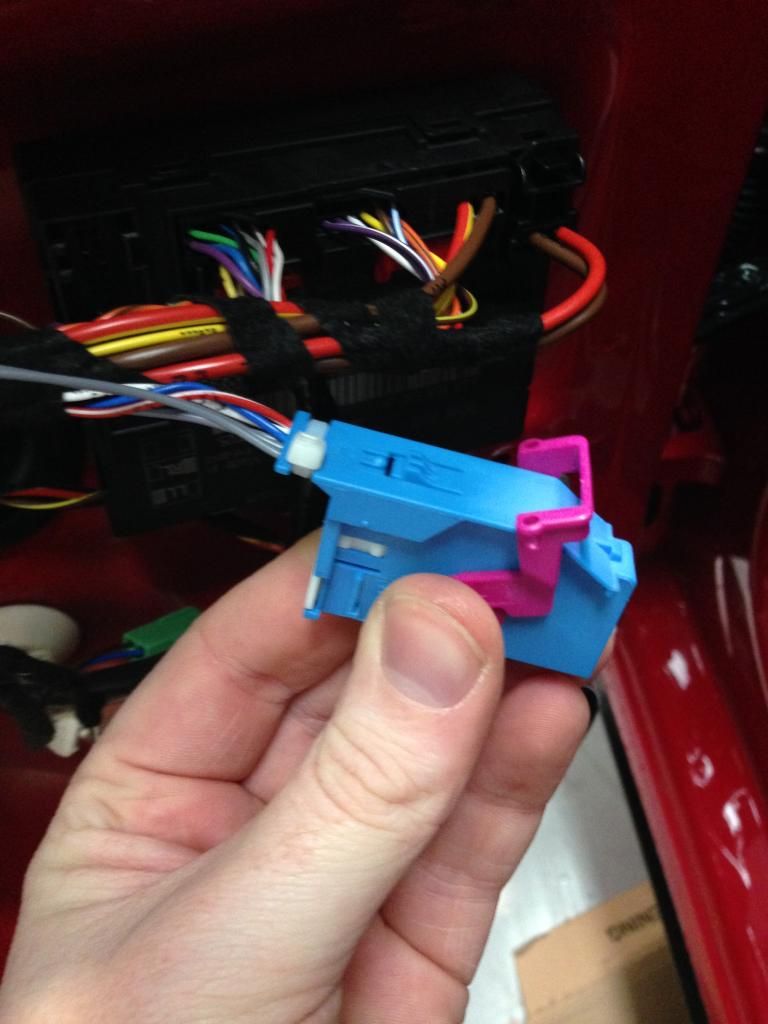
Remove the plug, cut the cable tie holding the cables to it and release the white plastic piece from the blue cover.


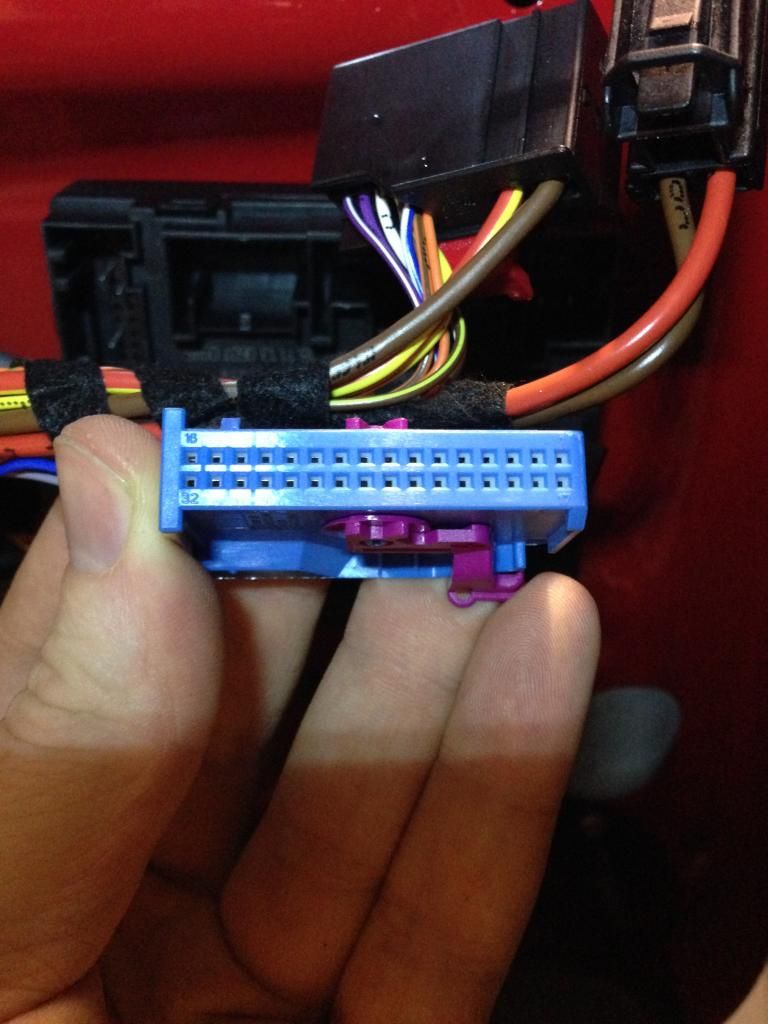
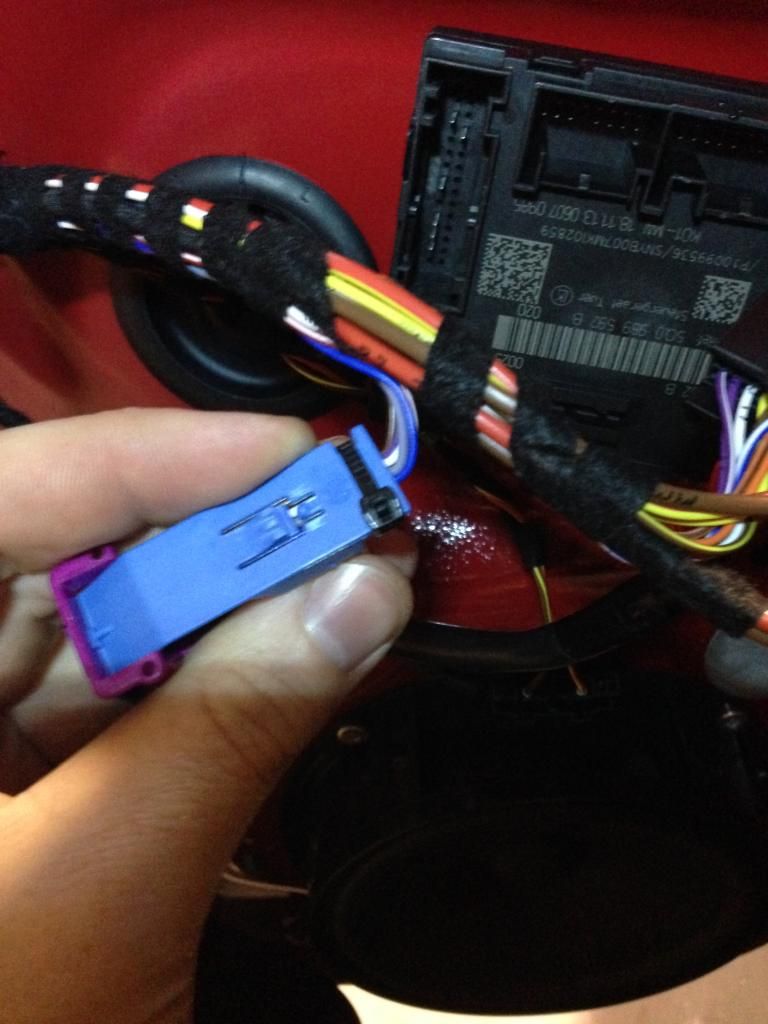
The 2 wires we are interested in are the brown at pin 5 and the purple at pin 16:


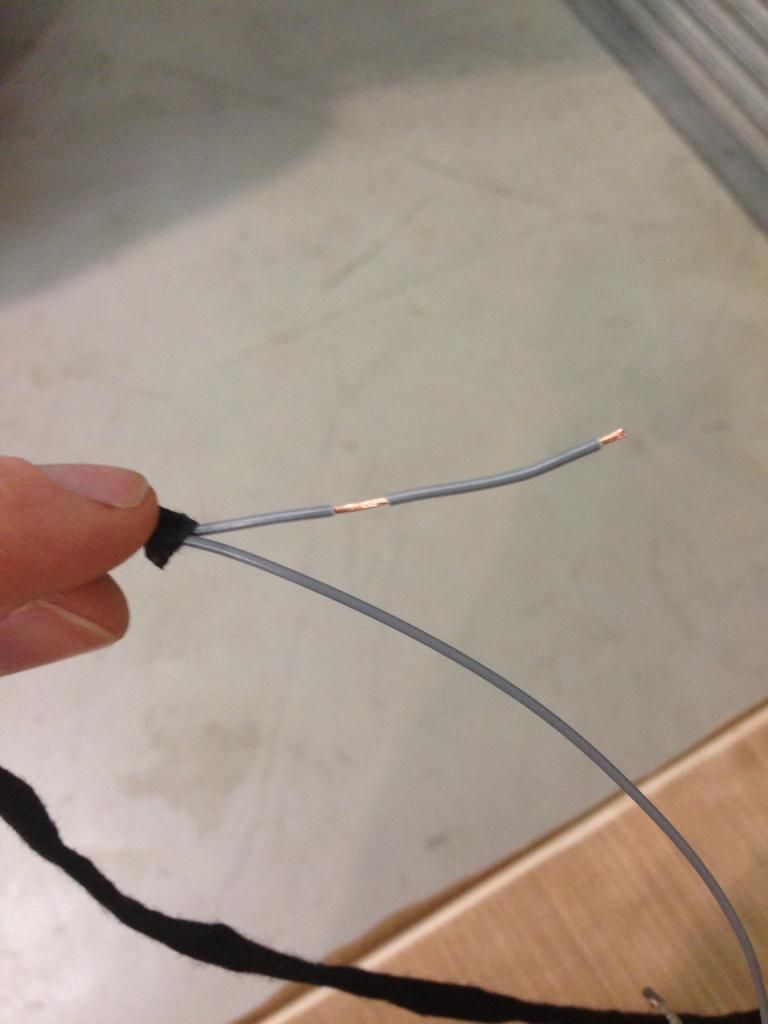
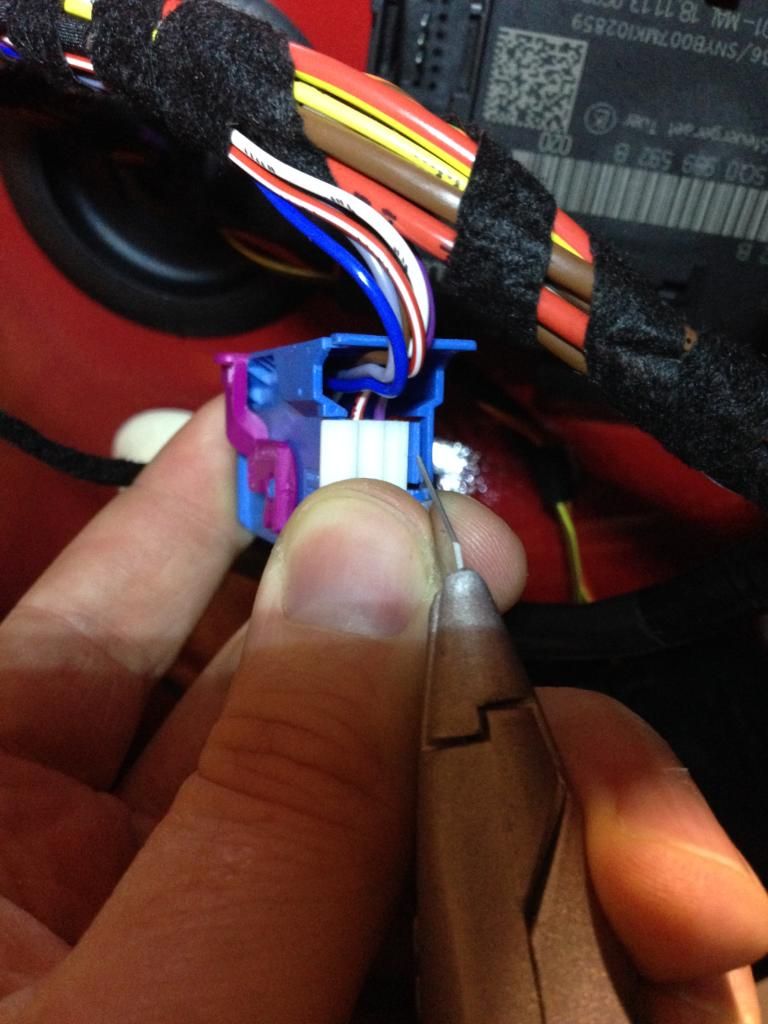
Remove these pins from the plug and lie them back along the loom towards the rear of the door and plug in the ends of the new loom in their place:


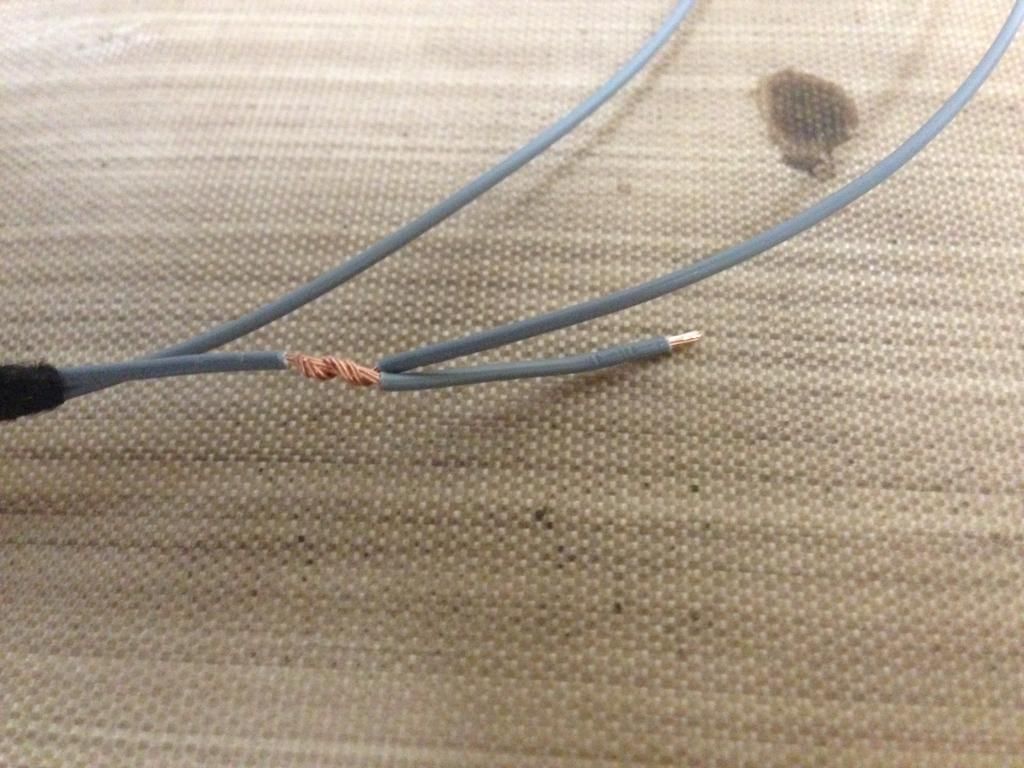
Next join the purple and brown wires from the car loom to the spurs in the new loom. These pins will plug securely and easily hold themselves together. Put some heat shrink tubing around them to hold them together and insulate.


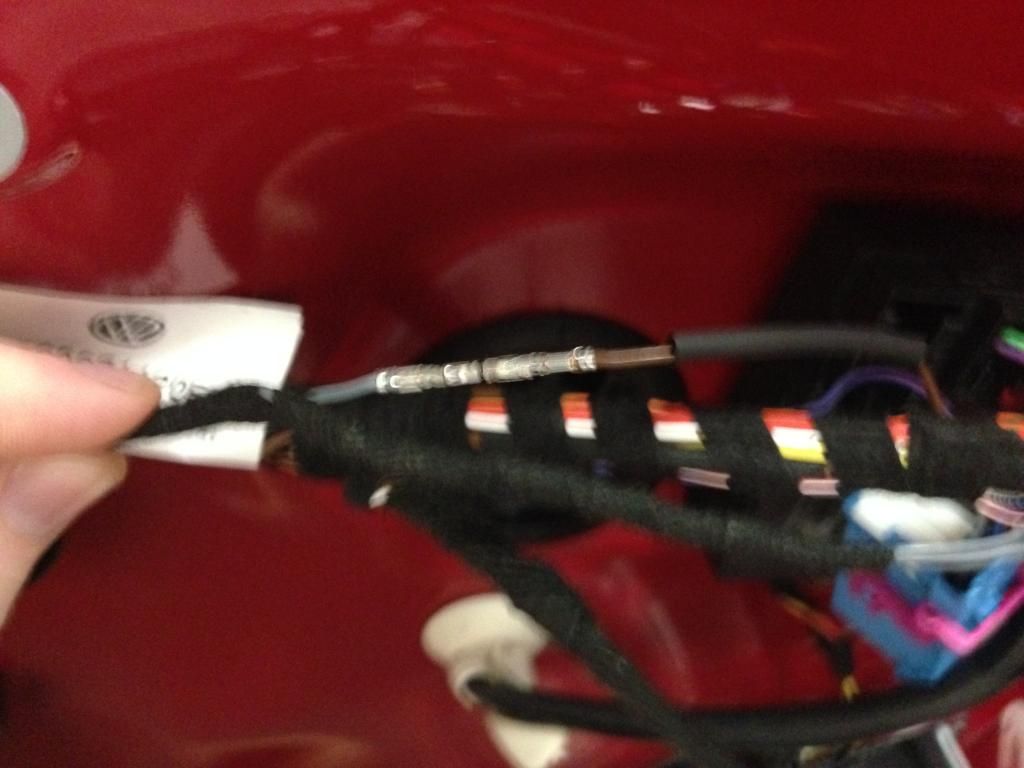
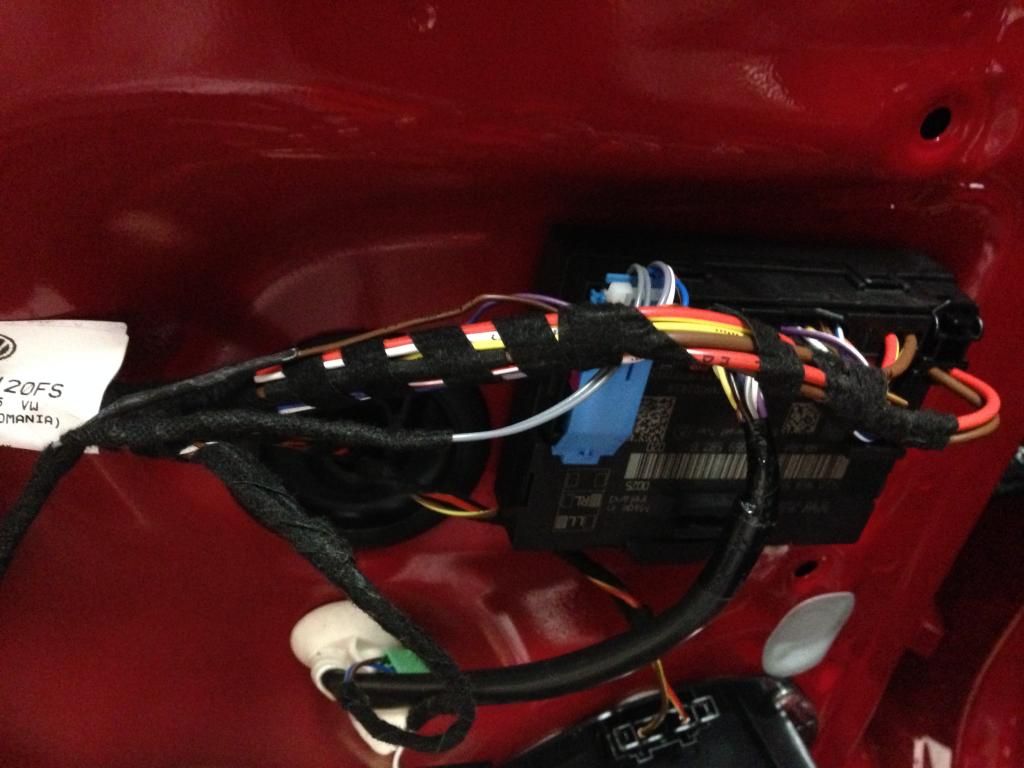
Now tape the loom to the existing car loom, put the 32 pin plug back together and fit a new cable tie.


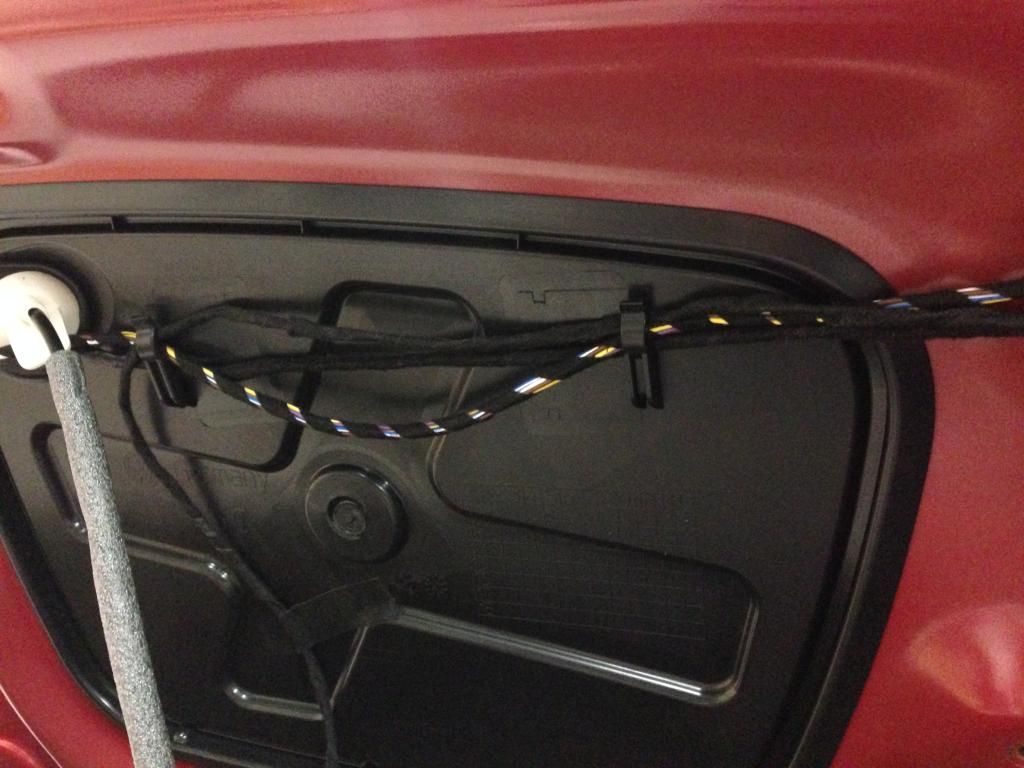
Here is a picture showing the left side with the plug back in but the wiring not yet taped up and secured. You can see the 2 new grey wires coming from the 32 pin plug. These are the terminals to the far right in my diagram. You can also see the purple and brown wires that used to be plugged into the 32 pin plug. The shrink tubing on the brown wire covers where it plugs into the spur on the new loom. The purple wire wire is also joined in the same way but it's obscured by the thick bundle of cables.


The pic below is of the right side with the plug back in but the brown and purple wires not yet joined to the new loom. If you are wondering where the other spur is, you can just see it to the left of the thick brown and red cables going into the door controller.


Tape up the loom and run it beside the existing loom through the 2 hooks. Then turn it down toward the bottom of the door. In the pic below, you can see that I taped it to the door to secure it.


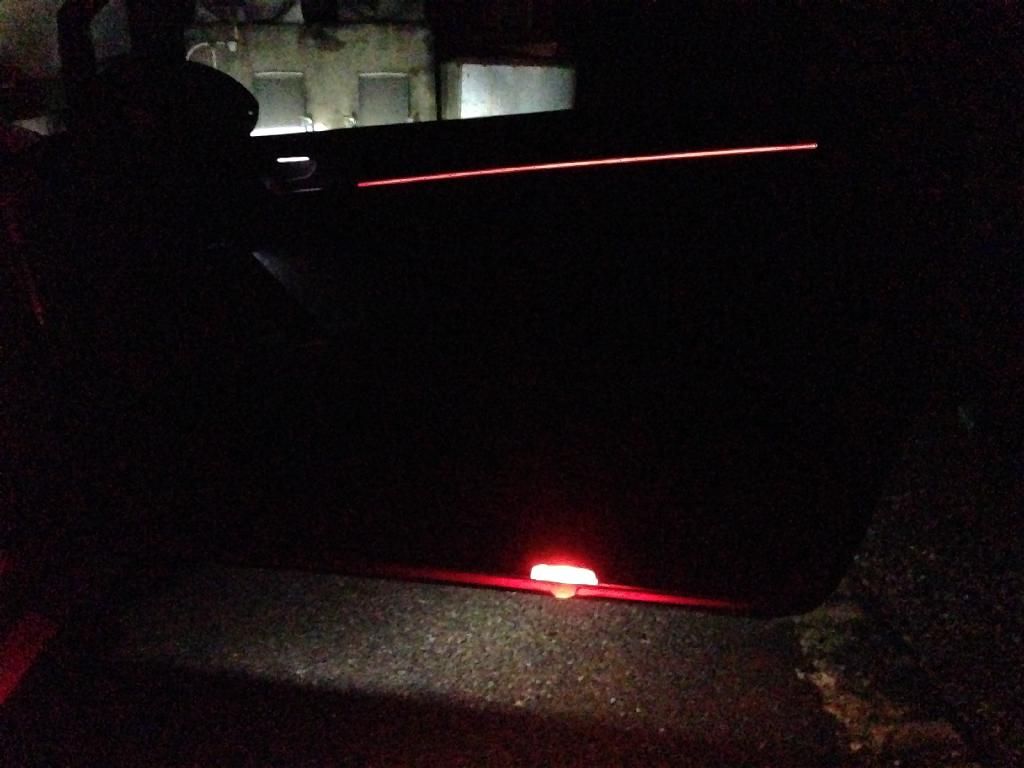
Now plug in your light to test it works before you refit the door card. You may need to close the door lock with a screwdriver and open it again to get the door controller to power up the light. If the sill lights up but the door warning light does not, you more than likely have the polarity wrong. Swap the pins around on the plug going into the light and try again.

If it works remove the light again and refit the door card with the wire poking out through the hole where the reflector is located. And Voila! Door warning lights are done!

« Last Edit: 17 September 2014, 09:11 by kevinm »
Current: His: 2020 M340i   Hers: 2019 GTD

Previous:
2014 GTI PP DSG
GTI ED30 DSG

Offline Sootchucker

  • I live here
  • *****
  • Posts: 2,344
Re: Kev's GTI PP DSG with OEM mods
« Reply #32 on: 15 September 2014, 17:09 »
That's superb, many thanks Kevin, it will help immensely.
2022 Tiguan R-Line 2.0 TSI 4-Motion. Nightshade blue, pano roof, IQ lights, Nav Pro, Harmon Kardon, Heated Windscreen, Heated rear seats, Wireless charging, Heads up display, dual height boot floor, Keyless with electric tailgate, Electronic TPMS, underbody protection, Area View Cameras

Offline DeanLearner

  • Just got here
  • *
  • Posts: 3
Re: Kev's GTI PP DSG with OEM mods
« Reply #33 on: 18 September 2014, 22:53 »
Thanks Kevin, your work here looks fantastic, with subtle but clearly well thought-through modifications.

I've just got a question about the jacking points mod, which I'm currently trying to get the parts for to enable maintenance of the wheel arches and exchanging winter/summer wheels.

If you're these points for a trolley jack, is there somewhere else that axle stands could then go beneath? Or if you're planning to use stands then should you use the standard jacking points by the sills?

Apologies if it's a bit of a dumb question - I've only previously used scissor jacks for quickly switching out flat tires and am just learning about when trolley jacks and axle stands are more appropriate/safer.

Offline kevinm

  • GTI forum regular
  • ***
  • Posts: 229
Re: Kev's GTI PP DSG with OEM mods
« Reply #34 on: 19 September 2014, 14:40 »
Thanks Kevin, your work here looks fantastic, with subtle but clearly well thought-through modifications.

I've just got a question about the jacking points mod, which I'm currently trying to get the parts for to enable maintenance of the wheel arches and exchanging winter/summer wheels.

If you're these points for a trolley jack, is there somewhere else that axle stands could then go beneath? Or if you're planning to use stands then should you use the standard jacking points by the sills?

Apologies if it's a bit of a dumb question - I've only previously used scissor jacks for quickly switching out flat tires and am just learning about when trolley jacks and axle stands are more appropriate/safer.

Thanks for the kind words. I have not used axel stands on the car yet. I'd say it would be best to use a trolley jack on the new jacking points and the axel stands on the sills
Current: His: 2020 M340i   Hers: 2019 GTD

Previous:
2014 GTI PP DSG
GTI ED30 DSG

Offline DeanLearner

  • Just got here
  • *
  • Posts: 3
Re: Kev's GTI PP DSG with OEM mods
« Reply #35 on: 19 September 2014, 17:36 »
Thank you!

Offline Sootchucker

  • I live here
  • *****
  • Posts: 2,344
Re: Kev's GTI PP DSG with OEM mods
« Reply #36 on: 21 September 2014, 11:37 »
Thanks to your excellent how to Kevin, I did the door opening lights in both my front doors yesterday. Went very smoothly and only took about an hour all in.

Seemed to be much easier to get the door trim off and on than it was on my Scirocco, and a very nice touch is that VW have left a small insert for a trim removal tool in the upper end of the door grab handle trim, which made the whole operation much easier (the handle trims on the scirocco were a pig to get off without damaging them).

An added plus is that I didn't break one single door clip  :grin:
2022 Tiguan R-Line 2.0 TSI 4-Motion. Nightshade blue, pano roof, IQ lights, Nav Pro, Harmon Kardon, Heated Windscreen, Heated rear seats, Wireless charging, Heads up display, dual height boot floor, Keyless with electric tailgate, Electronic TPMS, underbody protection, Area View Cameras

Offline mcmaddy

  • Forum addict
  • *
  • Posts: 5,244
Re: Kev's GTI PP DSG with OEM mods
« Reply #37 on: 21 September 2014, 20:04 »
Thanks to your excellent how to Kevin, I did the door opening lights in both my front doors yesterday. Went very smoothly and only took about an hour all in.

Seemed to be much easier to get the door trim off and on than it was on my Scirocco, and a very nice touch is that VW have left a small insert for a trim removal tool in the upper end of the door grab handle trim, which made the whole operation much easier (the handle trims on the scirocco were a pig to get off without damaging them).

An added plus is that I didn't break one single door clip  :grin:
Don't suppose you fancy doing mine Andrew??
TCR, Pure Grey, DCC, Dynaudio and Climate Screen.

Offline Sootchucker

  • I live here
  • *****
  • Posts: 2,344
Re: Kev's GTI PP DSG with OEM mods
« Reply #38 on: 21 September 2014, 22:07 »
Ha, if we are ever in the same vicinity, i'd certainly help you with it Chris.
2022 Tiguan R-Line 2.0 TSI 4-Motion. Nightshade blue, pano roof, IQ lights, Nav Pro, Harmon Kardon, Heated Windscreen, Heated rear seats, Wireless charging, Heads up display, dual height boot floor, Keyless with electric tailgate, Electronic TPMS, underbody protection, Area View Cameras

Offline kevinm

  • GTI forum regular
  • ***
  • Posts: 229
Re: Kev's GTI PP DSG with OEM mods
« Reply #39 on: 21 September 2014, 22:23 »
Glad the guide was a help Andrew!
Current: His: 2020 M340i   Hers: 2019 GTD

Previous:
2014 GTI PP DSG
GTI ED30 DSG