Author Topic: bens ... 1986 MKII 1.8 8v K-Jet Golf ... project  (Read 134444 times)

Offline Ben Lessani

  • I live here
  • *****
  • Posts: 3,873
  • The poor mans MK2 Haynes author
Re: bens ... 1986 MKII 1.8 8v K-Jet Golf ... project
« Reply #50 on: 11 January 2009, 16:34 »
full steam, straight ahead
after messing with so many aspects of the steering components, my tracking was out of whack, so it needed sorting. as the last place i used, Pro-Grip in Bonnybridge was shut today i had no choice but to find an alternative. www.alignmycar.co.uk lists all the 4 wheel alignment places, not that i can align all 4 wheels - but its the equipment they use, the hunter laser gear is far superior to everything else and gives a nice print out too.

i found a place in Edinburgh that does this for £25 for the two wheels (it doesn't include camber adjustment though, whereas pro-grips £45 did). the guys were all right and they did a good job, but it wasn't as professional as Pro-Grip. John measured the suspension height, checked all tyre pressures, hub nut and bolt torque setting and bushes for play and spent a good hour getting it perfect. the place i went to, farmer autocare in maindencraig set the toe and that was it (guess its all you get for £25). anyway, a little tweaking and a print out later, it now looks something like this...


luckily i, again!, got the camber spot on by eye in the garage, so it was just the toe that was out, and strictly it wasn't out, it was the steering wheel that wasn't straight - so i had done a pretty good job in the garage myself. drove home 40 miles and its peachy perfect - big smile on my face! but the stupid resonant rattle is back, when its light, i'm tearing off the downpipe heatshield.

Offline Ben Lessani

  • I live here
  • *****
  • Posts: 3,873
  • The poor mans MK2 Haynes author
Re: bens ... 1986 MKII 1.8 8v K-Jet Golf ... project
« Reply #51 on: 12 January 2009, 21:24 »
got the new stoppers on
after fitting the new wheel bearings, i noticed my pads and disks were in a very sorry state, so i grabbed some new ones today to ensure i'm nice and safe driving about.

here's what the old ones looked like ...


eeeek! funny thing is, they still worked without fail!

fitting the front discs and pads


Tools Required: 6mm allen key, 17mm wheel wrench, jack, posidrive screwdriver, wire brush, emery cloth, piston winder (optional), copper slip (not really a tool)

changing your brakes is really straightforward and i actually reckon you could do it with your eyes closed :tongue:

pop the bonnet and remove the cap from the brake fluid
loosen off the wheel nuts
jack up the car under the front jacking point and get it nice and high
remove the wheel nuts and the wheel


the calliper is now exposed, you need to remove the two slide bolts, these are both 7mm allen heads which are likely to round off - so make sure the allen key is in snug first. the larger slide bolt is for the top, smaller for the bottom. the two bolts are at the back of the calliper hidden behind rubber covers - they don't need removing unless you round the bolt head.

if you round the head, you'll need vice grips, a hammer and patience, give the head a few taps with the hammer to shock it, then grab with the vice grips - TIGHT! you will be able to get it off, it might just take a while, thats all.

now the two slide bolts are out, you need to support the weight of the calliper whilst we fiddle - you don't want it dangling on the hose. i popped mine on top of an old battery.

next up, remove the two pads, remember, the larger pad (with more material) goes on the outside, the smaller on the inside. now remove the retaining clips - you should have got new one with the pads, so ditch these.

nb. if you don't have a piston winding tool, then now is the time to pry the piston back, stick the outside old pad back in place (but not the inside) and use a lever through the hole in the middle of the calliper between the disk and piston and tease it in, be careful not to damage the disk if you are re-using it.

if you have a winding tool, wind the piston fully back - you'll know when this is as you'll hit plenty of resistance.


« Last Edit: 17 January 2009, 01:55 by Ben Lessani »

Offline Ben Lessani

  • I live here
  • *****
  • Posts: 3,873
  • The poor mans MK2 Haynes author
Re: bens ... 1986 MKII 1.8 8v K-Jet Golf ... project
« Reply #52 on: 12 January 2009, 21:53 »
if you are replacing the disk too the disk is held on probably by rust and a small posidrive bolt - unscrew this and pop it somewhere safe. if the disk is stuck on, rotate the hub whilst tapping lightly on the back of the disk with a hammer, it will free up within about 2 full rotations. the new disc should be cleaned with brake/clutch cleaner, then is bolted back into place with that same posidrive bolt.


now the disk is back on, we'll quickly check the condition of the slide bolts. the bolts you removed should be cleaned of rust/contamination with a wire brush. the slider is composed of the bolt you removed, a metal barrel inner section and a plastic wrapper. you can push this out from the calliper with your fingers, its the same hole the bolt goes through. basically stick your finger in the hole and you'll know what i mean.

mine were in a sorry state, here's one before and after cleaning ...


i cleaned the outer with emery cloth and then polished it on a buffing wheel.

now, you'll want to coat everything with copper slip - apart from the friction elements, pad itself and disks. the backs of the pads should be covered, the edges at the top and bottom of the pad where it locates on the calliper carrier, the calliper in the place the pads locate, the metal barrel outer and inner (do the inner by putting a blob of slip on the tip of the slide bolt and move it in and out to work it in, from both sides). in my photo i've got some parts on top of a pad - THATS THE OLD ONE, dont do that on the new one! you'll now have something like this ...


put the metal barrel back inside the plastic sleeve, then push it back into place - remember longer top, shorter bottom.

now pop the metal retaining clips in place as shown below and fit the pads over the top


nb if you did round the inside of the head, then your best grinding a couple of flats onto it, or buying a new bolt. i ground two flats to bring it to 11mm


pop your calliper over the top of the pads and bolt back into place. these bolts need to be moderately tight - don't go nuts though, as you'll never get them off again.

stick the wheel back on and torque up the wheels, drop the jack and repeat on the other side. remember to put the cap back on the fluid reservoir at the end, and before driving pump the brakes for about 10s with the engine running. then follow this guide to bed them in

co2 is better for me and you
whilst i was at the garage on my mission to repair all the little things on my brum brum, my mechy friend offered kindly to set the co2 as the car was a bit stinky. i stuck the probe where the sun don't shine, grabbed an allen key and adjusted the screw on the pressure plate until it read 2.0 for co2. my hydrocarbons were well within normal bounds and co was at about 5 - just a fraction over the limit, but thats because i've done mainly short journeys recently. a long blast with my clean oil will sort that out ;)

Offline Ben Lessani

  • I live here
  • *****
  • Posts: 3,873
  • The poor mans MK2 Haynes author
Re: bens ... 1986 MKII 1.8 8v K-Jet Golf ... project
« Reply #53 on: 14 January 2009, 21:16 »
big grin, little grin, big grin, little laugh  :laugh:
not a fan of nacho libre - never mind. bit more of a bloggy post today that anything of any use. after having replaced a lot of the front end components, esp the ARB bush, the car feels like its on rails again! i forgot how well it drove, seriously tight into corners with plenty of grip and feedback :grin:

after doing some lengthy amounts of driving i drove by my local shell and topped the old girl up with some vpower. 31 litres later and she was full. i always note the mileage at fill up times to see what kind of mpg i've been getting, this time round, 265 miles on 31 litres @ 90.2p per litre comes to a pretty decent ... 39 mpg at 10.53p per mile! totally chuffed, especially the way i've been driving :evil: setting the co2 must have made a nice pleasant difference, feels more responsive too (but that's probably mental  :rolleyes: )

the only that has me mildly concerned is that the warter light came on and it took 500ml of antifreeze to fill it back up. half a litre is a pretty substantial amount for an air lock, so i must have a leak somewhere, when its light, i'm going to look over the car and see what's going on  :huh:

Offline Ben Lessani

  • I live here
  • *****
  • Posts: 3,873
  • The poor mans MK2 Haynes author
Re: bens ... 1986 MKII 1.8 8v K-Jet Golf ... project
« Reply #54 on: 17 January 2009, 01:31 »
how to tension PAS belt

loads of people have been asking about this recently, so i'm adding my guide to it.


Tools Required: 13mm ratchet, 13mm spanner

There are a few variants in the way PAS belts are fitted, this is how mine is done though. Also, ignore the belt orientation in my photo, it doesn't go round the water pump, there's a second pulley off the crank that drives it on its own.


Start by jacking up the car from the front cross member with a block of wood to prevent damage to the x member. Stick axle stands under the left and right of the x-member where it bolts onto the chassis leg.
Look under the car and you'll see the PAS belt and pulley, you need to loosen 3 bolts, all 13mm.
Grab a 13mm spanner and a 13mm socket and loosen off the bolt shown below (and above, No. 14),


Mine is always stiff, so get some penetrating oil on it (watch the belts!) and a few heavy hammer taps. Once this is loose, move onto the next nut.


You can't see it in the above picture, but that's where it is. Between the sump and the PAS lower bracket there's a nut you need to loosen off the slide bolt, to allow the bolt to slide up (top picture, No. 20).

Then once that's loose, go ahead and loosen the last bolt (top picture, No. 5) and when you've got plenty of slack, you can *gently* tap the PAS swing assembly towards the back of the block.

This will give you enough room to get the new belt on. Once its on, tighten bolt No. 5, then No. 20, then No. 14 and that's you all set. 10mm of deflection either way should be fine for tension.
« Last Edit: 24 January 2009, 23:03 by Ben Lessani »

Offline Ben Lessani

  • I live here
  • *****
  • Posts: 3,873
  • The poor mans MK2 Haynes author
Re: bens ... 1986 MKII 1.8 8v K-Jet Golf ... project
« Reply #55 on: 24 January 2009, 20:23 »
saturday afternoon
as you will have read, the lower exaust heat shield has been driving me mad because its rattling like crazy - but i couldnt get to it to remove it! well, i'd had enough today, so I jacked my little bugger up as high as the sky, got underneath with a grinder and cut the heat shield away.


5 minutes of cutting, swearing and bending, and it was off


then for a little under bonnet check to see how things are going. i was rooting about and found a wire which went to a sensor which was broken and looks like its been broken for while.


no idea what it is, but i'll solder it back together and see how it goes :huh:

then the bad news! i lifted the oil filler cap to find a hell of a lot of mayo!


so then i took off the rocker cover and had a look at that, its real bad news, i have no idea what has happened here.


the entire of the rocker cover is covered in mayo! but there is none whatsoever on the oil baffle, and none at all on the cam/running gear.

after removing the rocker cover, i also found that the throttle housing breather was completed blocked with oily crud, and the breather going to it was torn.


i like this photo, its off the rocker cover, it has no relation to anything at all :laugh:

« Last Edit: 24 January 2009, 22:41 by Ben Lessani »

Offline Ben Lessani

  • I live here
  • *****
  • Posts: 3,873
  • The poor mans MK2 Haynes author
Re: bens ... 1986 MKII 1.8 8v K-Jet Golf ... project
« Reply #56 on: 24 January 2009, 22:58 »
overhaulin' your tappets

there is a pretty good guide on cgti too for this.


Tools Required: 13mm ratchet, 13mm spanner, 6mm hex, 17mm socket, jack, 10mm socket, 15mm spanner, tip-ex

first things first, lets get the wheel off and the timing marks on.

jack the car up and remove the wheel
if you have pas, loosen off the belt and remove it (do the reverse of this)
get in the engine bay and loosen off the alternator tensioning bolt and push it down to slacken and remove the aux belt

the crank pulley needs to be cracked off now. odds are, you'll find the engine turning when you try to undo them - and you don't want to turn the engine over backwards! if you have a impact wrench you can get them off easy, if not, use the pikey impact wrench and put a socket & ratchet on it and tap it with a hammer - then engine won't turn but the bolt will.


once you've got the crank pulley off you can remove the timing belt cover, its 4x 10mm bolts/nuts that need removing. with the cover off, you'll now have access to the crank timing pulley. get your tipex out and mark the crank pulley against the block, the belt and the oil pump pulley. nows the time to take the car out of gear!


now we'll mark up the cam so when we put it back it, it ends up in the right place, in the right location. again, tipex the belt and tipex the gear in relation to the head. mark the belt once and only on one side, so we can differentiate the crank belt marking from this.


i had already taken the rocker cover off first - but that's becase i was doing something else. now we'll get the rocker cover off. ignoring the white crap in my photos (not a headgasket, just water sucked in through the airbox!), remove the 8/9 retaining nuts that are around the cover. you'll need to remove the coil earth and bracket too.


you'll now have something that resembles the above. removing the cam is easy peasy, there is 8 nuts to remove and you need to remove them in the correct order. they are not very tight, so just crack the nut, then work the next one and repeat.


after the nuts are off, you need to remove the bearing caps - these are big metal horseshoe shaped brackets which are what hold the cam in place. mine wouldn't budge with hand power, so i turned the cam a little and it lifted a bit, so then i could lift the bearing caps off.

« Last Edit: 24 January 2009, 23:20 by Ben Lessani »

Offline Ben Lessani

  • I live here
  • *****
  • Posts: 3,873
  • The poor mans MK2 Haynes author
Re: bens ... 1986 MKII 1.8 8v K-Jet Golf ... project
« Reply #57 on: 24 January 2009, 22:59 »


now the tappets. these are only held in by gravity - but lifting them out is mighty difficult given how oily they are! i had to use a pair of grips to grab them gently and lift them out. i kind of deviated from cgti here, he reccomends whacking the tappet - open face down on a wooden bench to get the piston out the middle. i kid you not, this will take about 20/30 whacks with the tappet in your hand, repeat this over 8 tappets and you'll have a mighty bruised hand!

so, i cheated ....


i got a piece of soft pine and a rag. i put the rag over the top and pulled it really tight, wrapped it round the back and tied it off.


then tap it on the desk, after each tap check if the piston has come out or if it has worked loose - you don't want to bash the piston. it only took about 3-6 taps doing this and the piston would move out enough so that it was flush. take the tappet out the rag and then you can use your fingers to pull the piston out.


the bucket is covered in crud, so this bad boy will get cleaned up, later. now we need to strip the piston down into its components, its made up of a bucket, spring and piston. now you have the piston in your hand, try and squeeze it - odds are it won't budge. this is the whole reason why the tappets are making noise. the piston comes apart relatively easily, just grab it softly with a pair of pliers and pull it apart.


now we have to take the little retaining cap off the piston. if you get your pliers, you can gently grab the cap and just tilt it and it will pop loose. do this slowly and carefully because the ball bearing and spring inside is tiny.


Offline Ben Lessani

  • I live here
  • *****
  • Posts: 3,873
  • The poor mans MK2 Haynes author
Re: bens ... 1986 MKII 1.8 8v K-Jet Golf ... project
« Reply #58 on: 24 January 2009, 22:59 »


i filled my magnetic parts tray with degreaser and chucked all the little bits in it, i let them sit for a little while whilst i started banging the next tappet.

You do not need to soak tappets in oil, but you don't put them in dry either. Give them a good coat of oil, then fit them. Never remove tappets from the head with a magnet. You will polarize the ball valve inside the tappet and prevent it from doing its job which is forming a hydraulic lock whilst under load.


after degreasing, clean it off on a clean rag, take this chance to really rub the black crud off the outside of the inner and outer piston. bang away excess degreaser and dry off, then re-assemble.


don't put the whole piston back into the main bucket yet, we need to clean that out. i used some foaming mr muscle oven cleaner, i sprayed load into the main bucket


then i threw it into a bag


then i lined up all my bags. when i removed my tappets i put them each in a numbered bag, so the right one could go back where it came from. now - all tappets are the same, but just incase one had worn differently to another i'd rather it go back in the same place it came from. if only those bags weren't full of mr muscle foam ....  :evil:


12 hours of mr muscle later i came back to some pretty damn clean tappety parts. the buckets were full of a broken down oil sludge, which was easily rinsed out with thinners. 8 tappets later and it started to look something like this,


fill the tappets full of oil before putting the piston back in. i'm not going to explain how to re-assemble, but tension the cam bolts in the reverse of the photo above to 20Nm.

after putting the tappets back in the car, i started putting the belts and pulleys back on. i lost my timing belt tensioning tool (a bent piece of metal), so i improvised by popping two drill bits in the holes and levering it with an allen key.

belts tensioned, wheels refitted and the engine fired up just fine, but the tappets are louder than ever, lol! just my luck. i reckon the oil needs to circulate a little bit, so once my air filter is clean and dry i'll take it for a drive.


i replaced the torn rubber pipe with a bit of spare fuel line and i re-crimped a new wire in place for the sensor on the inlet manifold (red), rubjonny says its for the fan switch when the engine is off - i'm dubious ...

until next time troops.
« Last Edit: 26 January 2009, 23:15 by Ben Lessani »

Offline Ben Lessani

  • I live here
  • *****
  • Posts: 3,873
  • The poor mans MK2 Haynes author
Re: bens ... 1986 MKII 1.8 8v K-Jet Golf ... project
« Reply #59 on: 07 February 2009, 19:45 »
tappets part deux
so, after rebuilding my tappets (as above), i also managed to kill them by using a magnetic parts tray. so i ordered up some new ones off the bay. i figured if i was dismantling the head again, i may aswell do the stem seals whilst im at it. heres a pretty handy guide on replacing the seals. start by removing the cam and tappets from the guide above.


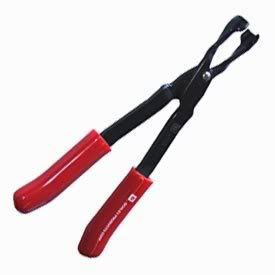
Tools Required: valve stem seal pliers, valve spring compressor

get all your parts lined up first,


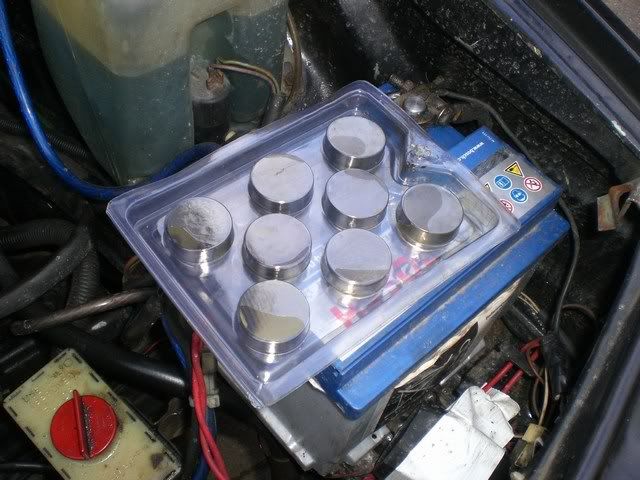
then line up your tools,


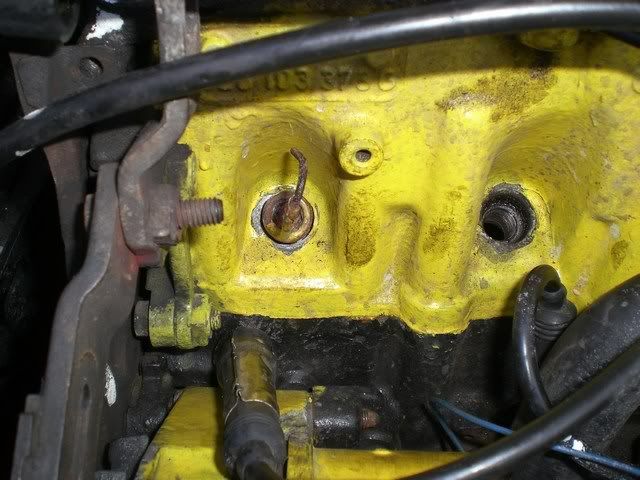
its actually very straightforward to do. start by removing the spark plugs in all 4 cylinders. now there is two ways of going about this, pressurise the cylinder with an air hose adaptor or fill the cylinder with about 2ft of rope and turn the crank until its at/near top dead centre. i went with the latter and shoved an old bunjee cord in the cylinder :grin:


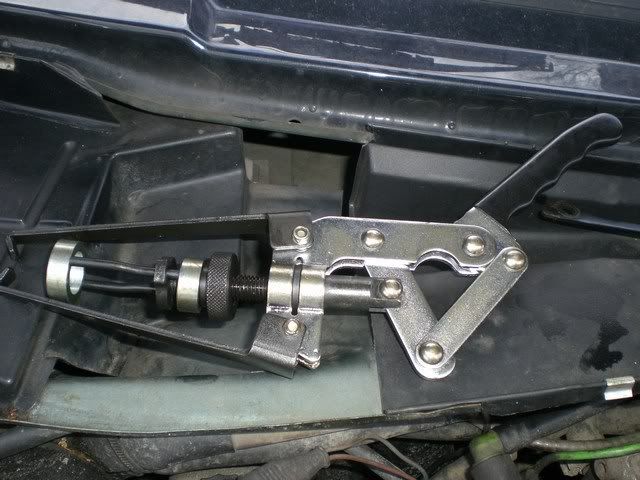
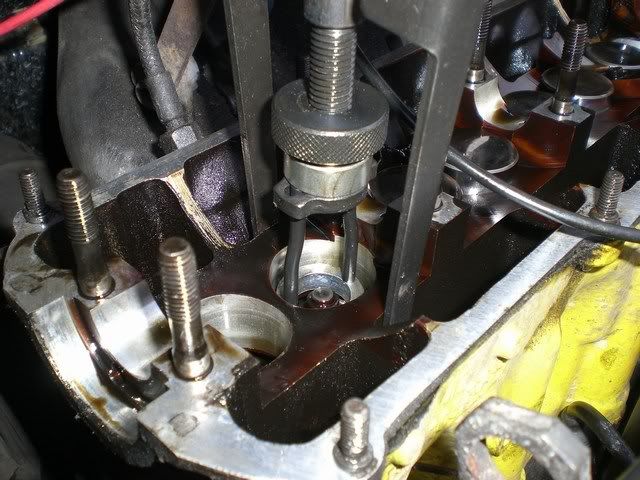
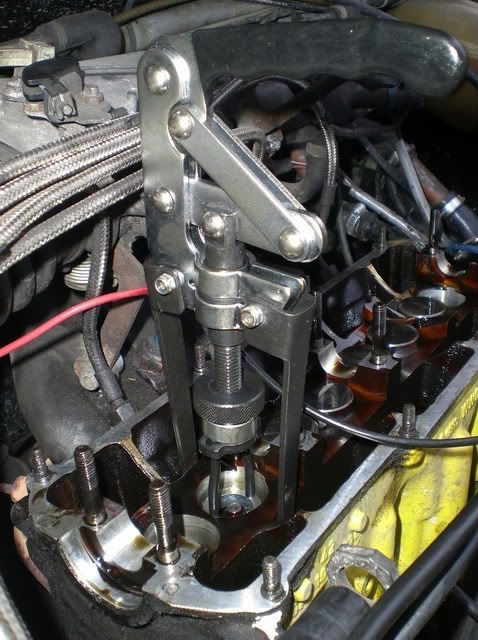
as i wasn't removing the cylinder head, i had a special compressor which mounts overhead.


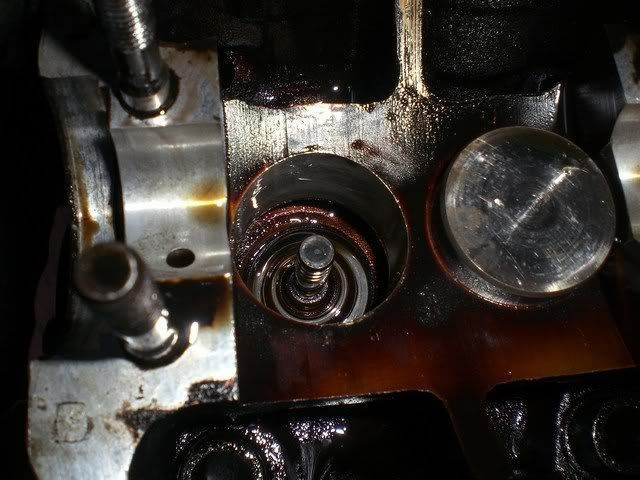
after compressing the spring, get a watchmakers screwdriver and gently push the locking collects out of position. then use a magnetic tool to grab and remove them. with the collets out, when you release the spring compressor the springs will be easy to get to. there is two springs, an inner and outer with a cap on the top and bottom. the bottom cap is under the valve seal and doesn't need to come off.


get your pliers and grab the stem seal, give it a gentle twist and pull it up, make sure you dont grab the spring seat though.


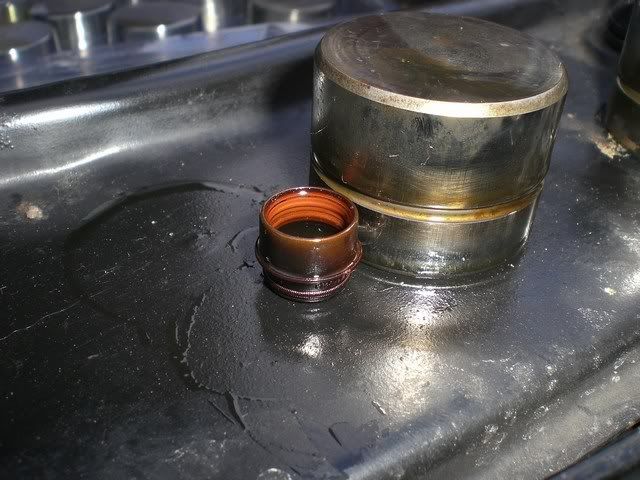
get your new stem seal and give it a coat of oil so it slides down the stem seal without bother. push it down the stem seal until its in place. refit the springs the right way up, put the spring cap on, fit the spring compressor and then reposition the collets. i used a pair of needle nosed pliers to get it roughly in place, then kept poking it with the watchmakers screwdriver until it was in place. when they were sat right, release the spring compressor and go onto the next one.

as 1 and 4 are linked, and 2 and 3 - you can do 4 seals at a time, as long as you stuff both clyinders.


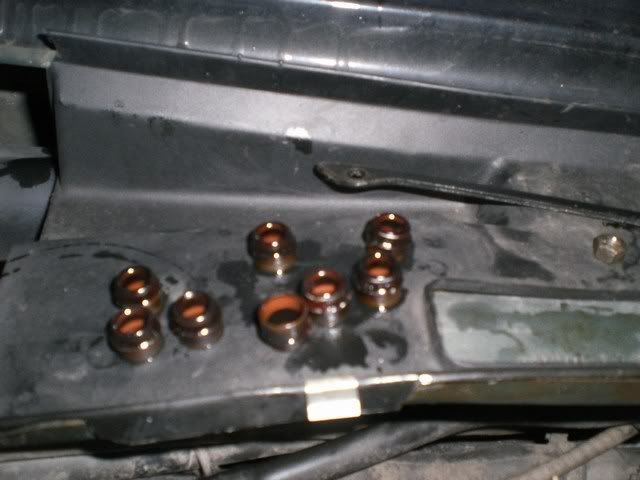
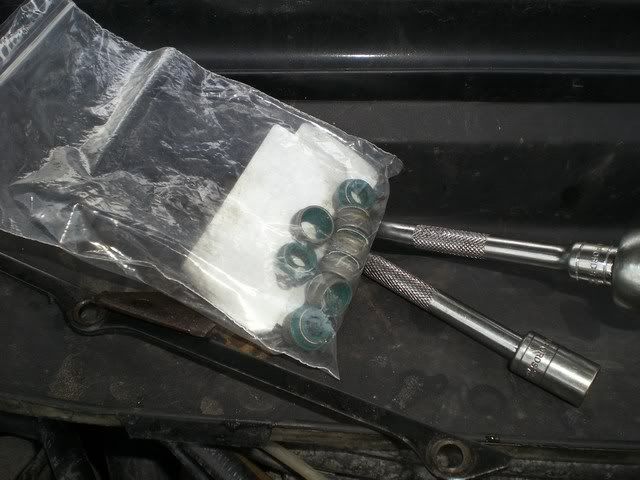
then you can view all the old seals and bin them. remember when refitting the tappets that you need the oil to prime the head. put the cam, rocker cover and timing belt back on, unplug the fuel pump relay and crank the engine. it won't fire and it will turn relatively easily, this should spin some oil around the block and head so its ready to go. refit the aux belt, pas belt put the wheel back on, then start her up and enjoy the lack of oil burning and new tappetly quietness.

its a real quick and easy job, i managed to do mine from start to finish in about 4 hours - and i was working slowly too, it was -4 degrees outside!

to recap
shadyP asked me recently how to go about this, so i thought i'd update my post with what i said to him.

I got my tools from http://www.pvrdirect.co.uk/ - it was a spot cheaper than eBay. Its a really straightforward job. Mark up your crank, aux and cam shaft thoroughly as you're going to need to rotate the cam to do the job. Its easy to put the cam back on 180 degrees out.

Remove the rocker, cam and spark plugs. I used rope to stuff inside the cylinder to stop the valve falling down (otherwise its a head off job). By moving the crank to just before TDC, stuff about 2 feet of (non-fraying) rope into the spark hole, then turn the crank until it hits TDC and you meet a fair amount of resistance.

Remove the tappets, use a cloth and some wide grip pliers to get them out. They're only held in by gravity but they're seriously hard to grip with your fingers.

Fit the overhead valve spring remover and put pressure down on it, if the valve starts to go down with the spring - then you need to just re-position the rope a bit. If you've got an air compressor you can get an adaptor to fit in the spark threads to pressurise the cylinder.

Once you've got the pressure on the spring, there is two metal collets that bite onto either side of the top of the valve stem. I used a telescopic magnet to grab the collets, but BPB disagrees with this method - DannyP says to use a cable tie with a blob of grease on the end. Either way, collets come out, then release tension on the spring compressor.

You'll have 3 bits, the outer spring, inner spring and spring cap - try and remember which way round these went in! Then you need to remove the stem seal, its at the bottom of the valve stem usually obscured by oil. Using stem seal pliers grab the seal and pull it upwards. It doesn't take a massive amount of force, be careful what you grab as its easy to pull the spring seat up too.

Replacing the seal is easy as coating it in oil, coat the valve stem in oil, then slide it down, using the pliers push it into the valve spring seat. Put the outer, inner and spring cap back on, refit the spring compressor and put the collets back in place - I found using long nose needle pliers to position them and a small watchmakers screwdriver to poke it into the exact position works well. Release tension on the tool and thats it.

Because of the firing order, 1+4 then 2+3, you can do Cyl 1 and 4 at the same time and 2 + 3 at the same time (as long as you do the rope trick / pressurise simultaneously).

Refit the tappets, cam, give it all a splash of oil, rocker cover on, timing belt on and away you go!


it snowed


« Last Edit: 12 May 2009, 23:45 by Ben Lessani »