The Audi TT short shifter is available from Audi and it's part number is :
W8N0711751A
Updated part number: 8N0711046 (was 8N0711051A)
It should cost less than £30 and in my opinion it's a worthwhile thing to do, it doesn't drastically reduce travel in the gear box but does make it a slightly shorter throw.
*Note This modification is for 5 speed 1.8T models*Things you'll nee if you don't remove airbox:Audi Short Shifter
13mm Socket + Ratchet
Tippex (ideally)/Marker
Additional Things If you do remove the air box:Philips Screwdriver
10mm socket with a long extension arm
10mm spanner
WD40
To remove the Air BoxWhen I did this, I didn't remove the air box as it didn't seem to effect me getting the parts I needed, however if you want to remove the air box, undo the two Philips screws on the windscreen side of the airbox. You can then un clip the lid. Now for the bolts holding the airbox in which are located near the suspension strut (10mm bolt) and behind the battery to the left side of the airbox (same 10mm bolt). Then you can undo the jubilee clip by the MAF sensor and also the 10mm nut that holds the air duct to the wing. Remove and keep safe!
After removal of the airbox or if you're not going to remove it.Locate the part that is being replaced, it's to the right hand side of the block on top of the gear box.
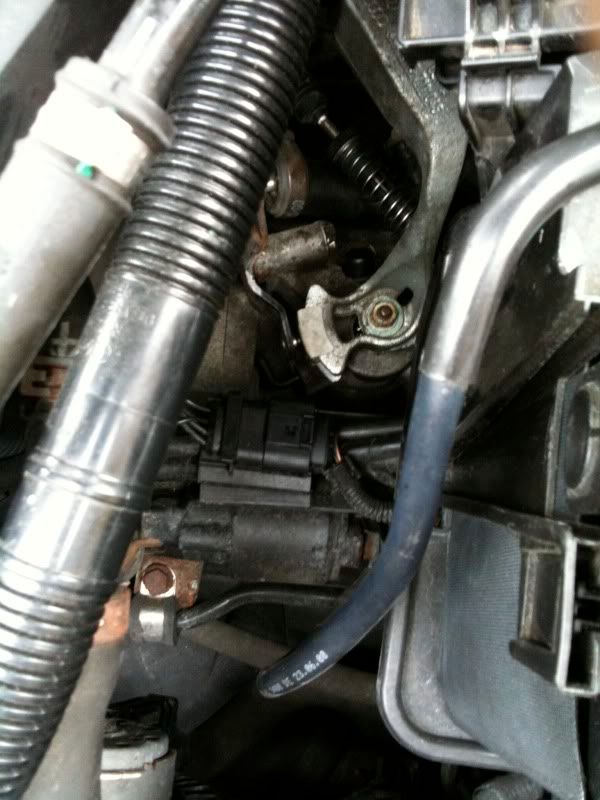
This shows the location of the part to be replaced which look near on identical to the replacement part, shown here:
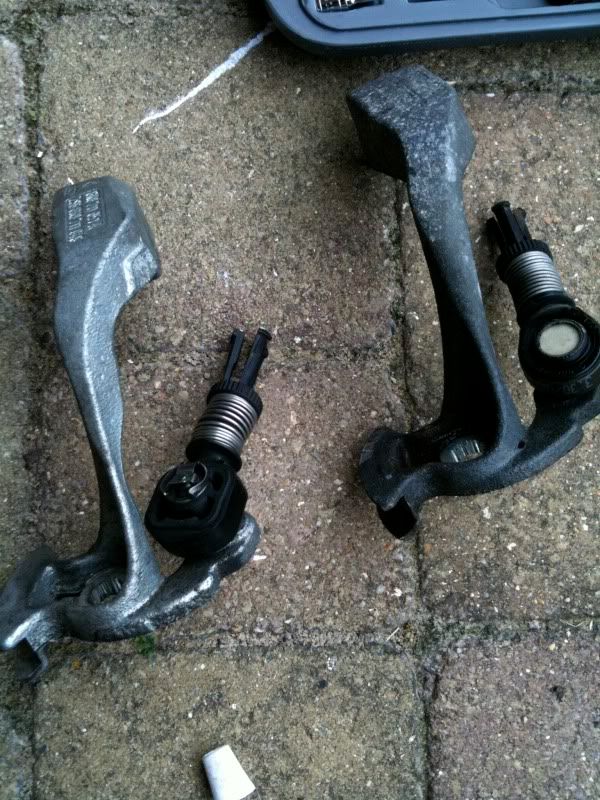
Audi TT one on the left, standard on the right.
Soak the 13mm nut on top of the shifter in some WD40 (or similar)
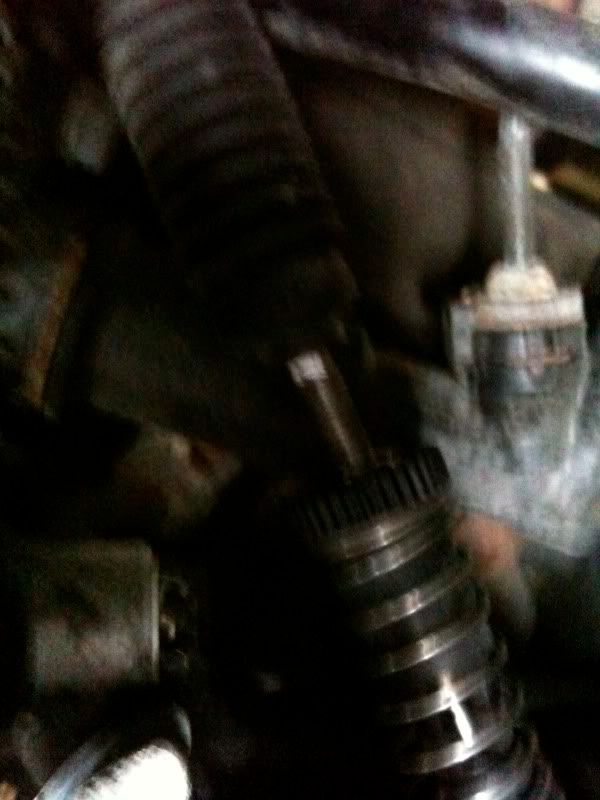
Locate this part of the shifter, it's to the right hand side:
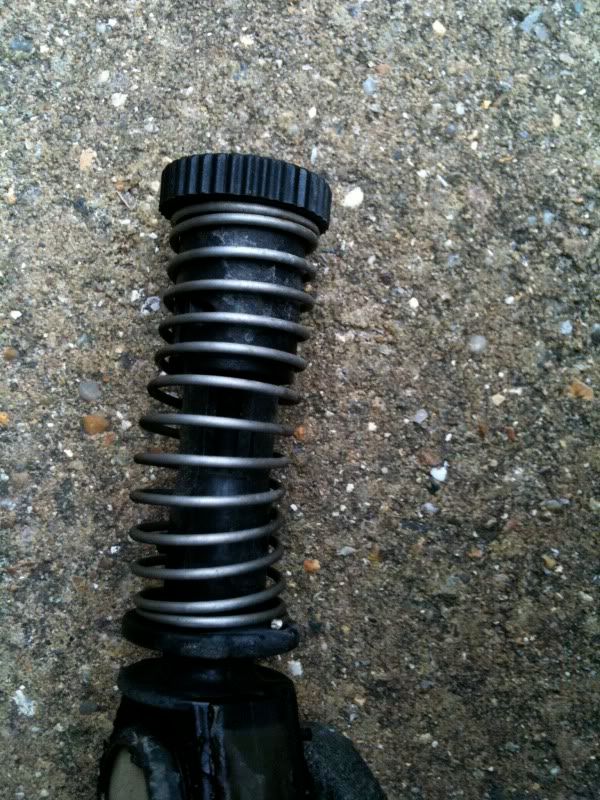
And using Tippex mark where the sprung plastic piece sits, in this picture it isn't clear where I marked it as I did it both ends as I wasn't too sure when I did it. But its the part closest to the front of the car. When you are happy this has been marked pull the spring back and twist it to the left to lock the spring back.
These two pictures show this, however when I did these the part was off the car:
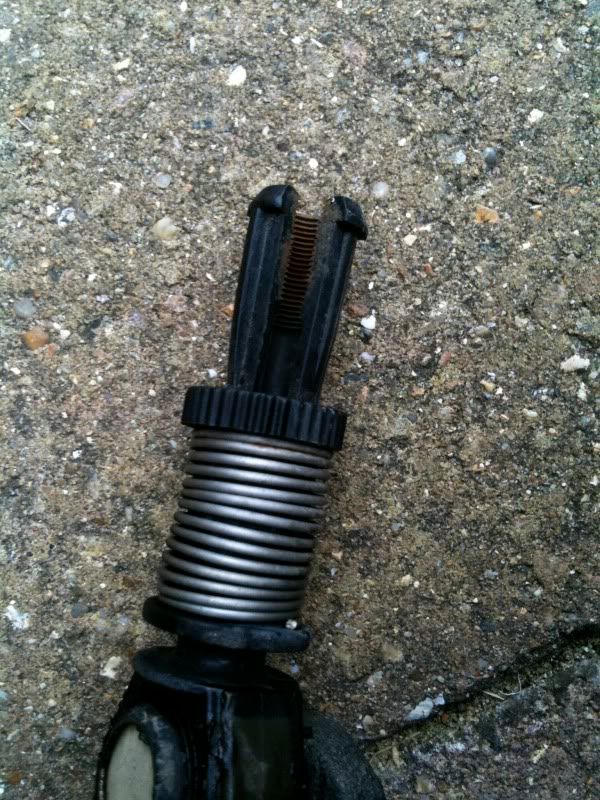
Now the rod that was slid into that sprung plastic clip can be pulled out ready for refitment.
By now the WD40 should have soaked in, so you can actually remove the shifter. Undo the but on top of the shifter and place safely to one side. Now take note of how the shifter is sitting so you can refit the new one in the same position. After the bolt is un done you need to pull the shifter towards you, however if it doesn't budge you can give it a gentle tap with something and that should free it up. Don't worry about the white plastic clip on the left hand of the shifter as this will just slide off when the shifter is removed.
You can now refit the new item, in the exact reversal of the steps above. Making sure that the shifter goes back into the same position, also when the sprung loaded clip is placed back on make sure that the plastic piece comes up to the mark you made. If you didn't make a mark you may be able to see where the old clip sat.
refit the airbox if you removed it.
You should be all good to go.
GolfGTI.co.uk or the writer of this guide accepts NO responsibility if you bugger your car up, follow instructions carefully 